 |
|
 08-11-2015, 12:15 PM
|
#1
|
|
Junior Member
Join Date: Jul 2015
Location: Wixom
Posts: 19
|
Outdoor LED lighting
On my new X23B I found that I have one switch that powers my awning LED light strip as well as the orange covered light behind the steps. I'd like to put these lights on two separate switches. Has anyone attempted this? Thanks!
|

|

|
|
08-13-2015, 10:30 PM
|
#2
|
|
Junior Member
Join Date: May 2015
Location: Aurora
Posts: 27
|
Same thing one the 23f I'm looking at the same thing but have not seen a mod. I'm thinking of adding a switch for the amber stair light off another 12v source and leave the led awing light as is. Anyone else tried anything.
__________________
2007 Toyota Sequoia
2014 Jayco 23F
|
|
|
|
|
08-14-2015, 03:58 PM
|
#3
|
|
Senior Member
Join Date: May 2015
Location: Fairfax
Posts: 141
|
I was in the same boat with my TT.
I put one of these dimmers in the track, right in front of the LED light strip. To waterproof the dimmer, I just filled the ends up with some automotive sealant, and then put some larger heatshrink tubing over the connection between the dimmer and LED strip, and smaller heatshrink over the solder connections on the right side. To make room for the dimmer, I needed to trim/shorten the cover strip a little. With the way I cut it, it holds down the front of the dimmer so the whole thing is sitting securely wedged in the track. It's survived some pretty good rain, a week at the beach and about 500 miles of highway driving so far. The remote lives attached to the door of the control panel with velcro.
These dimmers won't work at the switch end of the circuit because it requires a dedicated ground, and the awning/porch light control has a shared ground. The dimmer works using PWM (pulse width modulation), basically by turning on/off the negative/ground line very rapidly - more off than on for dim, more on than off for bright. With the shared ground in the mix, you need to get it on the LED side of the connection where the grounds meet up. In my case, the ground for the LED strip meets up with the awning control where they come through the sidewall, which is about 16" to the right of where the dimmer is. That's why I chose to place it where I did.
When we set up camp, the switch awning/step light switch goes on and says on. If we need the awning LEDs, the remote turns them on/off. The dimmer also remembers what the last setting was. On its dimmest setting, it provides something similar to medium to full moonlight. If I ever find myself in a position where I want to annoy the neighbors or I'm hosting a rave  , I have all of the various flashing settings to use at full power.

__________________
2022 Entegra Accolade 37K <- 2019 Jeep Wrangler Unlimited
2019 Jeep Wrangler Unlimited <- 2022 inTech Flyer Explore
|
|
|
|
|
08-17-2015, 02:59 PM
|
#4
|
|
Senior Member
Join Date: Aug 2015
Location: Cumming, Georgia
Posts: 144
|
Is it as easy as cutting the red and black wires and inserting this between and connect the red to red on each end and black to black?
|
|
|
|
|
08-17-2015, 03:25 PM
|
#5
|
|
Member
Join Date: Aug 2015
Location: Orange County
Posts: 32
|
Just a thought, but why not pull the switch from inside the trailer, disconnect which ever one you prefer from that switch, and then just install a second indoor switch? I would think this would be the cleanest option, and fairly easy to do depending on the switch location.
|
|
|
|
|
08-17-2015, 03:45 PM
|
#6
|
|
Senior Member
Join Date: Sep 2013
Location: South Texas
Posts: 7,216
|
Quote:
Originally Posted by DustyGeek

I was in the same boat with my TT.
I put one of these dimmers in the track, right in front of the LED light strip. To waterproof the dimmer, I just filled the ends up with some automotive sealant, and then put some larger heatshrink tubing over the connection between the dimmer and LED strip, and smaller heatshrink over the solder connections on the right side. To make room for the dimmer, I needed to trim/shorten the cover strip a little. With the way I cut it, it holds down the front of the dimmer so the whole thing is sitting securely wedged in the track. It's survived some pretty good rain, a week at the beach and about 500 miles of highway driving so far. The remote lives attached to the door of the control panel with velcro.
These dimmers won't work at the switch end of the circuit because it requires a dedicated ground, and the awning/porch light control has a shared ground. The dimmer works using PWM (pulse width modulation), basically by turning on/off the negative/ground line very rapidly - more off than on for dim, more on than off for bright. With the shared ground in the mix, you need to get it on the LED side of the connection where the grounds meet up. In my case, the ground for the LED strip meets up with the awning control where they come through the sidewall, which is about 16" to the right of where the dimmer is. That's why I chose to place it where I did.
When we set up camp, the switch awning/step light switch goes on and says on. If we need the awning LEDs, the remote turns them on/off. The dimmer also remembers what the last setting was. On its dimmest setting, it provides something similar to medium to full moonlight. If I ever find myself in a position where I want to annoy the neighbors or I'm hosting a rave , I have all of the various flashing settings to use at full power.
 |
I did this same mod on my trailer recently, and I love it. Though mine isn't quite as clean as Dusty's.
Quote:
Originally Posted by Amosmoses33
Is it as easy as cutting the red and black wires and inserting this between and connect the red to red on each end and black to black?
|
Yup, it's that easy. Just make sure you have the dimmer module faced the right way. It is specific to which end connects to the light and which end connects to the 12V source.
Quote:
Originally Posted by OC Dan
Just a thought, but why not pull the switch from inside the trailer, disconnect which ever one you prefer from that switch, and then just install a second indoor switch? I would think this would be the cleanest option, and fairly easy to do depending on the switch location.
|
The dimmer module Dusty and I installed is actually FAR easier than fishing through the mess of wires, and then having to route another set of wires up to a switch in the box. In my case, that would be a monster project. Clipping 4 wires and putting this little module in line was WAY easier, albeit maybe not QUITE as clean, but still not bad at all. AND you get the added benefit of being able to dim that ridiculously bright awning light. 
__________________
-2018 Greyhawk 29MV
-2020 Jeep Wrangler Unlimited (JLU) (Primary Toad)
-1994 Jeep Wrangler YJ (Secondary Toad)
-2014 Jay Flight 28BHBE & Ram 2500 6.4L CC 4x4 (sold)
|
|
|
|
|
08-17-2015, 04:12 PM
|
#7
|
|
Senior Member
Join Date: Aug 2015
Location: Cumming, Georgia
Posts: 144
|
My awning light wire runs down the awning support then enters the trailer at the bottom. It has a guard/cover towards the bottom. Couldn't I splice it there? Then not have to worry about the track and being super neat?
Was gonna post pic but I guess it has to have a webpage host it.
|
|
|
|
|
08-17-2015, 04:15 PM
|
#8
|
|
Senior Member
Join Date: May 2015
Location: Fairfax
Posts: 141
|
That sounds like it would work as long as the wires go straight to the LED strip and aren't joined to any other wires.
The only other gotcha is making sure not to wire it backwards (direction or polarity). The label on the dimmer module is pretty clear about which end connects to the LED strip and the +/-, so that's actually somewhat hard to mess up as long as you're paying attention.
__________________
2022 Entegra Accolade 37K <- 2019 Jeep Wrangler Unlimited
2019 Jeep Wrangler Unlimited <- 2022 inTech Flyer Explore
|
|
|
|
|
08-17-2015, 04:18 PM
|
#9
|
|
Senior Member
Join Date: Aug 2015
Location: Cumming, Georgia
Posts: 144
|
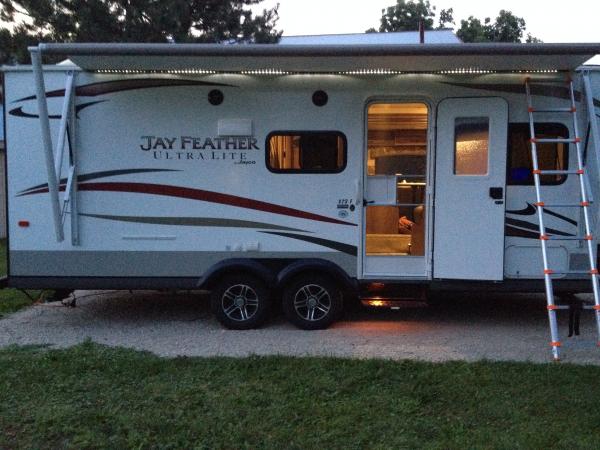
See if this pic works. 
|
|
|
|
|
08-17-2015, 08:13 PM
|
#10
|
|
Senior Member
Join Date: Sep 2013
Location: South Texas
Posts: 7,216
|
Quote:
Originally Posted by Amosmoses33
See if this pic works. |
I'm gonna say that if those red and black go to your awning light, you're good to go, and you got it easy. Look at it this way, if you mess something up, you can always just butt splice it back the way it was, but it's really easy.
On mine, I didn't have very much exposed wire to work with, and it was way up at the top of the awning where it connects to the side of the trailer. So once I got the dimmer module spliced in, I had a bit of a "wad" that I needed to tuck away somehow. My solution was to cut a small hole in the track that the LED strip rides in and zip-tie the whole mess up in there. Not nearly as elegant an install as Dusty... But it works, and that's what's important.
__________________
-2018 Greyhawk 29MV
-2020 Jeep Wrangler Unlimited (JLU) (Primary Toad)
-1994 Jeep Wrangler YJ (Secondary Toad)
-2014 Jay Flight 28BHBE & Ram 2500 6.4L CC 4x4 (sold)
|
|
|
|
|
08-18-2015, 01:22 PM
|
#11
|
|
Senior Member
Join Date: Aug 2015
Location: Cumming, Georgia
Posts: 144
|
Good deal, thanks for the responses. Part should be here tomorrow.
|
|
|
|
|
08-20-2015, 07:59 AM
|
#12
|
|
Senior Member
Join Date: Aug 2015
Location: Cumming, Georgia
Posts: 144
|
I got mine installed yesterday BUT 
I tested it out by just twisting the connections together and it worked great. I installed the butt connectors and heat shrink tubing. I put one big heatshrink over the dimmer unit itself as well and now it doesn't work. The light comes on at the dimmed level I left it but the remote won't change anything. I outsmarted myself I guess. I'm thinking the mini torch used to "melt" the heatskrink must've melted something in the dimmer unit itself. I ordered another and will put it in Friday and sill just put some caulk on it to waterproof.
__________________
------------------------------------------
2015 Jayco Eagle Premier 318RETS
2008 Ford F-250 Lariat CC Super Duty 6.4 Turbo Diesel
Cumming, Georgia
Go Dawgs!
|
|
|
|
|
08-21-2015, 08:05 AM
|
#13
|
|
Senior Member
Join Date: Aug 2015
Location: Cumming, Georgia
Posts: 144
|
I guess it just got wet. It rained during my install. It works today. Going to caulk it good now.
__________________
------------------------------------------
2015 Jayco Eagle Premier 318RETS
2008 Ford F-250 Lariat CC Super Duty 6.4 Turbo Diesel
Cumming, Georgia
Go Dawgs!
|
|
|
|
|
09-01-2015, 10:08 PM
|
#14
|
|
Junior Member
Join Date: May 2015
Location: Aurora
Posts: 27
|
__________________
2007 Toyota Sequoia
2014 Jayco 23F
|
|
|
|
|
09-02-2015, 06:17 AM
|
#15
|
|
Senior Member
Join Date: Jan 2011
Location: Vienna
Posts: 2,044
|
Neat job. Mine are factory and work fine, just no dimmer available. Now I know where to begin looking if I want to make any changes. Isn't this forum just great?
__________________
Joe Hinson
2010 Jayco Quest G2(SOLD)
2014 Jayco Eagle 33.5RETS
2007 Ram 2500 5.9L Cummins(SOLD)
2015 Ram 2500 6.7L Cummins 4WD
:)
|
|
|
|
|
09-02-2015, 07:15 AM
|
#16
|
|
Junior Member
Join Date: Jul 2015
Location: Wixom
Posts: 19
|
That is freaking awesome guys!! DustyGeek, I owe you a 12 pack for this gem! The benefit of being able to dim the awning light and basically separate the step light is just great, because that light can be overwhelming...especially being it can ruin a good campfire with its light. I was going to add a separate step light so I could leave that on all night, but it doesn't look like that's necessary now. Plus much cheaper, so cheap I may order two of these so I have a backup remote. Thanks again and yes these forums are great!
__________________
2015 Jayco Jay Feather X23B
Upgraded from REI Half Dome, The North Face Trailhead 8, Coleman Mesa popup.
|
|
|
|
|
09-02-2015, 07:24 AM
|
#17
|
|
Senior Member
Join Date: Sep 2013
Location: South Texas
Posts: 7,216
|
Quote:
Originally Posted by mlugi
|
25'?! Holy max distance Batman! Mine only works to about 10' (maybe?) if I'm pointing right at it, and mine is on the OUTSIDE of the tin box! Maybe I need to order another one to get another remote?
__________________
-2018 Greyhawk 29MV
-2020 Jeep Wrangler Unlimited (JLU) (Primary Toad)
-1994 Jeep Wrangler YJ (Secondary Toad)
-2014 Jay Flight 28BHBE & Ram 2500 6.4L CC 4x4 (sold)
|
|
|
|
|
09-08-2015, 05:32 AM
|
#18
|
|
Junior Member
Join Date: May 2015
Location: Aurora
Posts: 27
|
I used it this weekend and it work sometimes at the 25' found that the remote at the camp ground was less accurate then when I was testing it. But I found range 15-25' the only disadvantage I found was as I understand it this unit turns the ground on/off to achieve the "dimming" which is great but when testing I found that the built in IRV DVDs player screen flickers on the tv when I'm dimming the outside light strip. Not a big deal since those lights would hardly be dimmed if we left the kids watch a movie. If the led strip is at full or off with that controller the tv/DVD is fine. At any dim setting the screen flickers. I May look into it more but for now it is acceptable and not being blinded while enjoying the camp fire is awesome. Next project is LEDs in the pantry and the outdoor storage compartments.
__________________
2007 Toyota Sequoia
2014 Jayco 23F
|
|
|
|
|
09-08-2015, 06:14 AM
|
#19
|
|
Junior Member
Join Date: Jul 2015
Location: Wixom
Posts: 19
|
mlugi - The TV screen flickers constantly or just when you are pushing the button on the remote to dim the LED light strip? Thanks
__________________
2015 Jayco Jay Feather X23B
Upgraded from REI Half Dome, The North Face Trailhead 8, Coleman Mesa popup.
|
|
|
|
|
09-08-2015, 06:34 AM
|
#20
|
|
Junior Member
Join Date: May 2015
Location: Aurora
Posts: 27
|
Quote:
Originally Posted by cgmoses74
mlugi - The TV screen flickers constantly or just when you are pushing the button on the remote to dim the LED light strip? Thanks
|
Only when you used the remote to dim the lights ( any dim setting - there is a different flicker rate) full on or full off the tv is screen is fine. I've only tested this on the dvd screen not on an TV channel either but again we don't use it that much just a back up if the weather is bad and the small kids need a distraction for the storms.
__________________
2007 Toyota Sequoia
2014 Jayco 23F
|
|
|
|
|
|
 Posting Rules
|
You may not post new threads
You may not post replies
You may not post attachments
You may not edit your posts
HTML code is Off
|
|
|
|
 » Recent Threads
 |
|
|
|
|
|
|
|
|
|
|
|
|
|
|
|
|
|
|
|
|
|
|
|
|
|
|
|
|
|
|
|
|
|
|
|
|
|
|
|
|
|


 Linear Mode

