 |
 06-03-2017, 03:14 PM
|
#1
|
|
Senior Member
Join Date: May 2017
Location: Munford
Posts: 149
|
Observation camera installed on aluminum trailer
My Furrion Wireless Observation System arrived today and I was anxious to install it.
I looked at threads on how to mount this to the curved aluminum skin of my new trailer and I wasn't too crazy about having to put a ton of sealant or silicone around it, so I decided to make my own "spacer".
I started with a nylon tapping block for laminate flooring that I had lying around. The gasket was just a bit wider than the block, but that was perfect since the spacer was going to have a curved side. I cut off the tapping edges on the block to make a flat piece about 3/8" thick. Then I used the gasket as a template and traced the outline. I cut it out and sanded it to match the shape of the gasket as closely as possible. Then countersunk a screw and screwed it to a board that I placed in a vice and used a belt sander to sand one flat surface into a curve that very closely matched the curve in the aluminum trailer skin. I drilled my holes and I was ready to install the camera.
So, I removed the center running light, looked and looked, fished and fished, but there were no other wires in that area to provide constant power to the camera. No biggie. I had pretty much decided, with the input of some folks on here, that it was a better idea to have it hooked to the running lights. So, I used a level to get a plumb line from the center of the running light hole and came down to the second "curve in" of the aluminum skin and drilled my holes.
I fished the camera wires through the hole I drilled and attached them to the center light wires. I reattached the center running light, sealed it and then mounted the camera. I turned the running lights on and the blue light lit up and it was over.
I wasted more time looking for the supposed "pre-wired" wires than it took to install this camera.
Unfortunately, when I plugged the monitor into the 12v outlet and connected the power cord, the monitor wouldn't power on. I tried the second outlet and still no power. I checked the outlets with another device and confirmed that they have power. So, while the camera is installed and I'm very happy with that, I have a monitor that doesn't work. I'll have to deal with that on Monday. I'm kind of bummed out that I can't see how it works yet.
|

|

|
 06-03-2017, 03:16 PM
|
#2
|
|
Senior Member
Join Date: May 2017
Location: Munford
Posts: 149
|
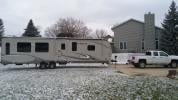
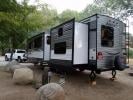
Three more pics - installed:
|

|

|
 06-03-2017, 06:10 PM
|
#3
|
|
Senior Member
Join Date: Oct 2015
Location: Southern, VT
Posts: 387
|
Looks Great!!!! Super job on the spacer and very nice write-up! Thanks for sharing and enjoy the new peace of mind!
Happy Travels,
Duke
Sent from my iPhone using Tapatalk
__________________
2019 Jay Flight 31QBDS Elite, Fiberglass, Thermal Pkg, Al. Rims, 15K AC
2018 Jay Flight 28BHS Elite, Fiberglass, Thermal Pkg, Al. Rims, 15K AC, Elec. Stab. Jacks (Traded)
2016 Jay Flight 26BH Elite, Fiberglass, Thermal Pkg, Al. Rims, 15K AC, Elec. Stab. (Traded)
2015 RAM 3500HD Cummins Turbo Diesel, Tradesman Crew Cab 4WD

|

|

|
 06-03-2017, 08:04 PM
|
#4
|
|
Senior Member
Join Date: Jun 2016
Location: Newburgh
Posts: 6,307
|
Looks great - Nice Job! Love it when we use repurposed material for a project...
__________________

2022 33RBTS
Progressive Industries EMS - Hardwired
Equalizer 4 Point WDH
2021 Ford F350 7.3
Air Lift Rear Bags w/ On Board Compressor (Pending)
2016 28BHBE - (Traded and Missed already)
|

|

|
 06-03-2017, 09:50 PM
|
#5
|
|
Senior Member
Join Date: Jul 2015
Location: Mid-Mi
Posts: 1,492
|
Nice job!!!
Could the monitor issue be a fuse in the cig plug?
|

|

|
 06-04-2017, 02:33 AM
|
#6
|
|
Senior Member
Join Date: May 2016
Location: Way down here........FL
Posts: 2,097
|
Looks good!! Great job!!
|

|

|
 06-04-2017, 06:18 AM
|
#7
|
|
Senior Member
Join Date: Sep 2010
Location: Waukesha
Posts: 608
|
That sucks. Call Furrion
__________________
Rod and Linda
SE Wisconsin
2018 330RSTS
2015 Silverado 2500 
|

|

|
 06-04-2017, 07:27 AM
|
#8
|
|
Senior Member
Join Date: May 2017
Location: Munford
Posts: 149
|
Quote:
Originally Posted by need-a-vacation

Nice job!!!
Could the monitor issue be a fuse in the cig plug?
|
I'm afraid not. I have a 12v chainsaw sharpener that I plugged into both outlets and it worked fine.
|

|

|
 06-04-2017, 07:29 AM
|
#9
|
|
Senior Member
Join Date: May 2017
Location: Munford
Posts: 149
|
Quote:
Originally Posted by rodro123

That sucks. Call Furrion
|
I plan to call them first thing tomorrow morning. They're closed on the weekend, of course.
The "Mr. Fixit" in me wants to remove the back cover and look for a loose connection, but I don't want to risk voiding the warranty.
|

|

|
 06-04-2017, 07:48 AM
|
#10
|
|
Senior Member
Join Date: Mar 2017
Location: In the gnat capital of the world, Tifton, GA
Posts: 555
|
Quote:
Originally Posted by Johnny

I'm afraid not. I have a 12v chainsaw sharpener that I plugged into both outlets and it worked fine.
|
Not the female plug in the dash but inside of the male plug from the monitor. Many have an internal fuse. If that's blown, no power to the monitor. On some you can unscrew the metal tip (plastic collar), on others you have to take it apart.
|

|

|
 06-04-2017, 08:32 AM
|
#11
|
|
Senior Member
Join Date: May 2017
Location: Munford
Posts: 149
|
Quote:
Originally Posted by ifallsguy

Not the female plug in the dash but inside of the male plug from the monitor. Many have an internal fuse. If that's blown, no power to the monitor. On some you can unscrew the metal tip (plastic collar), on others you have to take it apart.
|
This is too funny.
I just logged onto the forum to say that I found the problem - a blown fuse in the plug adapter.
I can't read the amp rating on the fuse to save my life though. My wife says it has 125V stamped on it. Not being familiar with anything electrical, I can only assume that means 12.5 volts, but I need to find the correct amp rated fuse to put back in here.
The monitor says the working voltage is DC8-30v and the working current is 200mA.
Any input on what fuse that takes?
|

|

|
 06-04-2017, 09:26 AM
|
#12
|
|
Senior Member
Join Date: May 2017
Location: Sweetwater
Posts: 731
|
Quote:
Originally Posted by Johnny

This is too funny.
I just logged onto the forum to say that I found the problem - a blown fuse in the plug adapter.
I can't read the amp rating on the fuse to save my life though. My wife says it has 125V stamped on it. Not being familiar with anything electrical, I can only assume that means 12.5 volts, but I need to find the correct amp rated fuse to put back in here.
The monitor says the working voltage is DC8-30v and the working current is 200mA.
Any input on what fuse that takes?
|
Johnny,
Working current says 200mA, this translates to .2 amps. I'd go with a 1/4 amp fuse which is 250mA.
I'm going to put this same mod on my short list. Nice work by the way!
Happy trails...
__________________
- Jeff

2017 Jay Flight 32BHDS
2006 GMC 2500HD Classic CC SB 4x4 6.6L Duramax/Allison
|

|

|
 06-04-2017, 09:57 AM
|
#13
|
|
Senior Member
Join Date: May 2017
Location: Munford
Posts: 149
|
Quote:
Originally Posted by Vasquez Kid

Johnny,
Working current says 200mA, this translates to .2 amps. I'd go with a 1/4 amp fuse which is 250mA.
I'm going to put this same mod on my short list. Nice work by the way!
Happy trails...
|
Thanks.
I went to Autozone and the guy there had a magnifying glass. He said the fuse that was in it was a 1 amp fuse. It's much smaller than a normal fuse.
No place around here carries fuses that size, but I bought a new plug that takes normal size fuses and bought a package of 1 amp fuses.
I changed out the plug, took the 3 amp fuse out of the new plug and replaced it with a 1 amp.
Plugged it in, turned the running lights on and there you go.
It's unplugged now and stored. I'll contact Furrion tomorrow morning and find out exactly what rating the fuse is supposed to be. At least now I can use 1/4" x 1 1/4" fuses which are readily available anywhere.
|

|

|
 06-04-2017, 11:37 PM
|
#14
|
|
Senior Member
Join Date: Nov 2015
Location: Lakewood, WA.
Posts: 4,539
|
I didn't have power to mines but when I turn my light on it put the power to the light and that's when my monitor turn on, if the blue light is on your camera you have power when you turn the light on, I'm just saying and may you did that.
__________________
2023 Jayco North Point 310RLTS
2022 GMC Denali Ultimate DRW
Retired Army MSG
|

|

|
 06-04-2017, 11:39 PM
|
#15
|
|
Senior Member
Join Date: Nov 2015
Location: Lakewood, WA.
Posts: 4,539
|
Oh never mind you got it going at least.
__________________
2023 Jayco North Point 310RLTS
2022 GMC Denali Ultimate DRW
Retired Army MSG
|

|

|
 06-05-2017, 09:20 AM
|
#16
|
|
Senior Member
Join Date: May 2017
Location: Munford
Posts: 149
|
I called Furrion this morning and asked about the fuse. He had to hang up and go check, but he called me back within 30 minutes. It takes a 1 amp fuse, so I'm good to go. I really only posted this to say that I'm impressed that they called me back so quickly.
|

|

|
 |
 Posting Rules
|
You may not post new threads
You may not post replies
You may not post attachments
You may not edit your posts
HTML code is Off
|
|
|
|
 » Recent Threads
 |
|
|
|
|
|
|
|
|
|
|
|
|
|
|
|
|
|
|
|
|
|
|
|
|
|
|
|
|
|
|
|
|
|
|
|
|
|
|
|
|
|