 |
|
 03-31-2017, 11:25 AM
|
#21
|
|
Junior Member
Join Date: Oct 2016
Location: Pittsburgh
Posts: 25
|
Pre wire?
Don't see an extra set of wires... image attached.
|

|

|
|
03-31-2017, 11:45 AM
|
#22
|
|
Member
Join Date: Feb 2017
Location: Charles City
Posts: 95
|
I spliced into the extra wire or brown in your case for +12V. Mine was blue. splice into white for -12v. Don't cut the brown only use a splice. Drill hole lower for wire to poke up to this hole.
|
|
|
|
|
03-31-2017, 04:29 PM
|
#23
|
|
Senior Member
Join Date: Dec 2016
Location: Charles Town
Posts: 123
|
Quote:
Originally Posted by sfarw

Greg, did you get your camera installed? Are your marker lights round? We just picked up a 2017 23BHM today and the lights are round so I may be wondering the same thing as you were about removal of the light. I plan to install the camera tomorrow and am rather anxious to see what I have behind that light.
|
Haven't installed yet. Waiting for favorable weather. I'll post a pic of my light fixture. It isn't round.
Sent from my Nexus 7 using Tapatalk
__________________
Greg & Nancy Hubert
2017 Jayco 28RLS
2018 Ford F-250 Lariat 6.2L Gas
Equalizer 12K WD Hitch

|
|
|
|
|
04-01-2017, 03:50 PM
|
#24
|
|
Junior Member
Join Date: Oct 2016
Location: Pittsburgh
Posts: 25
|
Quote:
Originally Posted by NorthPoint5r
I spliced into the extra wire or brown in your case for +12V. Mine was blue. splice into white for -12v. Don't cut the brown only use a splice. Drill hole lower for wire to poke up to this hole.
|
Unfortunately there isn't room to mount the furrion camera I purchased between this light and the window! And, right above this hole I see metal... I was thinking about moving this light up and putting the camera in this spot, but I'm not sure it would be wise to attempt drilling through metal that could potentially be structural? Moving the light below it I imagine would obstruct the camera's view or at least cause glare.
What is the law on these marker lights? Would it be legal to remove the center one?
Edit: I guess the screws for the camera would be in the wall rather than the window trim, so it might be okay to overlap the window trim as long as I caulk the gap.
|
|
|
|
|
04-01-2017, 04:47 PM
|
#25
|
|
Senior Member
Join Date: Dec 2015
Location: Pennsylvania
Posts: 1,880
|
Quote:
Originally Posted by sfarw
Unfortunately there isn't room to mount the furrion camera I purchased between this light and the window! And, right above this hole I see metal... I was thinking about moving this light up and putting the camera in this spot, but I'm not sure it would be wise to attempt drilling through metal that could potentially be structural? Moving the light below it I imagine would obstruct the camera's view or at least cause glare.
What is the law on these marker lights? Would it be legal to remove the center one?
Edit: I guess the screws for the camera would be in the wall rather than the window trim, so it might be okay to overlap the window trim as long as I caulk the gap.
|
Trailers wider that 6.6 feet are required to have the 3 center marker lights:
Wide Trailers
Trailers that are more than 80 inches wide must be equipped with additional lighting on the front and rear to indicate the trailer's width. Two red rear clearance lights must be placed at the trailer's widest point, as far apart and as high as possible. Three red identification lights must be centered on the back of the trailer, spread between 6 and 12 inches apart, and placed as high as possible. Front clearance lights must be placed as high and as far forward as possible, at the trailer's widest point.
__________________
2012 Ford Expedition EL
2016 28BHBE, Elite and Thermal Packages.
Equal-i-zer 4-point Sway Control, Southwire 34930 Surge Guard 30A, Tire Minder TPMS A1A
(2) Yamaha EF2000iS Generators, Micro-Air EasyStart 364 (3-ton) Soft Start, Garmin RV 890, GoodYear Endurance ST225/75-15 Load Range E
|
|
|
|
|
04-02-2017, 04:19 AM
|
#26
|
|
Member
Join Date: Feb 2017
Location: Charles City
Posts: 95
|
I first drilled a starter hole a few inches below the light hole and ran into metal. I drilled below that and yes metal again but continued with installation. Hope I did not weaken it but I am sure with how tight I had to turn those screws my camera will not fall off.
|
|
|
|
|
04-02-2017, 08:17 AM
|
#27
|
|
Junior Member
Join Date: Oct 2016
Location: Pittsburgh
Posts: 25
|
Successful install on 23BHM
The brown wire was positive as suggested, the white was negative. The wires for the furrion were too small to fit into my tap, so I attached them first to extra wire of a thicker gauge and used that thicker wire in the tap. I was afraid that I wouldn't be able to push everything back into the wall but I managed it. I also made sure to keep the area behind each light screw clear of wires. I also trimmed down the length of wire that came with the camera because 6' is pretty long for this application.
There was a bit of plastic I had to drill down through below the light's hole. I didn't detect anything behind the four mounting screws on the camera either.
I still have to seal the gap created by the window trim underneath the camera mount but that should be simple enough.
The camera paired right away and I have good reception in the cab. I'm really excited to use it now!
|
|
|
|
|
04-02-2017, 09:03 AM
|
#28
|
|
Member
Join Date: Feb 2017
Location: Charles City
Posts: 95
|
the only thing I fussed with is pairing. Unlike the Eagles there is no switch and with prep wiring the camera is on all the time. I had to use the battery kill switch to cycle the power as required when pairing the monitor to camera.
|
|
|
|
|
04-02-2017, 10:04 AM
|
#29
|
|
Senior Member
Join Date: Dec 2016
Location: Charles Town
Posts: 123
|
Here is what my marker lights look like. Anyone have any ideas on how to remove to get behind to the wires? My best guess is to carefully use a utility knife to break the silicone sealant and then maybe pry gently?? 
Sent from my Moto G (4) using Tapatalk
__________________
Greg & Nancy Hubert
2017 Jayco 28RLS
2018 Ford F-250 Lariat 6.2L Gas
Equalizer 12K WD Hitch
|
|
|
|
|
04-02-2017, 10:11 AM
|
#30
|
|
Member
Join Date: Feb 2017
Location: Charles City
Posts: 95
|
it pops off with enough force all around with a putty knife. I too was concerned about breaking it.
|
|
|
|
|
04-02-2017, 12:01 PM
|
#31
|
|
Senior Member
Join Date: Dec 2016
Location: Charles Town
Posts: 123
|
Quote:
Originally Posted by NorthPoint5r
it pops off with enough force all around with a putty knife. I too was concerned about breaking it.
|
Going to try that.
Sent from my Moto G (4) using Tapatalk
__________________
Greg & Nancy Hubert
2017 Jayco 28RLS
2018 Ford F-250 Lariat 6.2L Gas
Equalizer 12K WD Hitch
|
|
|
|
|
04-20-2017, 12:53 PM
|
#32
|
|
Senior Member
Join Date: Dec 2016
Location: Charles Town
Posts: 123
|
Well, rear view camera (Furrion) is installed. The LED lens pried off easily. There was an extra black wire capped off behind the centerpiece clearance light. Opted to wire the camera into the clearance light power so it would be on when headlights are on.
Simple task. Works great. Was very helpful when driving on 95 this week on our way to spring camping at Cape Charles, VA.
Sent from my Nexus 7 using Tapatalk
__________________
Greg & Nancy Hubert
2017 Jayco 28RLS
2018 Ford F-250 Lariat 6.2L Gas
Equalizer 12K WD Hitch
|
|
|
|
|
04-21-2017, 04:48 AM
|
#33
|
|
Junior Member
Join Date: Apr 2017
Location: Langhorne
Posts: 2
|
Prewired
I installed my Furrion camera earlier this month, and opted to connect it to the marker lights vs the lone black wire that was there. I''m not great at electrical. The black wire didn't seem to be hot- though I tried various grounding methods. Expanded instructions from Jayco would have been nice. The only benefit to connecting it to the black wire vs the marker lights would have been the ability to use the camera for observation assuming it would be always powered. Since I have an expandable that solution would only get me a view of the top of my tent anyhow! So it was easy to tap into the center marker light. And it works great. Lights on camera is on. Easy.
|
|
|
|
|
04-21-2017, 05:48 AM
|
#34
|
|
Member
Join Date: Feb 2017
Location: Charles City
Posts: 95
|
there should have been two hot wires and a ground. The other hot is hot all the time. In mine it was blue.
|
|
|
|
|
05-16-2017, 04:41 PM
|
#35
|
|
Senior Member
Join Date: Oct 2015
Location: Southern, VT
Posts: 387
|
Quote:
Originally Posted by Greg&Nancy
Well, rear view camera (Furrion) is installed. The LED lens pried off easily. There was an extra black wire capped off behind the centerpiece clearance light. Opted to wire the camera into the clearance light power so it would be on when headlights are on.
Simple task. Works great. Was very helpful when driving on 95 this week on our way to spring camping at Cape Charles, VA.
Sent from my Nexus 7 using Tapatalk
|
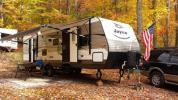
Can you show us a picture of the camera mounted to your TT and maybe a closeup from the side? Would like to see how it looks on aluminum siding.
Thank you in advance!
Sent from my iPhone using Tapatalk
__________________
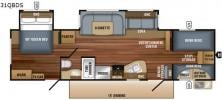
2019 Jay Flight 31QBDS Elite, Fiberglass, Thermal Pkg, Al. Rims, 15K AC
2018 Jay Flight 28BHS Elite, Fiberglass, Thermal Pkg, Al. Rims, 15K AC, Elec. Stab. Jacks (Traded)
2016 Jay Flight 26BH Elite, Fiberglass, Thermal Pkg, Al. Rims, 15K AC, Elec. Stab. (Traded)
2015 RAM 3500HD Cummins Turbo Diesel, Tradesman Crew Cab 4WD
|
|
|
|
|
05-16-2017, 06:14 PM
|
#36
|
|
Senior Member
Join Date: Dec 2016
Location: Charles Town
Posts: 123
|
Quote:
Originally Posted by Duke_26
Can you show us a picture of the camera mounted to your TT and maybe a closeup from the side? Would like to see how it looks on aluminum siding.
Thank you in advance!
Sent from my iPhone using Tapatalk
|
There you go.  
Sent from my Moto G (4) using Tapatalk
__________________
Greg & Nancy Hubert
2017 Jayco 28RLS
2018 Ford F-250 Lariat 6.2L Gas
Equalizer 12K WD Hitch
|
|
|
|
|
05-16-2017, 06:37 PM
|
#37
|
|
Senior Member
Join Date: Nov 2015
Location: Lakewood, WA.
Posts: 4,538
|
Nice job and I think that it's a much have mod on these TT and fiver.
__________________
2023 Jayco North Point 310RLTS
2022 GMC Denali Ultimate DRW
Retired Army MSG
|
|
|
|
|
05-16-2017, 07:17 PM
|
#38
|
|
Senior Member
Join Date: Oct 2015
Location: Southern, VT
Posts: 387
|
Quote:
Originally Posted by Greg&Nancy
There you go.
Sent from my Moto G (4) using Tapatalk |
Thank you very much!!! Assuming you have the rear observation system and not the back up camera version. I hope your enjoying it as much as I enjoy ours! The range in incredible. Makes driving so much more enjoyable knowing what's behind you in your blind spot and changing lanes, and of course backing up. Got almost 2000 miles clocked on ours with no issues.
Happy Trails!
Sent from my iPhone using Tapatalk
__________________
2019 Jay Flight 31QBDS Elite, Fiberglass, Thermal Pkg, Al. Rims, 15K AC
2018 Jay Flight 28BHS Elite, Fiberglass, Thermal Pkg, Al. Rims, 15K AC, Elec. Stab. Jacks (Traded)
2016 Jay Flight 26BH Elite, Fiberglass, Thermal Pkg, Al. Rims, 15K AC, Elec. Stab. (Traded)
2015 RAM 3500HD Cummins Turbo Diesel, Tradesman Crew Cab 4WD
|
|
|
|
|
05-16-2017, 07:24 PM
|
#39
|
|
Senior Member
Join Date: Dec 2016
Location: Charles Town
Posts: 123
|
Quote:
Originally Posted by Duke_26
Thank you very much!!! Assuming you have the rear observation system and not the back up camera version. I hope your enjoying it as much as I enjoy ours! The range in incredible. Makes driving so much more enjoyable knowing what's behind you in your blind spot and changing lanes, and of course backing up. Got almost 2000 miles clocked on ours with no issues.
Happy Trails!
Sent from my iPhone using Tapatalk
|
Yes, have the rear observation system. Makes driving in traffic so much better.
Sent from my Moto G (4) using Tapatalk
__________________
Greg & Nancy Hubert
2017 Jayco 28RLS
2018 Ford F-250 Lariat 6.2L Gas
Equalizer 12K WD Hitch
|
|
|
|
|
05-16-2017, 08:15 PM
|
#40
|
|
Member
Join Date: May 2017
Location: Dallas
Posts: 48
|
Quote:
Originally Posted by Duke_26
Can you show us a picture of the camera mounted to your TT and maybe a closeup from the side? Would like to see how it looks on aluminum siding.
Thank you in advance!
Sent from my iPhone using Tapatalk
|
That would be greatly appreciated to see some pics.. We bought a 17 26bh aluminum siding and wanted to see how the furrion sat on the aluminum for install. Thanks.
Sent from my SM-N920V using Tapatalk
|
|
|
|
|
|
| Thread Tools |
Search this Thread |
|
|
|
| Display Modes |
 Linear Mode Linear Mode
|
 Posting Rules
|
You may not post new threads
You may not post replies
You may not post attachments
You may not edit your posts
HTML code is Off
|
|
|
|
 » Recent Threads
 |
|
|
|
|
|
|
|
|
|
|
|
|
|
|
|
|
|
|
|
|
|
|
|
|
|
|
|
|
|
|
|
|
|
|
|
|
|
|
|
|
|


