 |
|
 06-11-2021, 11:01 AM
|
#1
|
|
Junior Member
Join Date: Jul 2019
Location: Fort Pierce
Posts: 29
|
How to replace 3/4" clearance marker LED lights
Along the top of the coach there are 3/4" LED Clearance Marker lights. They are amber and above the windshield. There is 5 of them that are press fitted into the cap. I have 2 that are bad. Has anyone replaced them? I have the replacement lights, and I tried to extract them from the outside and was unsuccessful. Now I believe they have to be pushed out from the inside? I am trying to figure out how to access them from inside the coach.
Thanks
|

|

|
|
06-12-2021, 06:54 AM
|
#2
|
|
Senior Member
Join Date: Jun 2021
Location: Morehead City
Posts: 735
|
Following
|
|
|
|
|
06-12-2021, 07:19 AM
|
#4
|
|
Senior Member
Join Date: Apr 2018
Location: East Lyme
Posts: 168
|
I've yet to try it, but I would think one could put a flat blade screwdriver @ 3 o'clock and 9 o'clock under the lip of the grommet and pry them out... or any other pair of o'clocks that are on opposite sides of the led.
__________________
2017 Eagle HT 26.5 BHS 5th Wheel
2014 F-350 Lariat 6.7 CC SB SW
B&W Turnover Ball
AUH #3220
|
|
|
|
|
06-12-2021, 07:46 AM
|
#5
|
|
Junior Member
Join Date: Jul 2019
Location: Fort Pierce
Posts: 29
|
Yep, got those lights, thanks for looking.
Yes it appears that it is a press fit. The problem is getting the the bad light out. I was lead to believe that you could pull the bad light out from the exterior and there is enough service loop in the wire to pull the bad light out enough to cut the wires and splice in the new light.
So I am up on the ladder with a flat blade screw driver and pliers and that bugger won't pull out see picture attached. Think it has to be pushed out from inside versus pulled out from the outside.
Jayco call #2 said drop the euroloft and take off the front trim by removing the accessible screws. Did that and then there were screws that were inaccessible.
Stopped and call Jayco number #3 and they talked to the service shop and called me back. Told me that I was working in the wrong area. I need to remove the "roof" panel by the windshield where the speakers are are mounted.
Decided to stop and try this when I had more help and started this thread. Sometimes the answers here are more productive. I hoped I could find a Youtube, but no luck.
Once I figure it out, I will post my continued experience.
Any more help from you guys would be appreciated.
|
|
|
|
|
06-12-2021, 07:53 AM
|
#6
|
|
Senior Member
Join Date: May 2016
Location: Way down here........FL
Posts: 2,097
|
If you are replacing them……..I would drill a small hole in center of lens and put a small screw in and pull out with vise grips
__________________
Jack
2016 Pinnacle 36 KPTS 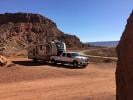
2016 F350 Lariat CC LB dually 6.7
|
|
|
|
|
06-12-2021, 08:04 AM
|
#7
|
|
Junior Member
Join Date: Jul 2019
Location: Fort Pierce
Posts: 29
|
These are the 3/4" LED lights that I brought. These seem to match up best to the OEM manufacturer. It has 3 SMD (surface mount diodes).
https://www.amazon.com/dp/B08YY4SRYS...roduct_details
Thanks
|
|
|
|
|
06-12-2021, 08:13 AM
|
#8
|
|
Junior Member
Join Date: Jul 2019
Location: Fort Pierce
Posts: 29
|
Quote:
Originally Posted by jasum

If you are replacing them
..I would drill a small hole in center of lens and put a small screw in and pull out with vise grips
|
Good suggestion, What I need to be careful of is losing the electrical wires down into the cavity. Or, the light pushing in when drilling.
|
|
|
|
|
06-12-2021, 08:34 AM
|
#9
|
|
Senior Member
Join Date: Apr 2018
Location: East Lyme
Posts: 168
|
My 5th wheel has the same LED markers up top in the front - and on the inside, I have finished cabinetry, so there is no removing that in order to push them out from the inside....
For replacement, I LOVE the "drill a small hole and put a screw in it" idea.
__________________
2017 Eagle HT 26.5 BHS 5th Wheel
2014 F-350 Lariat 6.7 CC SB SW
B&W Turnover Ball
AUH #3220
|
|
|
|
|
09-20-2021, 01:59 PM
|
#10
|
|
Senior Member
Join Date: Apr 2018
Location: Natalbany Creek Campground, Amite City, LA
Posts: 3,244
|
Quote:
Originally Posted by White Ox
My 5th wheel has the same LED markers up top in the front - and on the inside, I have finished cabinetry, so there is no removing that in order to push them out from the inside.... For replacement, I LOVE the "drill a small hole and put a screw in it" idea.
|
Same here. Both front and rear are impossible to get to from the inside. There has to be an easy way to remove them. I'll be listening because I need to replace one of my front ones.
__________________
AL & JANET KRUEBBE
2019 PINNACLE 37RLWS
2018 NORTH POINT 315RLTS (TRADED)
2017 RAM 3500 DRW DIESEL/AISIN 4.10 AIR BAGS
B&W COMPANION TURN OVER BALL HITCH
Formerly from Sequim, WA
|
|
|
|
|
09-20-2021, 04:36 PM
|
#11
|
|
Senior Member
Join Date: Oct 2017
Location: Oregon Coast
Posts: 3,094
|
I have used these LEDs on lots of cargo trailer projects and they are made so that you insert the rubber grommet into the 3/4" hole and then pressing the light in the grommet expands and seals the hole. The best way to remove them is the use two small flat blades and stick just the tips in 180° apart and gently pry the bulb out of the grommet, then cut your wires and remove old grommet and dont forget to press the new grommet in before you splice the wires of the new light. After wired, I use a silicone spray on the grommet and press the LED in, just make sure its straight when you put it in if it has any diffusers in the lens.
__________________
Brian & Jeannie
2018.5 Seneca 37RB with to many mods to list
2015 Jeep JKU Rubicon

|
|
|
|
|
09-21-2021, 05:04 PM
|
#12
|
|
Junior Member
Join Date: Jul 2019
Location: Fort Pierce
Posts: 29
|
Quote:
Originally Posted by Rustynuts
I have used these LEDs on lots of cargo trailer projects and they are made so that you insert the rubber grommet into the 3/4" hole and then pressing the light in the grommet expands and seals the hole. The best way to remove them is the use two small flat blades and stick just the tips in 180° apart and gently pry the bulb out of the grommet, then cut your wires and remove old grommet and dont forget to press the new grommet in before you splice the wires of the new light. After wired, I use a silicone spray on the grommet and press the LED in, just make sure its straight when you put it in if it has any diffusers in the lens.
|
This is what I expected the task to be. Unfortunately, my repair case was different. I have an Integra Vision Class A gas coach with a fiber glass front cap with 6 holes for six 3/4 inch LED clearance lights.
My guess is that they didnt get the hole size right during the fiber glass cap design, because what they did was RTVed the **** out of it from the inside during build.
So what I did from keying off a previous post was drill into the center of the failed LED and tap a screw in and pull out with pliers. A chunk pulled out with the screw, I was able to get a hold of the 2 wires, which were also caulked, and pull some workable length though. I continued o pull out pieces of the old LED with needle nose pliers and freed up the wires so I could push them back in once connected.
Tip: Use marine grade heat shrink butt splice connectors. The solder melts and insulation shrinks with a heat gun. This provides a good connection and allows you to easily push the wires back into the cavity. Here is he link:
https://www.amazon.com/gp/product/B0...?ie=UTF8&psc=1
I connected the wires using the butt splices specified above and tested before heating, polarity matters. It doesnt seem to damage the LED if wired backwards. After the bits of old LED are cleaned out of the cavity and enough(but not too much) RTV is removed so the wires can be pushed back into the cavity, I used clear silicone caulk and pressed the new LED in.
Note: There s no way on my coach to do this LED replacement from the inside.
Yaall let us know how your repair goes
|
|
|
|
|
09-22-2021, 08:26 PM
|
#13
|
|
Senior Member
Join Date: Dec 2018
Location: Fort White
Posts: 903
|
Thanks for circling back on what you had to do to get them replaced. I have a few out as well and i'm relaly hoping mine was done properly and they come out easier than what you explained.
__________________
Michael & Angela Foret
North Central Florida
2019 Entegra Vision 31V

|
|
|
|
|
09-23-2021, 07:07 AM
|
#14
|
|
Junior Member
Join Date: Jul 2019
Location: Fort Pierce
Posts: 29
|
Quote:
Originally Posted by Foretm
Thanks for circling back on what you had to do to get them replaced. I have a few out as well and i'm relaly hoping mine was done properly and they come out easier than what you explained.
|
I am glad to post problems and solutions on RV technical issues. I have found this forum to be a great reference.
I ordered replacement lights from Amazon:
https://www.amazon.com/gp/product/B0...?ie=UTF8&psc=1
I would take a guess if you went to your RV service center you would pay a lot more for the parts, expensive labor rates and long turnaround time.
When you replace yours, please post back on your experience.
|
|
|
|
|
09-28-2021, 02:33 PM
|
#15
|
|
Junior Member
Join Date: Jun 2020
Location: From Des Moines, now mobile
Posts: 17
|
I removed mine with two 1/4 inch nail pullers. At 9 and 3-o-clock. The wires are attached to blue squeezable wire connectors, and the LED wires will pull out of them toooo easy, so be careful. I put a Kelly clamp on to hold the wire (so it wouldn’t get lost inside the LED HOLE), removed the grommet from the new lamp, then spliced the new LED, then pushed it into the hole, without removing the old grommets. I did lose one inside the hole and had to lower the panel above the dash (troublesome) to reconnect the wiring.
I have a 2019 Precept 31 ul.
|
|
|
|
|
10-02-2021, 05:36 PM
|
#16
|
|
Senior Member
Join Date: Apr 2017
Location: Jensen Beach
Posts: 213
|
3 of my front 5 are out. All the nightmares I read about make me hesitant to attempt fixing them. What an Olympic Gold Medal PITA!!!
__________________

Gus and Jeanette and the Hunter Dawg in
Jada's Hut (a 2017 Precept 35S) towing a
2016 Jeep Cherokee High Altitude Limited
|
|
|
|
|
10-05-2021, 03:43 PM
|
#17
|
|
Member
Join Date: Dec 2019
Location: Saint Petersburg
Posts: 56
|
replacing LED clearance lights - there is an easy way, and a hard way
Apparently, Jayco's choice for LEDs (and vinyl material - oh, that is another tale) wasn't driven by durability.
We purchased our 2018 Alante in Nov 2018. One light was already a bit dim. Within 6 months, it needed to be replaced. Within 2 years, four needed to be replaced, and the 5th was dimming. Three were replaced under warranty.
I replaced two of them: one was simple, the other was a significant effort. The easy replacement was: drill a small hole and screw in a wood screw to gain a grip to pull out the lamp. With enough lead wire (about 4+ inches), I cut the original leads and used butt crimp solderless connectors and heat shrink tubing to connect the new lamp. The entire operation takes less than an hour given you have the tools and parts handy.
The other light was not so easy. After drilling and pulling the lamp, the lead was too short to pull sufficiently through, so I had to go in from the interior. This involved lowering the Euro bed, removing one large and two small panels, sixteen or so screws, and then gaining 'easy access' to the wire harness. There will be six screws under the header along the roll shade, seven or so screws with caps on the exposed surfaces of the padded interior panels, and 3-5 'hidden screws' under screw caps accessible after you remove the capped screws. Be sure to make note of how those six vertical screws fasten the removed large header to the headliner above the dash and windshield.

The 'long way' took me about 3 hours (versus 45 minutes for the easy method). The reason I had to go from the inside was due to the lamp was at the very end of the harness and there was no extra wiring on that side.

replacing LED clearance lights - there is an easy way, and a hard way. I got to do both!
P.S.: Be sure the LEDs you order are 'D.O.T." approved (for quality, safety, and performance).
|
|
|
|
|
01-10-2022, 05:43 PM
|
#18
|
|
Senior Member
Join Date: Dec 2018
Location: Fort White
Posts: 903
|
Quote:
Originally Posted by jasum
If you are replacing them
..I would drill a small hole in center of lens and put a small screw in and pull out with vise grips
|
Replaced all of my lights in the overhead fiberglass cap his past weekend. I did this trick and it worked great, highly recommend, thanks Jasum. I did pull too hard on one of them after it was out, and ended up pulling the wires out completely.
As a result, I had to let the euroloft down, remove the driver a pillar trim, remove the power visor, remove the speakers and roof panels, to get to the wiring. It sounds horrible, but in actuality wasn't too bad. Took about 2 hours start to finish even with the detour. The hardest part is laying on the bed and working basically with your head hanging over and upside down. While I was in there, I added insulation and resealed the back of the lights, while extending the wiring on a couple of them. I have a marker light on the side that is out as well. I was able to order it from command directly, so ti matched the others.
__________________
Michael & Angela Foret
North Central Florida
2019 Entegra Vision 31V
|
|
|
|
|
01-10-2022, 05:44 PM
|
#19
|
|
Senior Member
Join Date: Dec 2018
Location: Fort White
Posts: 903
|
Quote:
Originally Posted by AlwaysDreaming
My guess is that they didnt get the hole size right during the fiber glass cap design, because what they did was RTVed the **** out of it from the inside during build.
|
It's not just you, mine was the same way. I think they do that to keep water out, not sure. I know I had to remove all the inside trim to get to mine.
__________________
Michael & Angela Foret
North Central Florida
2019 Entegra Vision 31V
|
|
|
|
|
01-10-2022, 07:31 PM
|
#20
|
|
Senior Member
Join Date: Dec 2021
Location: DeMotte, IN
Posts: 278
|
Could you take a razor blade and just cut the grommet of the old one?
__________________
2023 F350 Lariat CCLB, 7.3, 4.3
2021 Jayco 33 RBTS
2019 Forest River Wildwood 26 DBUD: Gone
2012 Jayco 32 BHDS: Long Gone
2007 R-Vision 25: Long Long Gone
1965 Frolic Cabover: My First RV
|
|
|
|
|
|
| Thread Tools |
Search this Thread |
|
|
|
| Display Modes |
 Linear Mode Linear Mode
|
 Posting Rules
|
You may not post new threads
You may not post replies
You may not post attachments
You may not edit your posts
HTML code is Off
|
|
|
|
 » Recent Threads
 |
|
|
|
|
|
|
|
|
|
|
|
|
|
|
|
|
|
|
|
|
|
|
|
|
|
|
|
|
|
|
|
|
|
|
|
|
|
|
|
|
|


