 |
|
 11-23-2020, 10:11 PM
|
#201
|
|
Site Team
Join Date: Apr 2012
Location: Newark, NY
Posts: 15,916
|
It's the expense of the Eterna Bond, and the extra labor time to install it. The self-leveling and non-sag tubes are quicker to apply, and time is money.
Several moons ago I owned a class A MH that was over-engineered, and built extremely well. The company was in business for three years. They couldn't compete with the lesser expensive ones. I had it for eight years, and loved it. Unfortunately, it's about the math.
__________________
Moderator
Think you're too old to cry or swear out loud...walk into your hitch in the dark.
2012 Jay Flight 19RD
2016 Ford F150 XLT 2X4 SC 3.5L Eco Max Tow
2010 Tundra TRD DBL Cab (Traded)
2 new fluffy Corgis, Bayley and Stanley
|

|

|
|
11-24-2020, 04:59 AM
|
#202
|
|
Moderator Emeritus
Join Date: Apr 2011
Location: Michigan
Posts: 9,424
|
Quote:
Originally Posted by JFlightRisk

It's the expense of the Eterna Bond, and the extra labor time to install it. The self-leveling and non-sag tubes are quicker to apply, and time is money........snip
|
X2...., plus most RV manufactures put the responsibility of all seams, joints, caulked areas, etc., on the RV owner (warranty fine print).
Bob 
__________________

2016 GM 2500HD 6.0L/4.10
2018 Jay Flight 24RBS
2002 GM 2500HD 6.0L/4:10 (retired)
2005 Jayco Eagle 278FBS (retired)
1999 Jayco Eagle 246FB (retired)
Reese HP Dual Cam (Strait-Line)
|
|
|
|
|
11-24-2020, 12:45 PM
|
#203
|
|
Senior Member
Join Date: Aug 2020
Location: Litchfield
Posts: 241
|
It's not cost
Quote:
Originally Posted by JFlightRisk
It's the expense of the Eterna Bond, and the extra labor time to install it.
|
Then why do none of the RV roof repair houses use Eternabond? I've watched dozens of youtube videos and I see nobody using or recommending the stuff except for small patches.
|
|
|
|
|
11-24-2020, 03:10 PM
|
#204
|
|
Senior Member
Join Date: Feb 2020
Location: Chillicothe
Posts: 511
|
I dont have a dog in this hunt, but I was kinda wondering myself how long it lasts. What wasnt said in the video was how long ago the tape was put down. It seems to me that the caulk would not last as long but be easier to remove the old stuff. Jay
|
|
|
|
|
11-24-2020, 03:25 PM
|
#205
|
|
Senior Member
Join Date: Aug 2020
Location: Litchfield
Posts: 241
|
Eternabond?
Quote:
Originally Posted by Jay2504
I dont have a dog in this hunt, but I was kinda wondering myself how long it lasts. What wasnt said in the video was how long ago the tape was put down. It seems to me that the caulk would not last as long but be easier to remove the old stuff. Jay
|
I don't have a dog in this hunt either. I have a new camper, a replacement for a camper that had delamination problems after 19 years. I want my replacement to last longer than the previous one. Should I put Eternabond over the seams or maintain the caulk as recommended in the owner's manual? I hear dozens of folks sing the praise of the tape but you can't really tell until ten or more years down the road. "I put the stuff in two years ago and it's great!" doesn't tell me anything. I hear horror stories from professional repair folks regarding the stuff. As far as I can tell, you may have a mess to fix at about the time the warranty expires. I'd like to hear from someone who put it on more than ten years ago.
|
|
|
|
|
11-24-2020, 04:10 PM
|
#206
|
|
Senior Member
Join Date: Aug 2020
Location: Daytona Beach
Posts: 670
|
I've got a dog in the hunt.
2006 31' Flagstaff TT. I bought in 2007, 2008 applied eternabond on seam of front and rear cap as preventive measure. It started to unadhere after six months!! Went to supplier and asked why. Evidently applied wrong(by me). I removed, not easy, cleaned and reapplied per new directions.
From then till sold 2019, had no problems and looked like just applied.
Side note....I'd rather remove eternabond than silicone!!!!!
Just my experience, now do I get a bone??
PaulB12
|
|
|
|
|
11-24-2020, 05:45 PM
|
#207
|
|
Moderator Emeritus
Join Date: Apr 2011
Location: Michigan
Posts: 9,424
|
Quote:
Originally Posted by Jay2504
snip......wondering myself how long it lasts. What wasn’t said in the video was how long ago the tape was put down.....snip
|
Jay,
I applied Eternabond sealer tape to my retired 2005 Eagle front cap/roof joint, back wall/roof corners, and the slide roof seam. After 8 years not one problem when I sold it in fall of 2017.
I have no doubt that I will continue the same long-term results on my 2018 Jay Flight.
I personally don't use Eternabond around roof vents, skylights, stink pipes, etc..
Eternabond has a 18 to 35 year life expectancy, and is used on commercial rubber roofing as well. Removing Eternabond takes a little time to remove, but a heated hair blower works great.
Bob
__________________
2016 GM 2500HD 6.0L/4.10
2018 Jay Flight 24RBS
2002 GM 2500HD 6.0L/4:10 (retired)
2005 Jayco Eagle 278FBS (retired)
1999 Jayco Eagle 246FB (retired)
Reese HP Dual Cam (Strait-Line)
|
|
|
|
|
11-24-2020, 07:28 PM
|
#208
|
|
Senior Member
Join Date: Dec 2012
Location: Southern Indiana
Posts: 3,209
|
My Eternabond is going on it's 8th year and looks like new. The key to this tape is proper surface prep and a high quality metal roller such as referenced above to activate the adhesive. I admit I only watched the first 30 seconds of the video and it's obvious the guy didn't do his homework on application.
__________________
2012 Eagle 320 RLDS
2017 Ford F-250 FX4 Crew STX 6.2l
3.73 E-locker
|
|
|
|
|
11-24-2020, 10:46 PM
|
#209
|
|
Senior Member
Join Date: Feb 2020
Location: Chillicothe
Posts: 511
|
Ive actually thought about putting it on the slide at the edge and maybe at the very front where the roof meets the metal. Jay
|
|
|
|
|
11-25-2020, 09:35 AM
|
#210
|
|
Moderator Emeritus
Join Date: Apr 2011
Location: Michigan
Posts: 9,424
|
Jay2504,
The "existing" Jayco factory tape (normally black in color) covering the screw heads along the slide roof flange plate is of cheap quality, definitely inspect frequently...., or replace with Eternabond. I seen a new unit on a dealer lot with the OEM black tape blowing in the wind.
Bob
__________________
2016 GM 2500HD 6.0L/4.10
2018 Jay Flight 24RBS
2002 GM 2500HD 6.0L/4:10 (retired)
2005 Jayco Eagle 278FBS (retired)
1999 Jayco Eagle 246FB (retired)
Reese HP Dual Cam (Strait-Line)
|
|
|
|
|
11-26-2020, 09:43 PM
|
#211
|
|
Senior Member
Join Date: Feb 2020
Location: Chillicothe
Posts: 511
|
Thank you. When we first got the unit, I read this (and others) entire thread. I have kept a close eye on the slide tape. So far so good. Jay
|
|
|
|
|
01-30-2021, 12:01 PM
|
#212
|
|
Member
Join Date: Jan 2019
Location: Fullerton
Posts: 78
|
Hello and apologies if you addressed this already in your thread. I'm sure this is not unique to our trailer, but I'm concerned about gaps between the shower insert and the walls. I don't see caulk working for these, but eternabond tape seems extreme. Yet these gaps are super concerning to me. Yes we shower in here and have a good fan installed now. But I'm not sure what lies behind the shower insert--is it bare wood? Is it wallpapered like the rest of the bathroom?
Any thoughts on this would be appreciated!! I'm also going to post in the other 24RBS thread in case there are any insights over there.
__________________
2019 Jay Flight 24RBS
2017 F-150 V8
|
|
|
|
|
01-30-2021, 12:05 PM
|
#213
|
|
Senior Member
Join Date: Aug 2020
Location: Litchfield
Posts: 241
|
tub enclosure caulk
Quote:
Originally Posted by jhaan
...I'm concerned about gaps between the shower insert and the walls...
|
I put a bead of silicone sealant along the gap between the tub and tub wall enclosure. I'm not sure this was necessary but it couldn't hurt.
|
|
|
|
|
01-30-2021, 12:07 PM
|
#214
|
|
Member
Join Date: Jan 2019
Location: Fullerton
Posts: 78
|
Thanks Rich--mine seems very flexible--like the caulk would easily rip/separate. Was yours flexible like that? Or pretty rigid?
__________________
2019 Jay Flight 24RBS
2017 F-150 V8
|
|
|
|
|
01-30-2021, 01:13 PM
|
#215
|
|
Senior Member
Join Date: Aug 2020
Location: Litchfield
Posts: 241
|
The enclosure is pretty thin and flexible. Once the silicone dries, it's a decent adhesive however. I wiped the area down with denatured alcohol to clean the surface first and then ran a bead across the seam, smoothing with a finger. It can make a mess don't overdo it.
|
|
|
|
|
01-30-2021, 01:26 PM
|
#216
|
|
Senior Member
Join Date: Mar 2017
Location: North Texas
Posts: 3,589
|
Quote:
Originally Posted by jhaan
Hello and apologies if you addressed this already in your thread. I'm sure this is not unique to our trailer, but I'm concerned about gaps between the shower insert and the walls. I don't see caulk working for these, but eternabond tape seems extreme. Yet these gaps are super concerning to me. Yes we shower in here and have a good fan installed now. But I'm not sure what lies behind the shower insert--is it bare wood? Is it wallpapered like the rest of the bathroom?
Any thoughts on this would be appreciated!! I'm also going to post in the other 24RBS thread in case there are any insights over there.
|
While I can't determine where the first picture is taken from, it is common for the walls not to be sealed where they contact the plastic tub. This is not an issue and instead is by design as the tub pan itself has a lip behind the wall to keep water from going behind the tub wall. Similar to in this picture.
https://external-content.duckduckgo....6pid%3DApi&f=1
~CA
__________________
2010 GreyHawk 31SS
|
|
|
|
|
01-30-2021, 02:59 PM
|
#217
|
|
Moderator Emeritus
Join Date: Apr 2011
Location: Michigan
Posts: 9,424
|
jhaan,
Yes, my 24RBS has similar gap conditions as your 24RBS around the perimeter edging of the shower plastic wall insert, and I haven't had any moisture issues/concerns when using the shower along the top or side edging.
I would "assume" the wood wall panels are full length ceiling-to-floor behind the plastic surround insert..., I do recall a solid backing 'feel' when pushing against the plastic insert.
Slide open the small access panel near the floor and with a flashlight you may be able to confirm if the wall panel is viewed on the outer side wall, or otherwise.
Bob
__________________
2016 GM 2500HD 6.0L/4.10
2018 Jay Flight 24RBS
2002 GM 2500HD 6.0L/4:10 (retired)
2005 Jayco Eagle 278FBS (retired)
1999 Jayco Eagle 246FB (retired)
Reese HP Dual Cam (Strait-Line)
|
|
|
|
|
02-18-2021, 05:06 PM
|
#218
|
|
Junior Member
Join Date: Jun 2020
Location: BATTLE GROUND
Posts: 26
|
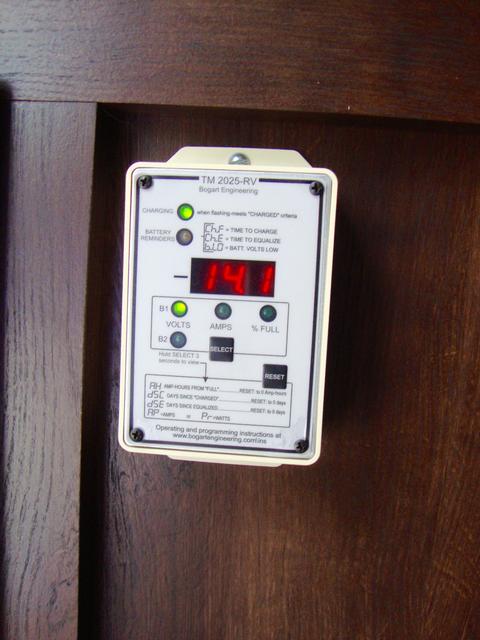
Quote:
Originally Posted by Rustic Eagle
|
Hey Bob,
Where did you place the shunt for your Tm-2025? Is everything mounted behind the converter/charger assy? Seems like the only accessible waterproof area.
-David
__________________
~David
2002 Ford F-350 Modded 7.3 Powerstroke Crew Cab 4x4
2020 Jay Flight 24RBS - Current
2004 Jayco Eagle 298BHS - Gone
2000 Jayco Kiwi 23b - Gone

|
|
|
|
|
02-18-2021, 05:28 PM
|
#219
|
|
Moderator Emeritus
Join Date: Apr 2011
Location: Michigan
Posts: 9,424
|
David,
I mounted the shunt behind my A-frame battery bank in a sealed plastic electrical box. I believe it's recommended to locate the shunt as close to the battery(s) as possible for connecting to the negative battery cable.
The battery monitor came with 50ft of 22-gauge 4-wire twist pair cable length to run back (through plastic conduit) to the actual monitor. One could consider routing the wire through the interior or underbelly of the TT, but in my case I transferred my monitor set-up from my prior TT.
I've seen some shunts mounted in the pass-through area as well.
Note: The red and grey wire seen to the left in the following photo aren't part of the battery monitor wiring......


Conduit routed through floor into floor kitchen cabinet where monitor is mounted.....

Bob
__________________
2016 GM 2500HD 6.0L/4.10
2018 Jay Flight 24RBS
2002 GM 2500HD 6.0L/4:10 (retired)
2005 Jayco Eagle 278FBS (retired)
1999 Jayco Eagle 246FB (retired)
Reese HP Dual Cam (Strait-Line)
|
|
|
|
|
03-01-2021, 10:45 PM
|
#220
|
|
Moderator Emeritus
Join Date: Apr 2011
Location: Michigan
Posts: 9,424
|
Quote:
Originally Posted by Jay2504
Rustic Eagle, did you come up with any solution to the furnace problem? We have a new 2020 24RBS with the same set up. I am thinking or adding a vent on the bottom of the couch so that the return air has a straight shot at the opening of the wooden box.......snip
|
Yes, last winter (2019/2020) I put to rest my concerns about the elevated operating temperature of the furnace, top panel temperature of the wood box enclosure, and the compromised cold air return flow with the following modifications:
OEM wood box enclosure in place covering the furnace with single front black screen vent......

The top blower fan louvers are located on the top/rear/corner of the furnace, and louvers also hidden down the back-side of the furnace facing the bedroom wall.....

I installed a new vent on top of the wood box directly above the blower fan louvers, and a 2nd new vent on the side of the wood box (2 following photos). The location of the two new vents are located within inches of the Dometic/Atwood specified/required minimum 65 sq. inches of cold air return passage (opening) located between the sofa back & wall. Prior to the addition of these to two new vents the cold air flow had to pass over the top of the wood box (rear to front of), down the front of the box through the OEM black screen vent, back over the top of the hot furnace (front to rear of), then enter the blower fan louvers in the rear corner of the furnace.


When the jackknife sofa was positioned for use as a bed, the Dometic/Atwood specified/required "minimum" 65 sq. inches of cold air return passage (opening) was totally blocked off. Dometic/Atwood states "Failure to meet "minimum" return air requirements nullifies furnace warranty"......, and for obvious reasons. I installed a cold air return vent on my bedroom wall directly across from the back-side blower fan louvers.


Modification(s) summary:
* Exceeds Dometic/Atwood's minimum (65 sq. inches) of cold air return..., tech support stated that "more is better".
* Lowered furnace operating temperature, good for electrical components.
* Lowered temperature of top panel of wood box enclosure (2" under sofa fabric).
* Reduction in blower motor RPM, noise reduction (not starving-racing for air).
* Smoother/quieter ignition.
* Reduction in overall furnace operating noise.
It should be noted that my furnace was not under Jayco warranty when modifications were incorporated. However, I did have a number of communications (phone/e-mail/ photos) with Dometic/Atwood technical support on the subject of my initial concerns and modifications.
Bob
__________________
2016 GM 2500HD 6.0L/4.10
2018 Jay Flight 24RBS
2002 GM 2500HD 6.0L/4:10 (retired)
2005 Jayco Eagle 278FBS (retired)
1999 Jayco Eagle 246FB (retired)
Reese HP Dual Cam (Strait-Line)
|
|
|
|
|
|
 Posting Rules
|
You may not post new threads
You may not post replies
You may not post attachments
You may not edit your posts
HTML code is Off
|
|
|
|
 » Recent Threads
 |
|
|
|
|
|
|
|
|
|
|
|
|
|
|
|
|
|
|
|
|
|
|
|
|
|
|
|
|
|
|
|
|
|
|
|
|
|
|
|
|
|


 Linear Mode

