 |
|
 06-09-2015, 01:28 PM
|
#1
|
|
Senior Member
Join Date: Apr 2014
Location: Calgary
Posts: 885
|
Jayco 28BHS Mods
We got our 281BHS last season and enjoyed camping in it for the duration of our short camping season. Over that time I have added a few mods and with the latest addition of solar to the trailer I think I finally have enough mods to show off a little. I am sure some of these ideas have come from this forum, so thank you all!
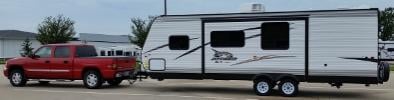
First of all the trailer and TV.

The first mod was one of the easiest. Get rid of the useless bathroom faucet. This one was easy. Picked up a new "high rise" faucet from Home Depot, unscrewed the old one and installed the new one. No plumbing necessary. Easy bolt on mod!

The underside.

Now I can actually get my hands under the tap! 
The next mod was an accumulator tank. I didn't want something tiny though. I wanted something that can deliver water all night if we need it. I found a 4 gallon residential one that looked like it would fit and was pretty cheap too! This one involved a bit of plumbing. I already had the tools for the job from a home reno so the outlay wasn't bad. Just a few clamps, a valve and some pex tubing.
I installed the two support beams and then strapped the tank to the beams. Pretty easy mount and has held well for 1 season. And yes is it always full unless winterized.


I think that was it for the mods from last season. This year I had a few more substantial mods in mind. The first being the fantastic fan and Maxxair vent cover. I didn't get any install photos of this one as my hands were covered in Dicor! Yes covered.
This install was pretty easy too. Scrape, pull, peel the caulking off the old vent fan enough to get at all the screws around the edge. Remove screws and then get someone to push the fan out from inside while you pull from the outside. The putty and sealant holding the fan on are pretty substantial and it took a fair bit of pushing/pulling to get it lose. Once that is out of the way I laid in the new fan right on top of the old putty surrounding the opening. It looked like it was in good shape still. Screw down the new fan and add Dicor sealant.
Then pull it all up again and get your hands covered in fresh sealant when you realize the fan is rotated 90° the wrong way. 


Next up is the bed support struts. The queen bed storage was a two person job to get into before this mod. One person had to hold up the mattress and plywood while the other grabbed whatever was needed. I ordered two gas shocks from Amazon and installed them under the mattress and it worked great. The shocks were 500N shocks and I would try for some weaker ones but these are working. One handed bed lift and lower now. Great mod!


Sorry the pictures are so small but I can't get the hosted images to display...
 https://goo.gl/photos/X4dwzSbpQYTFzruR6
Any help?
__________________
2014 Jayco Swift 281BHS, 300W Solar!
2015 F250 XLT 4x4 Crew Cab, Short box, 6.2 gas
|

|

|
|
06-09-2015, 01:56 PM
|
#2
|
|
Senior Member
Join Date: Apr 2014
Location: Calgary
Posts: 885
|
Solar Install
The solar install is the most involved, costly, time consuming, and exciting mod done to date. The difficulty is not that bad but the idea of drilling holes in our new trailer including the roof is not terribly desirable. Lots of research went into choosing all the components and I gained a lot of information from Handybob.
https://handybobsolar.wordpress.com/
Lots of good solar and battery information between all the ranting.
I decided on;
Two 6v Rolls S-290 Golf Cart batteries
Trimetric 2030RV battery monitor
Trimetric SC2030 charge controller
Two 150W "12v" panels for 300W total
10AWG wire from panels to combiner box (very short runs)
6AWG wire from box down to the charge controller (~10')
4 gauge jumper cables out to battery (big cables, not sure why they are listed as 4 gauge)
I wanted short wire runs and easy wire runs so I decided the combiner box was going up front and I would drill straight down through the roof into my bedside closet. Then continue straight down into the pass through storage area. This worked out great. Better than I expected. I used a 1" spade bit and drilled through the roof and then ran my 1" conduit down and marked where it hit the bottom of the closet, drilled, lowered the conduit further, marked the top of the bedside table, drilled, and I was in the front pass through. The conduit is visible right up against the wall for ~1.5' between the closet and top of the bedside table but is otherwise hidden from view.


The conduit run allows very easy wiring upgrades in the future if I need to. As is the 6AWG wire should allow me to add a couple more panels without having significant voltage losses. I am at 0.76% drop right now (calculated) with two panels. So 1.5% drop with 4 panels if I need to add.
Screwed the box down and sealed it up and then started installing the brains.
I mounted everything I needed on a board before hand which helped a lot and saved some install time inside the pass through area.


Near the top of the board is the breaker to connect to the + solar wire and a stud to connect to the (-) solar wire. These both feed into the charge controller and then out into another breaker (30amp) and to the shunt. The phone cable goes to the battery monitor and the small wires also go to the battery monitor. It is all very simple wiring without including a big inverter. But I have left room on the board for an inverter later on if needed.
This board is then secured to the front of the trailer and wire lengths were determined and secured. I had a little extra wire!


Panel install next.....
__________________
2014 Jayco Swift 281BHS, 300W Solar!
2015 F250 XLT 4x4 Crew Cab, Short box, 6.2 gas
|
|
|
|
|
06-09-2015, 02:04 PM
|
#3
|
|
Senior Member
Join Date: Apr 2014
Location: Calgary
Posts: 885
|
Panel Install
Most of the time involved in installing the panels was spent cobbling up some brackets to use. I though $40 bucks for mounting brackets was a little steep and decided to make my own. I also want to be able to tilt them if needed so I ended up using big hinges (gate hinges) on one side of the panels and L brackets paired up to make Z brackets on the other. One side of the hinge was bent in my vice to make Z brackets.
All brackets were mounted to the panels and then the panels were located on the roof and holes were drilled  all over our waterproof roof! The front brackets were located on the roof trusses but the back ones were not. I used #14 x 1.25 inch wood screws. Each hinge bracket got 4 screws and the other brackets got two each. Dicor was applied liberally under each bracket and then over all the screws and brackets. Wire was run to the combiner box and connected.


Roof work was done! Back to crawling into the pass through ")
__________________
2014 Jayco Swift 281BHS, 300W Solar!
2015 F250 XLT 4x4 Crew Cab, Short box, 6.2 gas
|
|
|
|
|
06-09-2015, 02:26 PM
|
#4
|
|
Site Team
Join Date: Nov 2010
Location: Virginia`s Eastern Shore
Posts: 17,093
|
Nice work! The under bed struts used to be standard on the 28BHS.
__________________
2017 Coachmen Catalina 283RKS
2018 Ford F250 Super Duty 6.2l CCSB
2010 Jayflight 28BHS (sold)
|
|
|
|
|
06-09-2015, 02:26 PM
|
#5
|
|
Senior Member
Join Date: Apr 2014
Location: Calgary
Posts: 885
|
After the panel install I still needed to install the Trimetric 2030-RV battery monitor. Ideally this would be located in the living quarters or by all the other switches and tank monitors but at this stage I was getting lazy and wanted it done. So I just ran the wires back up to my closet and mounted the monitor there. This will work fine and will keep little fingers from getting at it as well.


By this stage I was running out of time and still had to mount the batteries and run cables so the pictures run out. Sorry. Next time I get the trailer I will get some battery pictures.
I hummed and hawed a bit on how best to run the battery cables and temperature sensor and in the end I just drilled some holes straight down from the pass through area right in front on the installed board. You can see the cables in this picture.

Only the negative cable to the battery is connected to the downstream side of the shunt. All other negative leads including the trailer grounding cable are run to the upstream side of the shunt so that it can measure all loads to the battery.
The sun was too low on the horizon at this point to really test everything but the monitor was working to measure amps as I turned on lights and the water pump. It showed a constant -0.1 amp parasitic load then jumped up to 5.5 amps with a bunch of lights on (mostly led and one incandescent) and then got close to 10 amps with the water pump running. I also tested the charging while it was connected to my running truck. It showed ~ 4amps going back into the battery.
Hopefully everything is wired correctly because it is sitting at the storage lot with the sun blazing away and "hopefully" maintaining the batteries right now.
I am heading out tonight to make sure it is not a smoking pile of ash on the ground  and that all is well. Should be able to tell if the battery is getting charged too.
That is it for now. Hope you enjoy the pictures and if I figure out how to make them larger I will.
Cheers
__________________
2014 Jayco Swift 281BHS, 300W Solar!
2015 F250 XLT 4x4 Crew Cab, Short box, 6.2 gas
|
|
|
|
|
06-15-2015, 12:49 PM
|
#6
|
|
Senior Member
Join Date: Apr 2014
Location: Calgary
Posts: 885
|
I did go out the day after to check on the trailer. Good news is that the trailer was still in one piece. The bad news was that the charge controller wasn't doing anything.
It has two LED's on it and neither were lit up or blinking which they should. I measured the input voltage and was getting 21 volts from the panels.
Close to the open circuit voltage so that looked good.
The output side of the charge controller had zero volts. So something was definitely wrong.
I was thinking that I used the wrong phone cable to attach the SC2030 to the 2030RV and that they weren't communicating.
I called the manufacturer and asked them if they had any thoughts and they said send it in. Sounds like a bad unit.
Shortly after this I was thinking that there was no way I should have gotten zero volts at the output side as it is wired directly to the battery. Another trip back to the storage lot and the voltmeter confirmed that the breaker after the charge controller was defective.
I removed that and all is now working as it should. It showed 10amps charging on a fairly full battery at around 5 in the evening.
Went back again this past weekend and checked and it was just starting to power up as it went into bulk charge and a few minutes later was into float already. We are pretty happy with the setup so far and looking forward to see how it does this weekend out near Lake Louise.
__________________
2014 Jayco Swift 281BHS, 300W Solar!
2015 F250 XLT 4x4 Crew Cab, Short box, 6.2 gas
|
|
|
|
|
06-15-2015, 12:58 PM
|
#7
|
|
Senior Member
Join Date: Oct 2014
Location: St. Clairsville
Posts: 225
|
Great mods and information! Also looks like you have room to expand the solar setup. I look forward to hearing how it works for you. What is the overall length of the Jayco 281?
|
|
|
|
|
06-15-2015, 01:09 PM
|
#8
|
|
Senior Member
Join Date: Apr 2014
Location: Calgary
Posts: 885
|
Thanks.
The trailer is 30'11" long and it has a lot of roof space available for panels. I think I could easily fit 6 of the 150W panels up there if so inclined. I haven't measured out the high voltage panels though but they looked a lot bigger in the store.
As is I might add another in front of the AC if we need it.
Cheers
__________________
2014 Jayco Swift 281BHS, 300W Solar!
2015 F250 XLT 4x4 Crew Cab, Short box, 6.2 gas
|
|
|
|
|
06-26-2015, 03:10 PM
|
#9
|
|
Senior Member
Join Date: Apr 2014
Location: Calgary
Posts: 885
|
Even though we had shore power at last weekends sight we did not plug in until the second day. We used lights, water pump, bath fan, and ran the furnace all night.
Shortly after breakfast we were down to 88% capacity on our Rolls 6v batteries. At this point I plugged in to defrost some muffins and have a coffee!
I think the Trimetric battery monitor is by far the best addition to date and I would highly recommend a battery monitor to anyone that spends the odd night unplugged.
With our old group 27 130AH battery it would be down to 50% or lower by the morning easily. I think the biggest problem was that it never got a proper charge and never started the night fully charged. I've learned a lot about batteries in my solar research.
I also wanted to add on all the other mods that I forgot about.....
-Paper towel holder
-Sliding latch on the screen door so our little ones can't push it open. -They have both fallen out of the trailer last summer.
-Handle on the screen door so we can pull it closed without opening the little window!
-Separated the under bed storage from the front pass through.
The next mod I want to do is cut an opening in the top bunk near the back and add a ladder or stairs so the girls can crawl up there themselves. I think this would be an awesome addition. Has anyone tried something similar? Any pictures?
My biggest concern is weakening the top bunk structure but I am not really sure how it is built until I take it apart.
My other maintenance item that I did while we were out camping was to go over all the caulking. I could not believe how many little holes and cracks were already showing up around the storage compartments and other trim items of a 1 year old trailer!
Cheers
__________________
2014 Jayco Swift 281BHS, 300W Solar!
2015 F250 XLT 4x4 Crew Cab, Short box, 6.2 gas
|
|
|
|
|
06-26-2015, 07:47 PM
|
#10
|
|
Senior Member
Join Date: Nov 2014
Location: Trussville, Al
Posts: 2,093
|
Great mods, thanks for posting
__________________
Ron, Barbara & rescues Beamer (Lab mix), Buddy (Cavalier spaniel), Ruger (Golden retriever), Stanley (Bassett/Springer mix) and 3 grandsons
2012 Jayco Feather 29L BH
2015 Chevy 2500 HD Duramax and Equalizer WDH
|
|
|
|
|
07-07-2015, 10:07 AM
|
#11
|
|
Senior Member
Join Date: Apr 2014
Location: Calgary
Posts: 885
|
Battery Pictures
Finally got some battery pictures to post.


Still loving the solar setup. We were just camping for 5 days in Waterton, AB and even though we had full hookups at the site we were at I disabled the converter for a solar test. The lowest I saw on the battery monitor was 95% one morning. It was pretty warm though so the furnace didn't run much but we used the radio and bathroom fan most of the day and whatever lights we wanted. No water pump as city water was hooked up. But very happy so far.
I built in some additional capacity in the system in case I needed to go up to 450 or 600 watts but I think 300 will keep us charged up just fine. Might even have to sell the generator soon!
__________________
2014 Jayco Swift 281BHS, 300W Solar!
2015 F250 XLT 4x4 Crew Cab, Short box, 6.2 gas
|
|
|
|
|
07-14-2015, 02:10 AM
|
#12
|
|
Senior Member
Join Date: May 2011
Location: Aldergrove British Columbia
Posts: 815
|
Thanks for all the posts. I really liked reading your solar install as I plan on doing the same. Handy Bob's blog is a great read and the info he provides is really helpful.
__________________
Richard
2011 Jay Feather Select 28U
2007 Silverado Crewcab LT 6.0L
Happily married and father of
two university students.
Cancer survivor
|
|
|
|
|
07-14-2015, 08:45 AM
|
#13
|
|
Senior Member
Join Date: Apr 2014
Location: Calgary
Posts: 885
|
Glad you got something out of it. Let me know if you have any questions about the install.
Cheers
__________________
2014 Jayco Swift 281BHS, 300W Solar!
2015 F250 XLT 4x4 Crew Cab, Short box, 6.2 gas
|
|
|
|
|
09-15-2015, 02:50 PM
|
#14
|
|
Senior Member
Join Date: Apr 2014
Location: Calgary
Posts: 885
|
Bunk Bed Mod
__________________
2014 Jayco Swift 281BHS, 300W Solar!
2015 F250 XLT 4x4 Crew Cab, Short box, 6.2 gas
|
|
|
|
|
09-15-2015, 02:52 PM
|
#15
|
|
Senior Member
Join Date: Apr 2014
Location: Calgary
Posts: 885
|
One more photo!

__________________
2014 Jayco Swift 281BHS, 300W Solar!
2015 F250 XLT 4x4 Crew Cab, Short box, 6.2 gas
|
|
|
|
|
09-15-2015, 03:38 PM
|
#16
|
|
Junior Member
Join Date: May 2015
Location: WDM
Posts: 27
|
Quote:
Originally Posted by Subaru297

|
I like it! May want to cut an angle on the ladder that rests on the wall so it doesn't put a hole through.
__________________
Previous Camper: 2016 Jayco Jay Flight 267BHSW
Previous Truck: 2006 GMC Sierra 1500 4x4 5.3L 3.42 gears
|
|
|
|
|
09-15-2015, 03:49 PM
|
#17
|
|
Senior Member
Join Date: Apr 2014
Location: Calgary
Posts: 885
|
Thanks. I did cut the points off the ladder.

And attached some furniture pads to the flat part.
__________________
2014 Jayco Swift 281BHS, 300W Solar!
2015 F250 XLT 4x4 Crew Cab, Short box, 6.2 gas
|
|
|
|
|
09-15-2015, 06:27 PM
|
#18
|
|
Junior Member
Join Date: May 2015
Location: WDM
Posts: 27
|
Quote:
Originally Posted by Subaru297
Thanks. I did cut the points off the ladder.
Attachment 20172
And attached some furniture pads to the flat part. |
I should have looked closer, nice work!
__________________
Previous Camper: 2016 Jayco Jay Flight 267BHSW
Previous Truck: 2006 GMC Sierra 1500 4x4 5.3L 3.42 gears
|
|
|
|
|
09-27-2015, 06:45 AM
|
#19
|
|
Senior Member
Join Date: May 2013
Posts: 1,588
|
Just looking at your pictures of the battery set up... I did the same mod to my '13 BHS and it looks like the tongue frame of yours is different than mine for some reason. You clearly have lots of room between the diamond plate and the batteries, and then more room between the batteries and propane tanks.
On mine, the two battery box lids are touching the diamond plate. It's like the trailer body comes another 6 inches up the A frame and touches the batteries. I thought our trailers were the same floor plan on the same frame? Was it a change between '13 and '14?
Nice mods, by the way!
__________________
2013 F-150 EcoBoost MaxTow, Roush tuned (415hp 506tq), lifted on 33s, R.A.S.
2013 Jay Flight 28BHS Elite (Equalizer 10K hitch)
|
|
|
|
|
02-23-2016, 01:33 PM
|
#20
|
|
Senior Member
Join Date: Apr 2014
Location: Calgary
Posts: 885
|
Sorry for the late reply. Put the trailer away and haven't been on here in a while.
I looked up the specs of your trailer and I agree the floor plan looks the same but there are a few differences in the specs.
Our 281BHS and your 28BHS
7000 GVWR vs 7500
30'11" vs 30'6"
Water tank capacities
Couch looks different??
Thanks for the compliment on the mods. A few more are in the works....
Another fantastic fan and another BIG hole in the roof. Probably around the bunk area.
Wire inverter into the bedside outlets.
Bigger exterior handle next to the entryway.
Looking forward to the camping season!
__________________
2014 Jayco Swift 281BHS, 300W Solar!
2015 F250 XLT 4x4 Crew Cab, Short box, 6.2 gas
|
|
|
|
|
|
 Posting Rules
|
You may not post new threads
You may not post replies
You may not post attachments
You may not edit your posts
HTML code is Off
|
|
|
|
 » Recent Threads
 |
|
|
|
|
|
|
|
|
|
|
|
|
|
|
|
|
|
|
|
|
|
|
|
|
|
|
|
|
|
|
|
|
|
|
|
|
|
|
|
|
|


 Linear Mode

