 |
 04-02-2017, 07:32 PM
|
#2
|
|
Junior Member
Join Date: Mar 2017
Location: Haldimand
Posts: 5
|
Quote:
Originally Posted by Youngstown

|
Was it difficult to install the vent fans?
|

|

|
|
04-03-2017, 03:21 AM
|
#3
|
|
Member
Join Date: Jan 2017
Location: Poland
Posts: 47
|
Fan install was easy. Hardest part was running the wires because I did the have powered vent fans before. The other tricky part is getting the holes for the mount screws and the roof vent gear crank to all allign. Other than that it only took maybe 30 minutes per fan. They made a huge difference in airflow. On high the one fan pulls enough air to make the other start circulating. I also noticed how much air was leaking via the wall mount ac unit. Some pipe insulation and aluminum tape seemed to do the trick.
|
|
|
|
|
12-14-2017, 06:49 AM
|
#4
|
|
Junior Member
Join Date: Dec 2017
Location: East Stroudsburg
Posts: 6
|
We just picked up a 174bh yesterday! A tv is a must. I like your set up. What mount did you use? Was there a stud behind it to mount it to? I asked the dealer and they said no, but I've seen a few mounted there. Very clean install!!
|
|
|
|
|
12-14-2017, 10:05 AM
|
#5
|
|
Member
Join Date: Jan 2017
Location: Poland
Posts: 47
|
It is the smallest and most basic mount made by Ion. You can pick them up at walmart. No pan or tilt features but you can see the screen from every seat/bed in the house. There is a "stud" there, probably a 1x1. The electrical box above the counter is attached to the side of it. You can find it with a stud finder or just use your fingers to push the wall in until you "feel" the stud. The most important points are to get a single stud mount tv bracket, a small/light tv, and use short but stout screws so you don't go through the wall to the outside. I think I even drilled and added 2 extra mounting screws in the bracket.
|
|
|
|
|
12-14-2017, 10:15 AM
|
#6
|
|
Senior Member
Join Date: Dec 2014
Location: FL
Posts: 11,281
|
Quote:
Originally Posted by ianmacmi
We just picked up a 174bh yesterday! snip...
|
Congratulations and welcome to the forum.
__________________
Sherm & Terry w/rescue Eydie (min Schnauzer) & Charley (std Poodle)
SOLD:2015 Jay Flight 27RLS, GY Endurance (E), Days: 102 '15, 90 '16, 80 '17, 161 '18, 365+ '20
SOLD: 2006 Ford F350 PSD, 4WD, CC, LB, SRW, Camper pkg., 375,000mi
Full timing: Some will think you're crazy, some will be envious, just enjoy the freedom!
|
|
|
|
|
12-24-2017, 04:15 PM
|
#7
|
|
Member
Join Date: Jan 2017
Location: Jenks
Posts: 51
|
My Jay Flight SLX 174bh TV mount
Installed with cheap mount on amazon that has an arm. I think it was $10.
I also wired a 15ft. headphone jack in through the cabinets and the ceiling so it can be plugged into the stereo system and listened to either inside or with the outside speakers! My TV is a 24" Vizio smart TV for $100 at Wally World. Great Deal.
Articulating wall mount at Amazon:
https://www.amazon.com/gp/product/B0...?ie=UTF8&psc=1
https://www.jaycoowners.com/forums/m...cture8169.html
|
|
|
|
|
01-14-2018, 07:27 PM
|
#8
|
|
Junior Member
Join Date: Dec 2017
Location: East Stroudsburg
Posts: 6
|
Installed a medicine cabinet today to increase the storage for necessities. They should have installed one from the factory... next project is a tv/DVD set up. Has anyone installed a cable hook up?  
Sent from my SM-G930V using Tapatalk
|
|
|
|
|
01-14-2018, 07:29 PM
|
#9
|
|
Junior Member
Join Date: Dec 2017
Location: East Stroudsburg
Posts: 6
|
Quote:
Originally Posted by oldmanAZ
Congratulations and welcome to the forum.
|
Thank you! We are excited to start camping.
Sent from my SM-G930V using Tapatalk
|
|
|
|
|
01-27-2018, 05:37 PM
|
#10
|
|
Junior Member
Join Date: Dec 2017
Location: East Stroudsburg
Posts: 6
|
Brushed handle installed on the new med cabinet. New sign. And a shower dispenser installed (Not pictured). A magnetic strip installed in the kitchen.  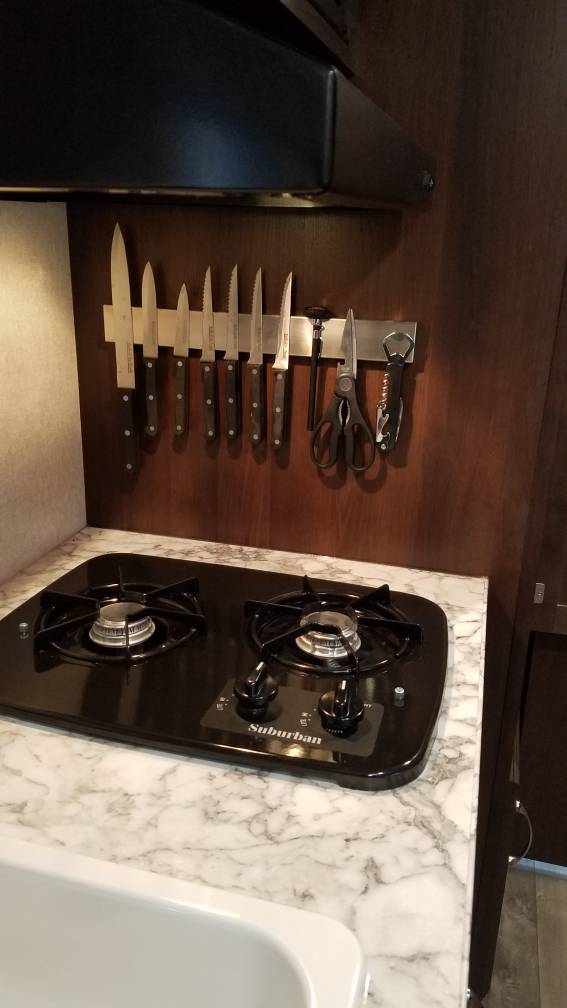
Sent from my SM-G930V using Tapatalk
|
|
|
|
|
02-03-2018, 03:45 PM
|
#11
|
|
Junior Member
Join Date: Dec 2017
Location: East Stroudsburg
Posts: 6
|
TV and DVD.....check 
Sent from my SM-G930V using Tapatalk
|
|
|
|
|
04-03-2018, 07:02 AM
|
#12
|
|
Member
Join Date: Jan 2017
Location: Poland
Posts: 47
|
174BH Upgrades Continue
Check the album for some new updates including power to the top bunk and a step for access to the top bunk. We have a new baby who will be sleeping with mom in the queen bed so it looks like I am resigned to the top bunk so want to make it as comfortable as possible.
https://www.jaycoowners.com/forums/m...lbums1366.html
|
|
|
|
|
06-07-2018, 10:10 PM
|
#13
|
|
Junior Member
Join Date: Sep 2017
Location: Calgary
Posts: 8
|
Which Wire did you pull for the Vortex II fan?
Hi Youngstown,
Where did you pull the wires from to power the vent? I also have a 174BH, great little trailer. I pulled the wire from the LED light next to the vent but it doesn't seem to run the fan. I'm only connected to battery power at the moment, so don't know if I need shore power.
Thanks in advance.
Quote:
Originally Posted by Youngstown
Fan install was easy. Hardest part was running the wires because I did the have powered vent fans before. The other tricky part is getting the holes for the mount screws and the roof vent gear crank to all allign. Other than that it only took maybe 30 minutes per fan. They made a huge difference in airflow. On high the one fan pulls enough air to make the other start circulating. I also noticed how much air was leaking via the wall mount ac unit. Some pipe insulation and aluminum tape seemed to do the trick.
|
|
|
|
|
|
06-24-2019, 07:45 PM
|
#14
|
|
Junior Member
Join Date: May 2019
Location: Dubuque
Posts: 1
|
Burner cover / Cutting board
Made a cover for the stove top that doubles as a cutting board. Used 3/4" maple.
|
|
|
|
|
06-25-2019, 06:43 AM
|
#15
|
|
Member
Join Date: Jan 2017
Location: Poland
Posts: 47
|
Vent Fan Power Wires
For the vent fans I fished for 12 volt power wires in the ceiling. In the bathroom it was easy as I just tapped into the power wire for led bathroom light. This light always has power from the battery so it always works on battery or shore power.
The vent fan in the main living area was a little harder. Still had to fish out wires but I found a large bundle that ran to various components in the trailer. You have to be sure you tap into one of those wires that is always hot. In other words some of the ceiling led lights run from a wall switch. If you tap into one of those the fan would only work with the switch in the "on" position. They have some wire testers that can detect power through wire insulation. I just guessed and got lucky that I his a constant power wire on my first try.
Quote:
Originally Posted by JayFlightLee
Hi Youngstown,
Where did you pull the wires from to power the vent? I also have a 174BH, great little trailer. I pulled the wire from the LED light next to the vent but it doesn't seem to run the fan. I'm only connected to battery power at the moment, so don't know if I need shore power.
Thanks in advance.
|
|
|
|
|
|
06-25-2019, 11:09 AM
|
#16
|
|
Senior Member
Join Date: Apr 2019
Location: North Vancouver
Posts: 130
|
I'm taking on this task in the next while. Which side of the opening did you find the bundle of wires?
Also there are knockouts in the wood frame around the opening, one on the bathroom side and one on the queen bed side. Did you use these for anything?
Quote:
Originally Posted by Youngstown
For the vent fans I fished for 12 volt power wires in the ceiling. In the bathroom it was easy as I just tapped into the power wire for led bathroom light. This light always has power from the battery so it always works on battery or shore power.
The vent fan in the main living area was a little harder. Still had to fish out wires but I found a large bundle that ran to various components in the trailer. You have to be sure you tap into one of those wires that is always hot. In other words some of the ceiling led lights run from a wall switch. If you tap into one of those the fan would only work with the switch in the "on" position. They have some wire testers that can detect power through wire insulation. I just guessed and got lucky that I his a constant power wire on my first try.
|
|
|
|
|
|
06-25-2019, 11:12 AM
|
#17
|
|
Member
Join Date: Jan 2017
Location: Poland
Posts: 47
|
If I remember correctly the wires were towards the front of the camper. I think it is a bundle of wires that go from the fuse panel over the ceiling and towards the front of the camper.
I did not have to cut or modify the opening in anyway.
Quote:
Originally Posted by distracto
I'm taking on this task in the next while. Which side of the opening did you find the bundle of wires?
Also there are knockouts in the wood frame around the opening, one on the bathroom side and one on the queen bed side. Did you use these for anything?
|
|
|
|
|
|
03-31-2020, 12:18 PM
|
#18
|
|
Junior Member
Join Date: Mar 2020
Location: Midvale
Posts: 21
|
Nice mods Youngtown. Mama says we need a medicine cabinet. Did you mount yours will wall anchors or are there studs there to screw into?
And I like what you did with the magnetic knife rack. I have on just collecting dust so I'm sticking ii in out 2020 174BH
|
|
|
|
|
05-24-2021, 11:31 PM
|
#19
|
|
Junior Member
Join Date: Sep 2020
Location: Arvada
Posts: 1
|
just curious if you were able to mount directly to studs?
|
|
|
|
|
 Posting Rules
|
You may not post new threads
You may not post replies
You may not post attachments
You may not edit your posts
HTML code is Off
|
|
|
|
 » Recent Threads
 |
|
|
|
|
|
|
|
|
|
|
|
|
|
|
|
|
|
|
|
|
|
|
|
|
|
|
|
|
|
|
|
|
|
|
|
|
|
|
|
|
|


 Linear Mode

