Journey with Confidence RV GPS App RV Trip Planner RV LIFE Campground Reviews RV Maintenance Take a Speed Test Free 7 Day Trial ×
Jayco RV Owners Forum


Reply
 
Thread Tools Search this Thread Display Modes
 
Old 07-29-2020, 12:13 AM   #1
Junior Member
 
Join Date: Jun 2020
Location: BATTLE GROUND
Posts: 26
The Next Jay Flight 24rbs Mod Thread

We purchased a 2020 Jay Flight 24rbs back in April. I read through all the mod pages posted here and found some great suggestions.
Here is a list of the mods I've completed. Additionally I will list everything I've had to repair, upgrade or items we've added.
This is our 3rd Jayco trailer. Here is the last 3 months of mods. More to follow I'm sure!

Repaired / Adjusted

Leaky low point drain valve on main water tank(s).

Dining table light pendants were angled towards each other from the mounting screws being too tight so I straightened them out.

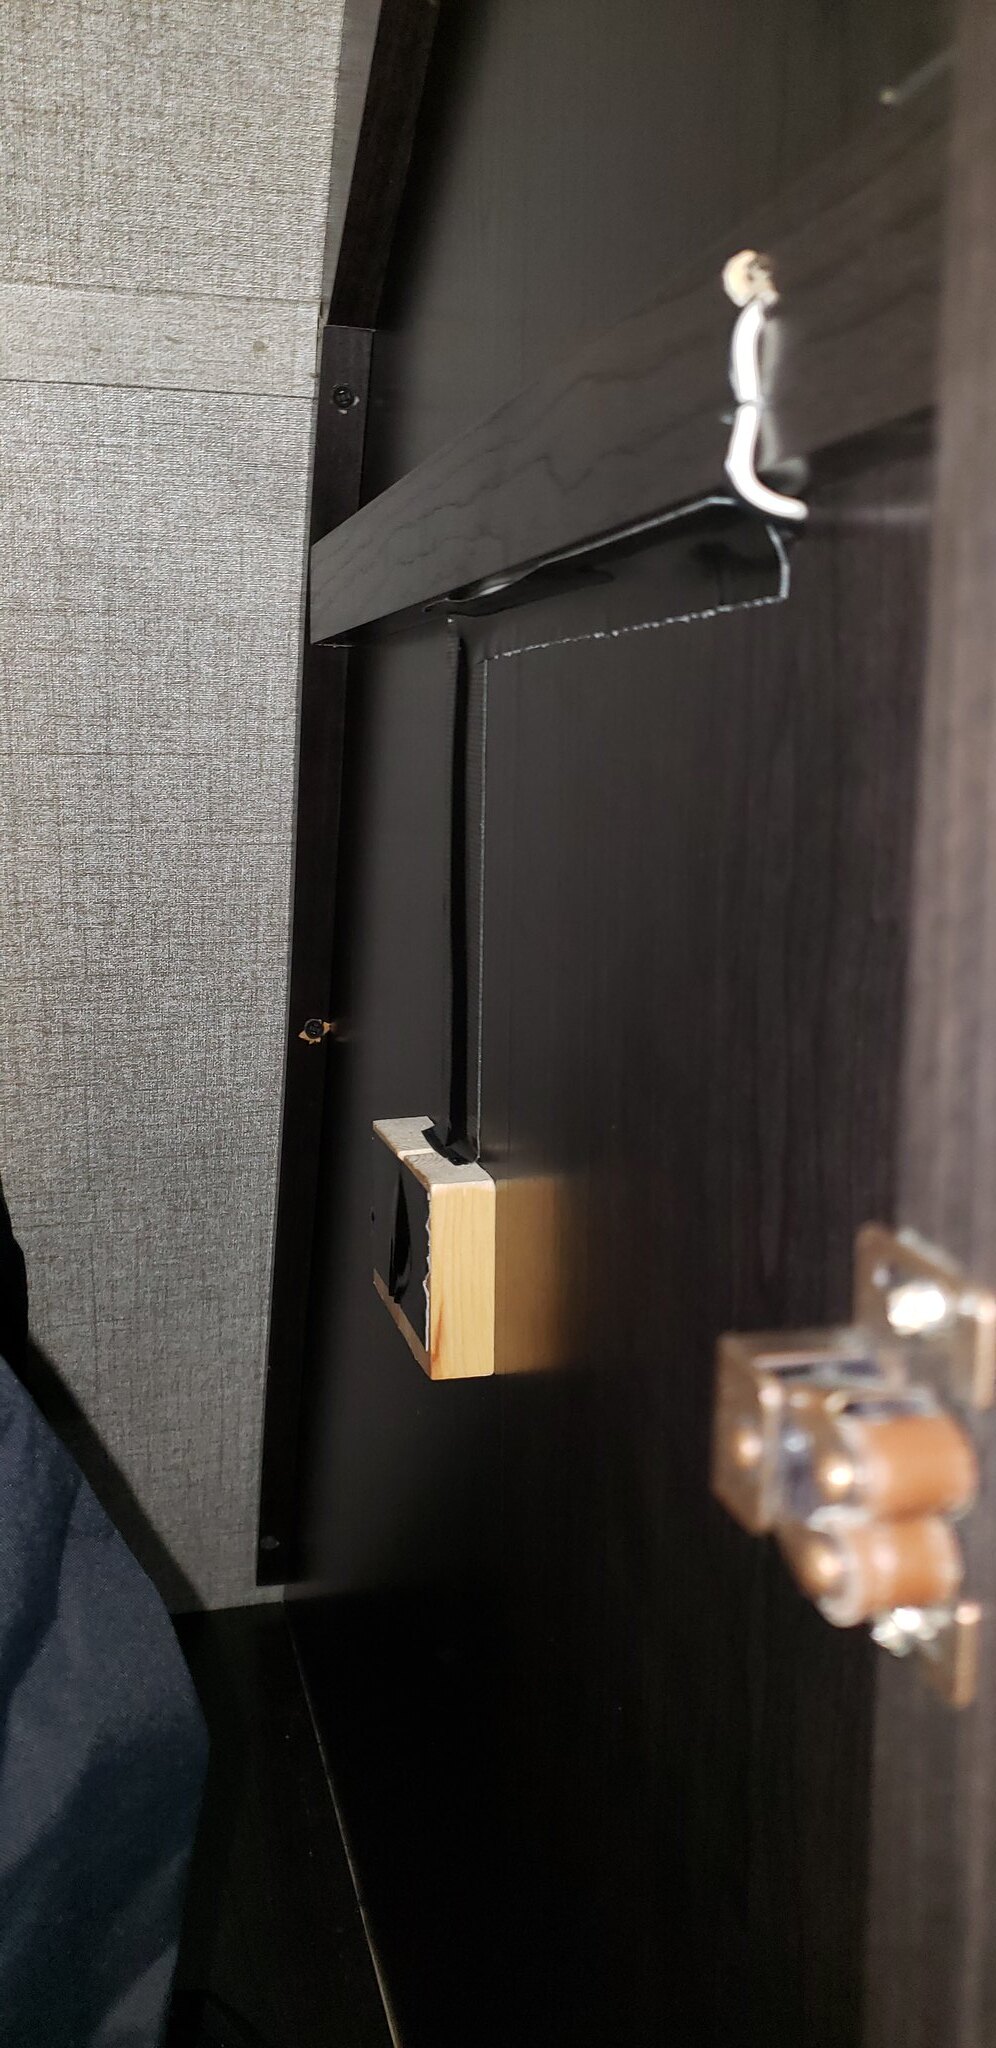
Rear storage compartment shelf was not attached on the right side. This is the shelf above the pull-out stove/sink outdoor kitchen. Reattached.

Propane tank mounting plate was put on crooked. It was 3/4 of an inch offset to one side and pushed back 1/2 inch on that same side. Had to completely re-drill it and repaint it.

Had a really bad ground loop hum through the stereo speakers. Found the fridge 12v wire terminated on the fuse panel incorrectly. Over half of the copper was not in the termination hole. I fixed that and put everything back together. The hum disappeared.

Queen bed platform screws on the left and middle support had already pulled through the plywood mattress base at the head of the platform before we used the trailer. Reattached those - more on this later.

The Furrion stereo was loose on the left side. Found the factory used a small vertical piece of pine that split in two when they screwed down the stereo. Replaced and pilot drilled so it is now tight.

Had to adjust the main entry door latch as it was extremely difficult to close. It required the door be slammed to latch. There is a metal strike plate that i recessed slightly with a hammer. Works much better.

Found a missing screw on the outside wheel well plastic trim ring. Replaced.

Flipped the propane regulator so it can be read.

Modifications

Reinforced Bed framing by adding the cross members that others have. Still need to work on the insulation in that area but everything is functional and supported now.

Installed a Maxxair Deluxe fan w/remote. Love this mod but hate the beeper. Everytime you click a key on the remote the thing beeps. I will probably disable it over winter. Hung the remote so it is easily controlled in the seated position!

]

Installed a pwm dimmer on the dining table pendant light. Like others I feel the LEDs are just too harsh. Drilled a small hole in the side for the dimmer. Ebay dimmer link:https://www.ebay.com/itm/2-PCs-Low-V...72.m2749.l2649


The 30amp plug bay mouse hole was already shattered behind the mouse hole when we took delivery so I changed it up to a Smart Plug. Amazon link: https://www.amazon.com/Smart-Plug-B3...5720155&sr=8-2 This required me to fabricate my own mounting plate for the outside as smart plug doesn't make a universal plate. I like their system so I adapted. Here is the plate made from a cutting board. Small circle was the original mouse hole outer diameter. I painted it black after cutting it out.


Added a Progressive Industries HW30C 30amp hardwired surge protector while I was changing out the cord arrangement. Amazon link: https://www.amazon.com/PROGRESSIVE-I..._t1_B0050EH004 I placed the remote down low beneath the TV entertainment center. Caution! It wasn't easy getting the remote to the far left as there is a vertical divider in the lower space separating the two inaccessible compartments near the floor. I was concerned about fit for the surge protector but noticed Rustic Eagle mounted his where I planned on mounting mine so I dove head 1st (Thanks Bob)!

I split the circuit for the stair amber light and the awning light. For the stairs I use the factory awning light switch and put a dimmer on the awning that has an internal switch. Dimmer here: https://www.amazon.com/Volt-Dimmer-L...omotive&sr=1-3

Replaced the main door privacy glass as others have. Love this mod! Showing a pic of the stupid plastic holders that are being used on the newer units. They are a pain. No screws holding the bezel on like the older units. Here is what the old clip(s) looks like that you will need to defeat to remove the bezel.


Replaced the outlet in the dinette with one that has usb charge ports. Will also be doing this in the bedroom drivers side.

Removed the beeper internal to the microwave.

Added higher strength towing chains. I needed i bit more length than the factory installed chains allowed. I plan on leaving the factory installed chains on as I will use them to lock motorcycles, kayaks and bicycles to the trailer. The replacements are bolted on. The OEM's are welded on.

Replaced the faucet in the bathroom with a Glacier Bay unit from Home Depot. $31 and change. Will also do this mod on the outside sink before camping season ends. I can actually wash my hands now! Copied Jay on this one.


Fabricated a outside kitchen paper towel holder. Purchased the plastic holder from Kroeger. I used thin gauge flat steel and cut a rectangle out with tin shears. Painted it white and mounted it to the cargo bay door with 3 command strips.


I purchased sticky back neodymium magnets online and fab'd another piece of steel to cover the back of the paper towel holder to stick the magnets to as the holder was not solid. Attached with teeny tiny screws.


Viola! Removable holder. Sticks to the side of the stove for transport/closing.


Additions

Installed 6 volt batteries as we do a lot of boondocking.

Added 3m Command strip Key rack below the control bay door.


I added a 2nd TV so we have a 32" TV in the bedroom and it can easily move to the outside TV mount under the awning. I used an HDMI wireless extender so the satellite signal on the main TV is transmitted to the 2nd TV wherever it is located. The transmitter stays in the entertainment center and the receiver is velcro'd to the back of the 2nd TV. Product on Amazon:https://www.amazon.com/Actiontec-Wir...5952337&sr=8-8

The list continues to grow! We have a couple of trips completed so far. Time to camp!
__________________
~David
2002 Ford F-350 Modded 7.3 Powerstroke Crew Cab 4x4
2020 Jay Flight 24RBS - Current
2004 Jayco Eagle 298BHS - Gone
2000 Jayco Kiwi 23b - Gone
Bike_pilot is offline   Reply With Quote
Old 07-29-2020, 09:01 AM   #2
Junior Member
 
Join Date: Jun 2020
Location: BATTLE GROUND
Posts: 26
The Next Jay Flight Mod Thread cont.

Here is the command strip key rack I placed below the control center.


Added 120V outlet in the kitchen.

__________________
~David
2002 Ford F-350 Modded 7.3 Powerstroke Crew Cab 4x4
2020 Jay Flight 24RBS - Current
2004 Jayco Eagle 298BHS - Gone
2000 Jayco Kiwi 23b - Gone
Bike_pilot is offline   Reply With Quote
Old 07-29-2020, 06:39 PM   #3
Junior Member
 
Join Date: Jun 2020
Location: BATTLE GROUND
Posts: 26
The Next Jay Flight Mod Thread cont.

Replaced the outdoor kitchen faucet today with another Home Depot Glacier Bay item# 247 368 bathroom faucet. Same one I used inside the bathroom. $31 and change.


Here's the brand of 6v batteries installed. Battery Exchange assured me these were better quality than Trojan T-105's that were my go to before.

__________________
~David
2002 Ford F-350 Modded 7.3 Powerstroke Crew Cab 4x4
2020 Jay Flight 24RBS - Current
2004 Jayco Eagle 298BHS - Gone
2000 Jayco Kiwi 23b - Gone
Bike_pilot is offline   Reply With Quote
Old 07-29-2020, 07:58 PM   #4
Moderator Emeritus
 
Rustic Eagle's Avatar
 
Join Date: Apr 2011
Location: Michigan
Posts: 9,424
Bike pilot,

Welcome to JOF

Nice mods.......

Question..., did you place the (2) 6V batteries in separate battery boxes, or a single dual battery box?

Bob
__________________

2016 GM 2500HD 6.0L/4.10
2018 Jay Flight 24RBS
2002 GM 2500HD 6.0L/4:10 (retired)
2005 Jayco Eagle 278FBS (retired)
1999 Jayco Eagle 246FB (retired)
Reese HP Dual Cam (Strait-Line)
Rustic Eagle is offline   Reply With Quote
Old 07-29-2020, 11:49 PM   #5
Junior Member
 
Join Date: Jun 2020
Location: BATTLE GROUND
Posts: 26
The Next Jay Flight Mod Thread cont.

Quote:
Originally Posted by Rustic Eagle View Post
Bike pilot,

Welcome to JOF

Nice mods.......

Question..., did you place the (2) 6V batteries in separate battery boxes, or a single dual battery box?

Bob
Here's a pic Bob. Had this dual box left over from the old Eagle. Bought it years ago from Battery Exchange in the Pacific NW. Fit perfect. Still need to develop a lock for it.

__________________
~David
2002 Ford F-350 Modded 7.3 Powerstroke Crew Cab 4x4
2020 Jay Flight 24RBS - Current
2004 Jayco Eagle 298BHS - Gone
2000 Jayco Kiwi 23b - Gone
Bike_pilot is offline   Reply With Quote
Old 07-30-2020, 11:36 AM   #6
Moderator Emeritus
 
Rustic Eagle's Avatar
 
Join Date: Apr 2011
Location: Michigan
Posts: 9,424
David,

Thanks for the follow-up and pic...., I like the dual battery box.

Curious..., if you have to remove "one" 6V battery from the dual battery box can it be done with the box remaining in place, or do you have to remove the entire battery box?

Not much room between the TT front cap and LP tanks on my 2018 24RBS, I went with separate boxes and even they are a challenge to deal with at 60lbs each.

I thought about instalingl battery supports along the top of the A-frame, but the TT front cap killed that idea.

My 24RBS setup:


In my case I remove my batteries between camping trips due to the fact that my TT rests in public storage.

Bob
__________________

2016 GM 2500HD 6.0L/4.10
2018 Jay Flight 24RBS
2002 GM 2500HD 6.0L/4:10 (retired)
2005 Jayco Eagle 278FBS (retired)
1999 Jayco Eagle 246FB (retired)
Reese HP Dual Cam (Strait-Line)
Rustic Eagle is offline   Reply With Quote
Old 07-30-2020, 11:48 AM   #7
Junior Member
 
Join Date: Jun 2020
Location: BATTLE GROUND
Posts: 26
Quote:
Originally Posted by Rustic Eagle View Post
David,

Thanks for the follow-up and pic...., I like the dual battery box.

Curious..., if you have to remove "one" 6V battery from the dual battery box can it be done with the box remaining in place, or do you have to remove the entire battery box?
Bob-
Just enough room to tilt the box toward the propane tanks and remove 1 at a time. No room left with the lid on when the batteries are in place. Almost touches the cap. I'm able to store at home so not removing them until winter.
-David
Bike_pilot is offline   Reply With Quote
Old 07-30-2020, 01:12 PM   #8
Senior Member
 
Join Date: Feb 2020
Location: Chillicothe
Posts: 511
I really like those mods! I especially love the outside kitchen paper towel holder. I have been trying to come up with a way to have paper towels when cooking. Never thought of mounting something on the door. Jay
Jay2504 is offline   Reply With Quote
Old 07-30-2020, 01:17 PM   #9
Senior Member
 
Join Date: Feb 2020
Location: Chillicothe
Posts: 511
I really like those mods! I especially love the outside kitchen paper towel holder. I have been trying to come up with a way to have paper towels when cooking. Never thought of mounting something on the door. Jay
Jay2504 is offline   Reply With Quote
Old 07-30-2020, 01:36 PM   #10
Junior Member
 
Join Date: Jun 2020
Location: BATTLE GROUND
Posts: 26
Quote:
Originally Posted by Jay2504 View Post
Never thought of mounting something on the door.
Thanks Jay! I didn't want to drill holes into the compartment so the metal plate seemed to be the best route.
-David
Bike_pilot is offline   Reply With Quote
Old 07-30-2020, 05:01 PM   #11
Junior Member
 
Join Date: Jun 2020
Location: BATTLE GROUND
Posts: 26
The Next Jay Flight Mod Thread cont.

Looks like the edit feature is set to disappear after so many hours so I will continue to update as we go.

Here is a photo of the smartplug previously mentioned from the outside.

__________________
~David
2002 Ford F-350 Modded 7.3 Powerstroke Crew Cab 4x4
2020 Jay Flight 24RBS - Current
2004 Jayco Eagle 298BHS - Gone
2000 Jayco Kiwi 23b - Gone
Bike_pilot is offline   Reply With Quote
Old 08-08-2020, 05:24 PM   #12
Junior Member
 
Join Date: Jun 2020
Location: BATTLE GROUND
Posts: 26
The Next Jay Flight Mod Thread cont.

It is very difficult to close the door from the inside. The cheap little plastic paddle is so small. I decided to make a soft strap so I can get my entire hand on it now. This is just a piece of 1 inch nylon strap I had laying around. I melted a hole into each end of the strap and then removed the two lock set screws furthest from the latch. Pull out slightly on the plastic handle and slide the strap under until you can see the strap hole line up with the lock set hole. Replace screws and your good. I chose this soft handle solution so the screen door sliding plastic guard will push the strap out of the way so there isn't any interference at all.

__________________
~David
2002 Ford F-350 Modded 7.3 Powerstroke Crew Cab 4x4
2020 Jay Flight 24RBS - Current
2004 Jayco Eagle 298BHS - Gone
2000 Jayco Kiwi 23b - Gone
Bike_pilot is offline   Reply With Quote
Old 10-20-2020, 01:32 PM   #13
Junior Member
 
Join Date: Jun 2020
Location: BATTLE GROUND
Posts: 26
Heading toward Winter - Installed FLOE

I used to use my home air compressor to blow out my TT water lines instead of using rv antifreeze to winterize when necessary. It was a 2 person endeavor so with the new 24RBS I splurged for FLOE.


I installed the main compressor unit under the sink to the right when you open the cabinet door. I can easily reach the on/off switch in that location.

The fuse box had position #7 open so I opted for the 12v version and wired it to that fuse slot. It requires a 15amp fuse.


The air line adapter was placed behind the water pump. Good straight portion of line at that point to cut and insert the adapter. Everything is provided in floe's box and I didn't need to purchase anything else.


Unit works well! It is noisy and a bit overpriced for the compressor used but it does do what it claims. Drain your fresh water tank and low point drains/water heater. Turn floe on and wait for the lines to charge with 15psi. Open a faucet, spigot or flush the toilet one at a time while letting floe recharge before each (about30 seconds).
__________________
~David
2002 Ford F-350 Modded 7.3 Powerstroke Crew Cab 4x4
2020 Jay Flight 24RBS - Current
2004 Jayco Eagle 298BHS - Gone
2000 Jayco Kiwi 23b - Gone
Bike_pilot is offline   Reply With Quote
Old 10-20-2020, 07:05 PM   #14
Moderator Emeritus
 
Rustic Eagle's Avatar
 
Join Date: Apr 2011
Location: Michigan
Posts: 9,424
Quote:
Originally Posted by Bike_pilot View Post
snip...... Drain your fresh water tank and low point drains/water heater. Turn floe on and wait for the lines to charge with 15psi. Open a faucet, spigot or flush the toilet one at a time while letting floe recharge before each (about30 seconds).
Nice MOD, and appears to simplify the winterization process

Bob
__________________

2016 GM 2500HD 6.0L/4.10
2018 Jay Flight 24RBS
2002 GM 2500HD 6.0L/4:10 (retired)
2005 Jayco Eagle 278FBS (retired)
1999 Jayco Eagle 246FB (retired)
Reese HP Dual Cam (Strait-Line)
Rustic Eagle is offline   Reply With Quote
Old 10-20-2020, 10:48 PM   #15
Junior Member
 
Join Date: Jun 2020
Location: BATTLE GROUND
Posts: 26
BRIGHT Light now not so bright!

Common complaint: Led dome light pucks are too bright. I see that a lot in the forums and I have to agree. One more issue in the 24RBS is the bedroom lights (4 of those pesky pucks) that are placed out of or just out of reach while in bed. I sought out a way to add some convenience
Found these lights on Amazon: RV Reading Wall Lamp with USB Socket- DC 12V Soft Warm White, Dimmer Touch Switch with Blue Night Decor Light

Definitely soft warm light. The flat lit area can be pointed down and moved any direction to point light for reading or at the ceiling. I keep them dimmed down at a nice level for getting in bed. Tap the button once & the blue night light comes on. Tap again for the warm led to come on and hold for dimming function (dimming is held in memory). Tap again for all off. The USB charger isn't a robust charger but it does work.
Now for connectivity.
I needed to get to 12v. In this picture is the driver side wardrobe cabinet next to the bed with a view of the puck light under the shelf that runs horizontal from ward to ward across the bed:


I drilled through the inside of the ward into the small gap where wires are run to the puck lights to access the 12v lines.
Using a coat hanger I fished the new wires through the hole I created and pulled them through the puck light hole(s). Connect the wires and replaced the puck light.
Made a back plate since the cabinet side is thin veneer luan. Measured and mounted the new lights. Wired them up and used black duct tape to conceal wires. No need to get fancy inside the cabinet and it works. Not near as noticeable as with a camera flash!


Here is the new light in Blue night light mode:


Here it is with the light active and dimmed to 50%:


Works very well. Fits with the design and finish of the TT and I can reach it while laying in bed with my head on the pillow!
__________________
~David
2002 Ford F-350 Modded 7.3 Powerstroke Crew Cab 4x4
2020 Jay Flight 24RBS - Current
2004 Jayco Eagle 298BHS - Gone
2000 Jayco Kiwi 23b - Gone
Bike_pilot is offline   Reply With Quote
Old 12-23-2020, 12:03 PM   #16
Member
 
Join Date: Jan 2019
Location: Fullerton
Posts: 78
As an alternative idea to the hardwired light (which I would prefer ), I bought a pair of these. First one came with 2 mounts. So now I have mounts on each side of the bed and a mount at the sofa. With the 2 lights they can be moved into position for reading as needed. Not sure if this is a cheaper alternative, but it's less work for the lazy

https://www.amazon.com/dp/B0895CT4MR
__________________
2019 Jay Flight 24RBS
2017 F-150 V8
jhaan is offline   Reply With Quote
Old 01-18-2021, 03:14 PM   #17
Junior Member
 
Join Date: Jan 2021
Location: Tarpon Springs
Posts: 10
We bought a 2021 24rbs yesterday at Tampa RV show. Don’t take delivery till mid feb. Everything you have done is killer! This forum is a blessing to those new to Jayco and its products.
Rolexmd tridenttech is offline   Reply With Quote
Old 01-30-2021, 12:02 PM   #18
Member
 
Join Date: Jan 2019
Location: Fullerton
Posts: 78
Hello, I'm sure this is not unique to our trailer, but I'm concerned about gaps between the shower insert and the walls. I don't see caulk working for these, but eternabond tape seems extreme. Yet these gaps are super concerning to me. Yes we shower in here and have a good fan installed now. But I'm not sure what lies behind the shower insert--is it bare wood? Is it wallpapered like the rest of the bathroom?

Any thoughts on this would be appreciated!! I'm also going to post in the other 24RBS thread in case there are any insights over there.
Attached Thumbnails
20210118_142633.jpg   20210118_142618.jpg   20210118_142622.jpg  
__________________
2019 Jay Flight 24RBS
2017 F-150 V8
jhaan is offline   Reply With Quote
Old 01-31-2021, 06:50 AM   #19
Senior Member
 
mokurt's Avatar
 
Join Date: Sep 2019
Location: Hollister
Posts: 517
Quote:
Originally Posted by jhaan View Post
Hello, I'm sure this is not unique to our trailer, but I'm concerned about gaps between the shower insert and the walls. I don't see caulk working for these, but eternabond tape seems extreme. Yet these gaps are super concerning to me. Yes we shower in here and have a good fan installed now. But I'm not sure what lies behind the shower insert--is it bare wood? Is it wallpapered like the rest of the bathroom?

Any thoughts on this would be appreciated!! I'm also going to post in the other 24RBS thread in case there are any insights over there.
In your first pic the outside vertical strips are wood covered with vinyl.
On our 248RSBW I caulked the inside and outside of the strips.

Also added this threshold dam to the tub to help keep the water in.
I left the other shower stall gaps alone.
Attached Thumbnails
41EO7A+NPKL._AC_SX679_-2.jpg  
__________________
2019 248RSBW
mokurt is offline   Reply With Quote
Old 02-17-2021, 02:12 PM   #20
Junior Member
 
Join Date: Jun 2020
Location: BATTLE GROUND
Posts: 26
Congrats! I love this floorplan! Should be about time to pick that baby up?
__________________
~David
2002 Ford F-350 Modded 7.3 Powerstroke Crew Cab 4x4
2020 Jay Flight 24RBS - Current
2004 Jayco Eagle 298BHS - Gone
2000 Jayco Kiwi 23b - Gone
Bike_pilot is offline   Reply With Quote
Reply

Tags
24rbs mods, jayco, jayflight, trailer, travel trailer


Posting Rules
You may not post new threads
You may not post replies
You may not post attachments
You may not edit your posts

BB code is On
Smilies are On
[IMG] code is On
HTML code is Off
Trackbacks are Off
Pingbacks are Off
Refbacks are Off


» Featured Campgrounds

Reviews provided by

Powered by vBadvanced CMPS v3.2.3
Disclaimer:

This website is not affiliated with or endorsed by Jayco, Inc. or any of its affiliates. This is an independent, unofficial site.


All times are GMT -6. The time now is 08:11 AM.


Powered by vBulletin® Version 3.8.8 Beta 1
Copyright ©2000 - 2024, vBulletin Solutions, Inc.
Copyright 2002-2016 Social Knowledge, LLC All Rights Reserved.