 |
 07-16-2019, 11:25 AM
|
#1
|
|
Member
Join Date: Nov 2018
Location: Phoenix
Posts: 88
|
15 Hrs. Labor for Tow Kit Install??
Ok, so now I'm ready to look into flat-towing my '17 Grand Cherokee Limited. Got a quote for the Blue-Ox Avail baseplate combo kits (#BX1128-20), and Invisibrake system with breakaway. Parts costs all make sense but labor was quoted at 15.5 hours.
Now I've never done this so don't know if that is about right or not so I'll reserve my judgement. How many of you with a Blue-Ox flat-tow setup have an idea on what labor would be to install this? I'm not quite sure I want to tackle this on my own with a friend but at $2k labor, I'm considering it...strongly. End of the day, I want to be safe and legal and ensure the job is done right which may mean me NOT doing it  Thoughts?
__________________

2014 Seneca 37FS
2017 Jeep Grand Cherokee Limited
|

|

|
|
07-16-2019, 11:33 AM
|
#2
|
|
Senior Member
Join Date: Jul 2016
Location: Atlanta
Posts: 307
|
Quote:
Originally Posted by AaronL

Ok, so now I'm ready to look into flat-towing my '17 Grand Cherokee Limited. Got a quote for the Blue-Ox Avail baseplate combo kits (#BX1128-20), and Invisibrake system with breakaway. Parts costs all make sense but labor was quoted at 15.5 hours.
Now I've never done this so don't know if that is about right or not so I'll reserve my judgement. How many of you with a Blue-Ox flat-tow setup have an idea on what labor would be to install this? I'm not quite sure I want to tackle this on my own with a friend but at $2k labor, I'm considering it...strongly. End of the day, I want to be safe and legal and ensure the job is done right which may mean me NOT doing it Thoughts? |
I would say 8 hours max. If you have done before and know what you are doing , you could probably do it in 4 hours. The first toad I had it done at a shop. Cost about 1200. My current toad I did myself. Found a youtube video on it that really help. I got it done in about 6 hours. Cost me about $5 and 6 hours of my time. I would definitely do it again for my next toad.
__________________
2017 Greyhawk 29MV

|
|
|
|
|
07-16-2019, 11:50 AM
|
#3
|
|
Member
Join Date: Nov 2018
Location: Phoenix
Posts: 88
|
Quote:
Originally Posted by GeorgiaRV
I would say 8 hours max. If you have done before and know what you are doing , you could probably do it in 4 hours. The first toad I had it done at a shop. Cost about 1200. My current toad I did myself. Found a youtube video on it that really help. I got it done in about 6 hours. Cost me about $5 and 6 hours of my time. I would definitely do it again for my next toad.
|
Much appreciated! That's honestly what I would have figured for a paid install. The self-install labor hours don't look that bad either. I watched a video on my exact vehicle install from eTrailer and while it looked somewhat simple, I was worried about the front facia removal. taking apart isn't the issue, it's putting it all back together that worries me but I have a certified mechanic friend who I may enlist to get this done. This is helpful so thank you!
__________________
2014 Seneca 37FS
2017 Jeep Grand Cherokee Limited
|
|
|
|
|
07-16-2019, 01:03 PM
|
#4
|
|
Senior Member
Join Date: Sep 2013
Location: South Texas
Posts: 7,216
|
I just did my 2015 JGC myself. I'd say 8 hours DIY is about right. Maybe 6 for a proficient shop with the right tools at hand.
I have the tools, but not a lift, and my tools are in somewhat disarray right now (I'm working on it) so it takes me a lot of time to find what I'm looking for sometimes. Plus getting up and down from the floor is troublesome since I'm a bit "fluffy" right now. ETA: I used a set of ramps to get the front of the car to a "workable" height, and that helped A LOT.
It's not a difficult install really, it's a bit tedious though, and there are LOTS of steps. Youtube videos and Etrailer.com videos were my best friend. But I've done stuff like this before, so I wasn't afraid to dig in and get my hands dirty.
The front facia isn't that hard either. Just go slow. The first time you take it off, you'll find where all the "clips" are and it will be much easier once you know that. When you're taking it off start from the outside in, and when you're putting it on, start from the inside and work your way out. The Etrailer instructions say to take the fog light bulbs out of the sockets. Don't do that, just unplug them. Which reminds me, I'm not sure I ever plugged mine back in!!
Also, I'm not sure why Jeep decided to use plastic rivets instead of standard trim buttons in that one spot in the front of the wheel well. I jammed up my rivet gun, so I just got a pair of vise grips and a set of needle-nose. Vise grips to hold down the rivet base, needle-nose to pull out the center of the rivet using a twisting motion, and it worked fine. Standard center-pin trim clips would work better.
Just take your time and follow the steps deliberately, and you should be fine if you're at all proficient or experienced in working on vehicles. If you don't own a good set of tools and know how to use them, then perhaps take it to a shop and pay for installation.
Actually the hardest part was mounting the break away switch and the 7-way plug. That front bumper is REALLY tough, and my bits were REALLY dull. And you can forget about using the "self-tapping" screw they give you in the kit to attach anything to the bumper (and I'm talking about the actual structural bumper, not the fascia), it just won't work. I even tried pre-drilling; no good. I ended up drilling holes through a pinch weld and using nuts and bolts. I insisted on attaching to the bumper because I wanted those plugs more "hidden" behind the fascia instead of sticking out the front. I believe the instructions for the Blue-Ox wiring kit say to just mount it to the fascia.
__________________

-2018 Greyhawk 29MV
-2020 Jeep Wrangler Unlimited (JLU) (Primary Toad)
-1994 Jeep Wrangler YJ (Secondary Toad)
-2014 Jay Flight 28BHBE & Ram 2500 6.4L CC 4x4 (sold)
|
|
|
|
|
07-16-2019, 08:12 PM
|
#5
|
|
Member
Join Date: Nov 2018
Location: Phoenix
Posts: 88
|
Nice write up. You’ve got me thinking more about tackling. Did you have that trim button removal tool or just use a flat-head screw driver?
The eTrailer video was great and it was for my exact model year Cherokee. I thought the same as you when they were drilling the frame. I DEFINITELY don’t have the bit for that. Last thing I need is to tear into something and not have the proper tools to complete it. DW would love giving me grief for that!
Well I’m getting a few quotes on installing backplate and brake controller plus wiring. That part I really don’t want to mess with. Me and wiring don’t get along. I’ll use this to make a decision on DIY or pay to play. Thanks for taking the time to write your thorough reply!
BTW, what are you using for supplemental braking? I’m looking at the installed options for more plug and play vs the brake-bot approach but weighing options there too.
|
|
|
|
|
07-16-2019, 08:53 PM
|
#6
|
|
Member
Join Date: Feb 2018
Location: Bartlett
Posts: 81
|
I have the Invisibrake in my Tahoe. It works great, and I am very satisfied with it. There are reports of uncommanded brake application. My research indicated that it was caused by improperly installed diodes at the tail lights. If not properly sealed with silicone, moisture will cause a “short” across the terminals. Silicone is your friend.
__________________
Chuck and Anita
Bella (RIP) and Pip (Our pups)
Bartlett, TN
2017 Seneca 36FK

|
|
|
|
|
07-16-2019, 09:38 PM
|
#7
|
|
Senior Member
Join Date: Dec 2014
Location: Akron
Posts: 3,207
|
Just remember that the baseplate installation might not be the only installation that needs completed!
Many toad braking systems have installation requirements too, possibly even significant wiring that needs accomplished. Many braking systems require a constant 12-volt source, but many cars shut off their accessory outlets after a short time. Also some vehicles require the disconnection of certain circuits or even the whole battery to tow. There might be installation requirements to accomplish those items too. And depending on how you want to accomplish toad lighting there is installation time needed for that too. There are portable lights that can work, but many newer cars have no place to even mount a magnetic lightbar with so much plastic, glass, and aluminum used in cars today.
Please understand I am not trying to dissuade anyone from doing the installation themselves, but it is important to understand everything that might be involved. I just finished a complete install on my new 2019 Ford Edge ST. It came out great and tows like a dream.
Good luck if you do decide to move forward!
__________________
Rob R.
Akron, OH
2014 Seneca 37TS
Toads: 2019 Ford Edge ST or 2013 Ford Focus ST

|
|
|
|
|
07-16-2019, 09:55 PM
|
#8
|
|
Senior Member
Join Date: Apr 2016
Location: Kingman AZ and where our Seneca is today.
Posts: 3,118
|
Aaron... Robbbbbbbbby is the best to answer this question for you.... especially after reading his latest post on what he had to do for his Toad.
https://www.jaycoowners.com/forums/f...tml#post772212
__________________
Steve & Stacy with Jasper (Australian Cattle dog)
2015 Seneca 36FK
Custom 27' flatbed trailer hauling:
07 Toyota FJC & Yamaha Kodiak 400 ATV
|
|
|
|
|
07-16-2019, 10:47 PM
|
#9
|
|
Senior Member
Join Date: Jul 2016
Location: Atlanta
Posts: 307
|
Quote:
Originally Posted by Robbbyr
Just remember that the baseplate installation might not be the only installation that needs completed!
Many toad braking systems have installation requirements too, possibly even significant wiring that needs accomplished. Many braking systems require a constant 12-volt source, but many cars shut off their accessory outlets after a short time. Also some vehicles require the disconnection of certain circuits or even the whole battery to tow. There might be installation requirements to accomplish those items too. And depending on how you want to accomplish toad lighting there is installation time needed for that too. There are portable lights that can work, but many newer cars have no place to even mount a magnetic lightbar with so much plastic, glass, and aluminum used in cars today.
Please understand I am not trying to dissuade anyone from doing the installation themselves, but it is important to understand everything that might be involved. I just finished a complete install on my new 2019 Ford Edge ST. It came out great and tows like a dream.
Good luck if you do decide to move forward!
|
My quote of 6 to 8 hrs also included the wiring for braking unit (Blue Ox Patriot) and tail lights.
__________________
2017 Greyhawk 29MV
|
|
|
|
|
07-17-2019, 04:36 AM
|
#10
|
|
Senior Member
Join Date: Feb 2017
Location: Kennewick
Posts: 331
|
I can't speak to the Grand, but my Cherokee Trailhawk took me about 8 hours the first time out which included R&R of the front facia twice. Since I am using a ReadyBrute, the wiring likely is not anymore difficult than running cables.
I just wired an EvenBrake (I think that is it...it's a wireless transmitter set up) for my son-in-laws Jeep Wrangler a couple of weeks ago and the most difficult part was wiring in the brake light relay. The entire wiring took maybe 4 hours to do the Hopkins diode lights, install the hot plug under the dash for the brake and other required wiring. This was my first time wiring up a Wrangler and working on this braking system.
My guess would be 8 to 12 hours for a first time install, but for a shop with experience 8 hours would be more than enough.
I used trim removal tools for the rivets (Harbor freight). I used the trim tool to hold the base of the rivet, then used vise grips on the shaft of the rivet rolling the vise grip over the trim tool which made a nice tight fit.
Get some quotes from other shops. I had the same thing...parts were about $1800, but install was quoted at 2-3K....so I did it myself.
__________________
2016 Jayco GreyHawk 31DS
2016 Jeep Cherokee Trailhawk Toad.
SE Washington State
|
|
|
|
|
07-17-2019, 08:22 AM
|
#11
|
|
Senior Member
Join Date: Sep 2013
Location: South Texas
Posts: 7,216
|
Quote:
Originally Posted by AaronL
Nice write up. Youve got me thinking more about tackling. Did you have that trim button removal tool or just use a flat-head screw driver?
The eTrailer video was great and it was for my exact model year Cherokee. I thought the same as you when they were drilling the frame. I DEFINITELY dont have the bit for that. Last thing I need is to tear into something and not have the proper tools to complete it. DW would love giving me grief for that!
Well Im getting a few quotes on installing backplate and brake controller plus wiring. That part I really dont want to mess with. Me and wiring dont get along. Ill use this to make a decision on DIY or pay to play. Thanks for taking the time to write your thorough reply!
BTW, what are you using for supplemental braking? Im looking at the installed options for more plug and play vs the brake-bot approach but weighing options there too.
|
I just used a flat-head screw driver and a pair of needlenose pliers for the "tough" ones. It takes a little more time, and you have to be careful. But don't worry if you break one, you can get replacements at most auto-parts stores. I probably should get a trim panel tool kit, but just haven't done it yet...
You don't need a particularly special drill bit to drill the holes in the frame, but you'll probably want to do it with multiple bits starting with smaller ones and progressively drilling until you get to the right size (3/8" IIRC). A good drill/driver and a decent set of bits will likely be up to the task. Measure twice (or three times) and cut once!
As for wiring, I don't like wiring either. But if you deliberately follow the instructions step by step, it's not that difficult. Of course, having the right tools here helps too. I have an extensively outfitted "electrical" tool box with a variety of extra splices, eyes and a nice stripper/crimper tool as well as a 12V test light. I installed the diode kit in mine.
I'm using the Blue Ox Patriot 2 (inventory only is available as it's been replaced with the Patriot 3) because I want to be able to use it in another vehicle. Wiring was pretty simple, it's the routing of the emergency switch wire that was most difficult. I ended up using an old whip antenna to pull the wiring through a grommet and into the passenger compartment (again, Youtube is your friend). This unit has a wireless control in the cab area of the MH.
I also wired up a supplemental 12V charge line (bought the kit with the rest of my gear). Again, pretty simple, and again, routing wires is the hardest part. So my brake won't drain the battery down while in transit. The Patriot has a capacitor in it, so that should help.
That's pretty much it for the install on a Grand Cherokee. As long as you have the transfer case with low-range that can be put in neutral (read your owner's manual for that procedure, or Youtube! LOL!), all you need is the tow bar, base plate, light wiring, and brake unit, and optionally the 12V charge line. There are no special procedures or fuses to disconnect. With mine, you just hook it up to your tow bar, put it in neutral, place the brake and plug it in (to the 12V in the center console which is "constant"), plug in to the motorhome, attach safety cables, and you're off.
FWIW, I spent A LOT of time researching and deciding what I wanted, and there are specific reasons I chose what I chose that are right for my particular situation.
And DW gave me grief about it the whole time, especially while I had the fascia off the Jeep. The threat of her jibbing was half the reason I went so slow and deliberate with this installation!
On a serious note, if there's something you have a doubt about in your ability to do this correctly, I would say don't do it yourself. It's important that this is done right for the safety of you, your family and the other people on the road around you. Personally I've done stuff like this a lot, so I'm confident in my ability to complete the install and troubleshoot appropriately, and I have all the necessary tools for the job and they are WELL used.
__________________
-2018 Greyhawk 29MV
-2020 Jeep Wrangler Unlimited (JLU) (Primary Toad)
-1994 Jeep Wrangler YJ (Secondary Toad)
-2014 Jay Flight 28BHBE & Ram 2500 6.4L CC 4x4 (sold)
|
|
|
|
|
07-17-2019, 10:55 AM
|
#12
|
|
Senior Member
Join Date: Aug 2015
Location: Cincinnati
Posts: 229
|
I just did the install on a 2018 Jeep Grand Cherokee myself. I installed the road master led tow bar and wired a supplemental break system.
It probably took me 15-16 hrs in 2-3 hr blocks. I am a decent mechanic. It was detailed and a bit tedious. The hardest part was some 1/2 holes to drill but once I used the floor jack as a drill press it was easy. I think around 6-8 hrs for someone who has done it for a living. If you tackle it follow the instructions and take your time. Youll get it
__________________
Mike
2015 Seneca HJ
|
|
|
|
|
07-18-2019, 10:11 AM
|
#13
|
|
Member
Join Date: Nov 2018
Location: Phoenix
Posts: 88
|
Robbyr, that is a sweet setup. I’m actual glad you shared your DIY details. As much as I want to tackle this, I think I’m going to go the pay to play route. My Toad is my daily driver too and I don’t want to have it out if commission for the eons I know it would take ME to finish this job! :-)
Thanks all for the replies. Will advise how this all ends up. Will Get this going after my trip to Cali end of the month to escape the heat for a few days.
__________________
2014 Seneca 37FS
2017 Jeep Grand Cherokee Limited
|
|
|
|
|
07-18-2019, 01:34 PM
|
#14
|
|
Member
Join Date: Sep 2018
Location: Spring Valley
Posts: 49
|
Recently had base plate (Roadmaster Crossbar-Style Base Plate Kit - Removable Arms), wiring, and Brake cable for Ready Brake installed on a 2012 Fiat 500. Front facia needed to be removed and holes needed to be drilled for cable.
Total cost for installation $500 for 6 hours labor. Work performed by local automotive shop. Quotes from "RV" facilities were totally out of line.
Shopped around for garage prior to choosing garage to perform work.
|
|
|
|
|
07-18-2019, 04:01 PM
|
#15
|
|
Senior Member
Join Date: Jul 2017
Location: Albuquerque
Posts: 322
|
I paid an independent RV shop a little over $1,000, I seem to recall.
He removed a big plastic piece under the front bumper of my Jeep Wrangler, bolted on the Blue Ox base plate, attached safety cables under the front end, wired lights, etc.
I did not want to try it and mess up.
|
|
|
|
|
07-19-2019, 05:17 PM
|
#16
|
|
Member
Join Date: Mar 2019
Location: Mesa
Posts: 63
|
I took my Colorado to a local body shop to mount the base plate and did the wiring myself. Took a couple of hours at the body shop and 215 bucks. Got the wiring kit from etrailer and it went in just fine. I use an RVI Brake 3 and wired it up pretty easily.
I like the RVI as it does not require any invasive work to the Colorado break system.
__________________
2019 Seneca RB
2017 Colorado toad

|
|
|
|
|
07-24-2019, 04:31 PM
|
#17
|
|
Junior Member
Join Date: Feb 2016
Location: Kissimmee
Posts: 10
|
I just did this for 2014 Grand Cherokee using Demco bar, wiring and stop n play brake system. Took me about 15 hours over 3 days. I could probably do it a second tine in 10 or so.
|
|
|
|
|
07-24-2019, 11:35 PM
|
#18
|
|
Member
Join Date: Nov 2018
Location: Phoenix
Posts: 88
|
Thanks for the replies. Well, I had a change of heart and decided not to risk my mechanical prowess for this job. I found a family-owned local shop that has a great reputation and specializes in this setup. Appointment is set to follow our trip in a few weeks. Im going with the Blue Ox baseplate and Alpha toe bar with the Stay and play Duo fixed install along with full light wiring and battery charge kit. Certainly not the cheapest route but I know my limits!
Will let you know how it all goes. Really excited to be able to take my own vehicle along!
__________________
2014 Seneca 37FS
2017 Jeep Grand Cherokee Limited
|
|
|
|
|
07-25-2019, 12:05 PM
|
#19
|
|
Senior Member
Join Date: Jul 2019
Location: Wildomar
Posts: 119
|
Braking
A little off topic, but have you checked out the Ready Brute Elite tow bar? If you already have a tow bar, they also make the Ready Brake adapter that will fit other tow bars. These are inertia based braking systems that seem pretty easy to install. No issues with electronics failing etc. I am seriously considering the Ready Brute Elite system myself.
|
|
|
|
|
08-19-2019, 08:36 PM
|
#20
|
|
Member
Join Date: Nov 2018
Location: Phoenix
Posts: 88
|
Quote:
Originally Posted by AaronL
Thanks for the replies. Well, I had a change of heart and decided not to risk my mechanical prowess for this job. I found a family-owned local shop that has a great reputation and specializes in this setup. Appointment is set to follow our trip in a few weeks. Im going with the Blue Ox baseplate and Alpha toe bar with the Stay and play Duo fixed install along with full light wiring and battery charge kit. Certainly not the cheapest route but I know my limits!
Will let you know how it all goes. Really excited to be able to take my own vehicle along!
|
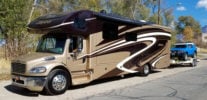
Going back to an old post but thought Id close out on what I decided. We went with the Blue Ox Alpha setup with the SMI Stay-In-Play Duo system with Battery Maintainer. Had it installed and very happy with results. 10 minutes to setup and unhook - connect, neutral on the Cherokee and flip a switch, done. It rolls beautifully behind the Seneca.
Aaron
__________________
2014 Seneca 37FS
2017 Jeep Grand Cherokee Limited
|
|
|
|
|
 Posting Rules
|
You may not post new threads
You may not post replies
You may not post attachments
You may not edit your posts
HTML code is Off
|
|
|
|
 » Recent Threads
 |
|
|
|
|
|
|
|
|
|
|
|
|
|
|
|
|
|
|
|
|
|
|
|
|
|
|
|
|
|
|
|
|
|
|
|
|
|
|
|
|
|


 Linear Mode

