 |
 11-04-2017, 11:08 AM
|
#1
|
|
Senior Member
Join Date: Sep 2017
Location: Anaheim, CA
Posts: 408
|
Seneca - add water tank
looking at adding more fresh water tank capacity to our Seneca. The RB has a good size grey tank and black tanks but the fresh water is lacking for dry camping.
Looks like a bunch of unused space behind the rear axle and wondering is anyone has added a tank in this location.
-
__________________
2018 Seneca 37RB
2005 LJ Rubicon - Sahara #90
2019 Can Am X3 XRS Max
2009 ATC enclosed trailer
|

|

|
|
11-04-2017, 11:18 AM
|
#2
|
|
Senior Member
Join Date: Sep 2017
Location: Anaheim, CA
Posts: 408
|
Here is the area I am looking at...
__________________
2018 Seneca 37RB
2005 LJ Rubicon - Sahara #90
2019 Can Am X3 XRS Max
2009 ATC enclosed trailer
|
|
|
|
|
11-04-2017, 04:01 PM
|
#3
|
|
Senior Member
Join Date: Jan 2017
Location: Manchester Center
Posts: 1,519
|
Found might want to contact him directly for specifics on this.
05-05-2017, 12:32 AM #24
ready2retire&drive
Senior Member
Join Date: Apr 2016
Location: sherwood park
Posts: 105
Registry
I think I solved two problems in one move
When out in the hills seems we needed more water, I found a 50 gallon tank that fit perfectly between the rails. so the process to build a tank that is insulated and protected is a tough one but worth it, the pictures show the results. When I cranked the tank up, the floor went up solving the upper water tank sag. I put the filler inlet right next to the fill in the water center so using a small 6" transfer hose should be able to use the farm fill switch to top up main tank. Tank has 1 inch of foam insulation surrounded by wire mesh than attached to mounting plates so it should not move and keep it safe from road debris and rocks, hope it helps
Attached Thumbnails
Click image for larger version
|
|
|
|
|
11-04-2017, 11:45 PM
|
#4
|
|
Senior Member
Join Date: Sep 2017
Location: Anaheim, CA
Posts: 408
|
I did an advanced search with the above posted info and found the post with pics but not a lot of detailed info.
It would be great to see a parts list and more info on how this tank has worked out. This is exactly what I was thinking about doing on mine and wondered if and how it would work.
_
__________________
2018 Seneca 37RB
2005 LJ Rubicon - Sahara #90
2019 Can Am X3 XRS Max
2009 ATC enclosed trailer
|
|
|
|
|
11-05-2017, 12:31 PM
|
#5
|
|
Senior Member
Join Date: Apr 2016
Location: sherwood park
Posts: 235
|
When we where out on our last trip the furnace issue was not solved. So I took unit back to dealer for warranty on the furnace (again !! for the fourth time!!) When I get it back can crawl under and give some tank dimensions. As for it's function it works very well. I will post pic's of the fill set up in the water center. On our last trip out the last night and day saw snow plus very cold weather, had no problems with water freezing, not sure if it would have got colder for longer if this would have been the same case. When I need to top up main tank I have a small 12v transfer pump that I use and just top it up very easily, never had a lot of luck with the farm fill side of valving.
|
|
|
|
|
11-05-2017, 12:52 PM
|
#6
|
|
Senior Member
Join Date: Apr 2016
Location: Kingman AZ and where our Seneca is today.
Posts: 3,120
|
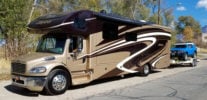
We have been looking at adding fresh water capacity... weighing the pro's / con's of the overall project. Most of our camping is primitive and we like to stay a week minimum before moving our Seneca. Since it just the two of us, we can conserve and have no problem getting thru a week on 70gal... but understand a family of 7 is a challenge.
We took a different approach - and got a 35 gallon tank (in the picture) where we can put it on our trailer. We use the "Farm-Fill" on the Seneca to pump it into our Fresh Tank.
The benefit of this tank is portability. We sometimes put the tank on the back of our 4-wheeler and can run over to a source of water and in two trips, can have the Seneca refilled in less than an hour of effort. (most of the time spent is waiting for it to pump into the Motorhome)
__________________
Steve & Stacy with Jasper (Australian Cattle dog)
2015 Seneca 36FK
Custom 27' flatbed trailer hauling:
07 Toyota FJC & Yamaha Kodiak 400 ATV
|
|
|
|
|
11-05-2017, 01:07 PM
|
#7
|
|
Senior Member
Join Date: Apr 2016
Location: sherwood park
Posts: 235
|
Man! I hear you on the family side of things, with kids and grandkids there are nine of us out there sometimes. They camp in smaller units and with 5 of the family being girls clean hair becomes to be an issue. Seems they don't think following grandpa's choice of hair style(chrome,shiny and able to clean with a wash cloth) works for them, so extra water is always a premium. On the plus side they are learning the meaning of military showers none of this taking half an hour stuff. But with the missus and I the water capacity last's longer on most trips.
|
|
|
|
|
11-07-2017, 03:39 PM
|
#8
|
|
Senior Member
Join Date: Sep 2017
Location: Anaheim, CA
Posts: 408
|
Quote:
Originally Posted by ready2retire&drive

When we where out on our last trip the furnace issue was not solved. So I took unit back to dealer for warranty on the furnace (again !! for the fourth time!!) When I get it back can crawl under and give some tank dimensions. As for it's function it works very well. I will post pic's of the fill set up in the water center. On our last trip out the last night and day saw snow plus very cold weather, had no problems with water freezing, not sure if it would have got colder for longer if this would have been the same case. When I need to top up main tank I have a small 12v transfer pump that I use and just top it up very easily, never had a lot of luck with the farm fill side of valving.
|
That would be great to get more pics and details on how to set this up !
I really like your idea here and would like to replicate it on mine. No need for me to reinvent the wheel here if you already have it figured out.
Thank you for the info !
-
__________________
2018 Seneca 37RB
2005 LJ Rubicon - Sahara #90
2019 Can Am X3 XRS Max
2009 ATC enclosed trailer
|
|
|
|
|
11-13-2017, 05:07 PM
|
#9
|
|
Senior Member
Join Date: Apr 2016
Location: sherwood park
Posts: 235
|
Got her back sort of
Just picked her up from RV dealer and took her to Freightliner for the sway bar warranty and to flash the computer to recognize the smart switch for the fog lights. But took some pics of the water tank and valving. As for the tank info here goes. The tank is a 50 gal tank by Ameri kart part number W1177 ??? the dimensions are 38 1/2" long by 22 1/4" wide by 14 1/4" high. I had my supplier plastic weld in two 1/2 bungs for me one at the bottom and one at the top coming off the ends, (In hindsight the top one which is the vent could have been bigger). I then got some flat expanded metal and broke a box 1 inch bigger than the tank(In two halves), this can be broke on the side of a bench pretty easy stuff to work with, stitch welded a center flat bar to secure the two halves of cage together, then stitch welded two flat bars to the outside bottom of this to bolt tank assembly to the L plate mounting brackets. Installed two small hoses in my bungs( to keep expanding foam out of threads) and centered tank inside my metal cage upside down. I tack welded cage to my metal work bench. Then filled gap between tank and cage with expanding foam for insulation and tank protection(Again in hind sight should have put tank heating pad on tank before foaming for future cold weather trips) After expanding foam dried, just scraped it all down smooth to the expanded metal and sprayed under coat over this to seal it a little better from road grit. As for the L plates I bolted the whole assembly together with a 1/2 inch piece of plywood between my L plate and tank flat bar, jacked it up tight to the floor marked my side holes then drilled frame. Bolted up the L plate to the frame, with out the plywood space I bolted up the tank and had some crush space to tighten tank up to floor and keep it secure. The valving is pretty straight forward and on the drain end of tank I have a male hose fitting to install hose and transfer up to my main water tank if needed either through farm fill or small 12volt pump. I use a small 12 volt transfer pump and had good success in refilling my tank. If I can be of any further help don't hesitate I will be glad to answer more questions if you need to. Just not sure how long Freightliner will have the unit (if you need more pictures) as they are also looking at an oil leak in the rear main seal area as there was a heavy sweat in the bell housing area when I was underneath there. Kinda long winded but hope it helps.
|
|
|
|
|
11-13-2017, 05:12 PM
|
#10
|
|
Senior Member
Join Date: Apr 2016
Location: sherwood park
Posts: 235
|
Sorry !! Forgot one very important detail !!! The water tank must be filled with water before foaming or you will not get full tank capacity when done due to foam expanding inwards instead of out through the expanded metal. WHEW !! I almost did this, just a fabrication hint to help out, gord
|
|
|
|
|
11-13-2017, 10:08 PM
|
#11
|
|
Senior Member
Join Date: Sep 2017
Location: Anaheim, CA
Posts: 408
|
Thank you for all the info !!
I am going to do this for sure. Just want to do it once and it seems like you have it done right so no need for me to re-invent the wheel on this.
With only two bungs, one top vent and one bottom...
Do you fill the tank through the same drain bung on the bottom ?
Where did you buy/order the valve and the fill port from ?
Those make the install look clean.
Do you mind me asking how much the tanks cost ?
I was looking at one online with 1.5" fill / .5" vent / .5" drain but it is $499.
-
__________________
2018 Seneca 37RB
2005 LJ Rubicon - Sahara #90
2019 Can Am X3 XRS Max
2009 ATC enclosed trailer
|
|
|
|
|
11-13-2017, 11:39 PM
|
#12
|
|
Senior Member
Join Date: Sep 2017
Location: Anaheim, CA
Posts: 408
|
Any chance you have a schematic or drawing of how you routed the plumbing/pipes for the add on tank ?
-
__________________
2018 Seneca 37RB
2005 LJ Rubicon - Sahara #90
2019 Can Am X3 XRS Max
2009 ATC enclosed trailer
|
|
|
|
|
11-14-2017, 10:01 AM
|
#13
|
|
Senior Member
Join Date: Apr 2016
Location: sherwood park
Posts: 235
|
The tank I ordered did not have any ports or fittings my supplier welded in the bungs where I needed and size I wanted. So if your tank has in them and they are in accessible locations and not on top it should work. As for the fill and three way valve I picked those up at my local RV parts store. I will send more pics when unit home. The price does not seem to bad. Mine was upwards of $649 plus tax and welding, we pay shipping, duty and of course the dollar exchange rate adds about 30% to every thing coming in. I will send schematic this afternoon on how the water compartment set up goes.
|
|
|
|
|
11-14-2017, 07:29 PM
|
#14
|
|
Senior Member
Join Date: Apr 2016
Location: sherwood park
Posts: 235
|
Water lines as requested
Sorry art work was never my forte' but this will give you a rough idea how it goes. I just used a simple open and close valve to minimize plumbing. The wire mesh is flush with the top of the tank to allow good contact to coach floor and make a firm seat on top. I have the vent hose coming out the front of the tank at top into my water compartment then down and out, there is just enough room between the coach floor and cross member to achieve this with a 1/2 line not sure if there would be enough space for a bigger line though. You could also come straight out and down if you wish but you have to get past cross member to go this route about 6 inch's out from tank then down. The fill and drain one comes in at rear of tanks bottom. I can take pics if needed. Hope it helps.
|
|
|
|
|
11-15-2017, 08:47 AM
|
#15
|
|
Senior Member
Join Date: Sep 2017
Location: Anaheim, CA
Posts: 408
|
Thank you for the drawing. Looks great and simple enough I should be able to duplicate it.
I like it, thank you again !
-
__________________
2018 Seneca 37RB
2005 LJ Rubicon - Sahara #90
2019 Can Am X3 XRS Max
2009 ATC enclosed trailer
|
|
|
|
|
02-03-2018, 09:41 PM
|
#16
|
|
Senior Member
Join Date: Sep 2017
Location: Anaheim, CA
Posts: 408
|
Finally got my secondary fresh water tank in... I still have to plumb it but I have all the parts and the plan. Hopefully finish it off this week.
58 gallons more fresh water for a total of 129.5 gallons.
-
__________________
2018 Seneca 37RB
2005 LJ Rubicon - Sahara #90
2019 Can Am X3 XRS Max
2009 ATC enclosed trailer
|
|
|
|
|
02-04-2018, 12:24 AM
|
#17
|
|
Senior Member
Join Date: Apr 2016
Location: sherwood park
Posts: 235
|
Looks real good , it's always nice out boon docking, adding more time enjoying the lifestyle by having that little bit of extra water.
|
|
|
|
|
02-04-2018, 09:10 AM
|
#18
|
|
Senior Member
Join Date: Jan 2017
Location: Manchester Center
Posts: 1,519
|
Seneca - add water tank
Where there is a will there is a way. Looks great and certainly will help with the extra water.
Sent from my iPhone using Tapatalk
__________________
Paul
2018 37TS
Jeep JL
|
|
|
|
|
 Posting Rules
|
You may not post new threads
You may not post replies
You may not post attachments
You may not edit your posts
HTML code is Off
|
|
|
|
 » Recent Threads
 |
|
|
|
|
|
|
|
|
|
|
|
|
|
|
|
|
|
|
|
|
|
|
|
|
|
|
|
|
|
|
|
|
|
|
|
|
|
|
|
|
|


 Linear Mode

