 |
|
 07-17-2020, 07:59 PM
|
#261
|
|
Senior Member
Join Date: Jul 2015
Location: Southern Illinois
Posts: 880
|
Quote:
Originally Posted by 75462

Has anyone looked into what it would take to have the option to flash the headlights during the day with the highbeam switch?
|
Our lights are on anytime we are on the road. Part of our get ready is to test the connection of the lights to the Towed vehicle, plus brake lights and direction signal/flashing lights. The lights stay on all the time we are on the road, so the bright beams work. Our 2016 Traverse has day time running lights and so does our 2018 Silverado, so to us it would almost seem unnatural for the lights not to be on when we are underway. Just part of the routine. 
__________________
Smooth Sailing,
Ric and Jan Golding
Southern Illinois
2016 Jayco Seneca 37FS
2016 Chevrolet Traverse
2018 Cheverolet Silverado
|

|

|
|
07-17-2020, 09:06 PM
|
#262
|
|
Senior Member
Join Date: Sep 2019
Location: Longs
Posts: 1,484
|
Quote:
Originally Posted by 75462
Has anyone looked into what it would take to have the option to flash the headlights during the day with the highbeam switch?
|
Unless I am drastically mistaken my 2020 Accolade already does this. It is a moot point for me however because I run with lights on because of the InvisiBrake. With the lights on the InvisiBrake charges the TOAD's battery.
__________________
Dave
US Army (Ret)
2020 Entegra Accolade 37TS
2019 Jeep Grand Cherokee Trailhawk TOAD
|
|
|
|
|
07-18-2020, 06:53 AM
|
#263
|
|
Senior Member
Join Date: Sep 2019
Location: Longs
Posts: 1,484
|
Quote:
Originally Posted by Robbbyr
My two grandsons and I take frequent "boys" trips and both like to ride up front so we can talk and view the passing scenery. Obviously just sitting between the front seats isn't safe, so I set out to find a solution.
I found a "take-off" new Ford center jump seat/console on eBay. It has an integrated shoulder harness/lap belt, and its size was perfect to fit in between the front seats. It also has cupholders and compartments whether flipped down or stood up! Once I received the seat I set out to design and fabricate a method to securely mount the seat yet have it be completely removable when it is just the wife and I traveling.
My 2014 chassis has the significant "step" from the house floor level to the cab floor. The rear of the new seat will secure to a bracket that is bolted down to the top of that step. Underneath the rig in that area is the first Jayco crossmember providing a solid place to attach the bracket. I will install bolts up through the crossmember behind the cab seats so they won't impede the "aisle" from the cab to the house when the seat is not installed.
To mount the front I fabricated brackets that bolt to the original cab seat bases and have a mounting "tab" to locate the front bracket for the new seat. These brackets will stay in place when the seat is removed but they tuck up under the seat and will be invisible behind the skirt when the jump seat is removed. Then there is a bracket that connects between both of the new seat brackets and it supports the front of the new seat.
The seat itself bolts to my new brackets in the original Ford mounting points, 4 - 1/2" grade 8 bolts will secure the seat to the brackets. I have grade 5 hardware installed now for mock-up but will replace with "the good stuff" for final installation.
I haven't yet decided whether I will have all my brackets powder coated or whether I will just bead blast and paint them. But they will be made "pretty" when I'm all done! Now if I could just find a way to make the new grey seat match my existing Flexsteel seats.........!
|
See if the cover set for a King Ranch edition is available. They are close to the same color if I’m not mistaken. This mod has the DW thinking and planning.
|
|
|
|
|
07-18-2020, 08:12 AM
|
#264
|
|
Senior Member
Join Date: Jul 2016
Location: Panama City
Posts: 569
|
Quote:
Originally Posted by Robbbyr
My two grandsons and I take frequent "boys" trips and both like to ride up front so we can talk and view the passing scenery. Obviously just sitting between the front seats isn't safe, so I set out to find a solution.
I found a "take-off" new Ford center jump seat/console on eBay. It has an integrated shoulder harness/lap belt, and its size was perfect to fit in between the front seats. It also has cupholders and compartments whether flipped down or stood up! Once I received the seat I set out to design and fabricate a method to securely mount the seat yet have it be completely removable when it is just the wife and I traveling.
My 2014 chassis has the significant "step" from the house floor level to the cab floor. The rear of the new seat will secure to a bracket that is bolted down to the top of that step. Underneath the rig in that area is the first Jayco crossmember providing a solid place to attach the bracket. I will install bolts up through the crossmember behind the cab seats so they won't impede the "aisle" from the cab to the house when the seat is not installed.
To mount the front I fabricated brackets that bolt to the original cab seat bases and have a mounting "tab" to locate the front bracket for the new seat. These brackets will stay in place when the seat is removed but they tuck up under the seat and will be invisible behind the skirt when the jump seat is removed. Then there is a bracket that connects between both of the new seat brackets and it supports the front of the new seat.
The seat itself bolts to my new brackets in the original Ford mounting points, 4 - 1/2" grade 8 bolts will secure the seat to the brackets. I have grade 5 hardware installed now for mock-up but will replace with "the good stuff" for final installation.
I haven't yet decided whether I will have all my brackets powder coated or whether I will just bead blast and paint them. But they will be made "pretty" when I'm all done! Now if I could just find a way to make the new grey seat match my existing Flexsteel seats.........!
|
Awesome work Rob! However, you need to seriously step-up your mods....you are falling behind RustyNuts 
__________________
Dave & Patricia
2017 Seneca 37FS
2016 Toyota Highlander
Kar Kaddy SS
|
|
|
|
|
07-18-2020, 11:50 AM
|
#265
|
|
Senior Member
Join Date: Oct 2017
Location: Oregon Coast
Posts: 3,099
|
Quote:
Originally Posted by Robbbyr
I haven't yet decided whether I will have all my brackets powder coated or whether I will just bead blast and paint them. But they will be made "pretty" when I'm all done! Now if I could just find a way to make the new grey seat match my existing Flexsteel seats.........!
|
You might also check out Katzkin, I know several guys that have upgraded their pickup interior with these and love it.
https://katzkin.com/
__________________
Brian & Jeannie
2018.5 Seneca 37RB with to many mods to list
2015 Jeep JKU Rubicon

|
|
|
|
|
07-19-2020, 05:46 PM
|
#266
|
|
Senior Member
Join Date: Oct 2017
Location: Oregon Coast
Posts: 3,099
|
Second 3D printing project finished, this is a huge improvement. I found the original file on Thingiverse but it would not work with the straight legged lever. I tried a second version (red one) and still didnt quite work right so I tried a 3rd version and it works great. Again, not making for sale but I will share the printing files.
__________________
Brian & Jeannie
2018.5 Seneca 37RB with to many mods to list
2015 Jeep JKU Rubicon
|
|
|
|
|
07-21-2020, 02:44 PM
|
#267
|
|
Junior Member
Join Date: Aug 2019
Location: Hunterdon
Posts: 5
|
Dave
Is there anything special we should keep in mind when installing a RoadMaster Invisbrake in our 37TS ? We are going to use a Jeep Wrangler on the back !
Which tow bar did you end up using ?
Thanks
Brian & Kathi
|
|
|
|
|
07-21-2020, 02:51 PM
|
#268
|
|
Senior Member
Join Date: Oct 2017
Location: Oregon Coast
Posts: 3,099
|
Quote:
Originally Posted by gorgas99
Dave
Is there anything special we should keep in mind when installing a RoadMaster Invisbrake in our 37TS ? We are going to use a Jeep Wrangler on the back !
Which tow bar did you end up using ?
Thanks
Brian & Kathi
|
For towing our JKU I went with the Currie Ent Base Plate and the Ready Brute Elite towbar with the braking system all built into the towbar. Quick, Easy hookup with no adjusting.
__________________
Brian & Jeannie
2018.5 Seneca 37RB with to many mods to list
2015 Jeep JKU Rubicon
|
|
|
|
|
07-21-2020, 02:55 PM
|
#269
|
|
Senior Member
Join Date: Sep 2019
Location: Longs
Posts: 1,484
|
Quote:
Originally Posted by gorgas99
Dave
Is there anything special we should keep in mind when installing a RoadMaster Invisbrake in our 37TS ? We are going to use a Jeep Wrangler on the back !
Which tow bar did you end up using ?
Thanks
Brian & Kathi
|
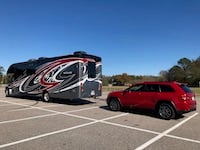
No. The InvisiBrake is installed in the TOAD not in the coach. I have a Universal Brake Monitor that has one module in the Jeep and another in the coach so I know when the InvisiBrake is applied. I did have a dedicated charging line run to the TOAD's battery from the umbilical cord. The InvisiBrake does charge the TOAD's battery when you have the coach parking lights on.
My setup is the:
RoadMaster Crossbar Baseplate. I like the quick disconnect feature of the baseplate.
RoadMaster Sterling Towbar. At the time of purchase the Sterling was the only towbar with the integrated safety cables. RoadMaster has since put those on the Night Hawk but I was going to shell out the extra cash for the "Purdy lights" on the towbar.
InvisiBrake. I like not having to connect and disconnect the braking system every time I tow.
RoadMaster light harness.
Hope this helps.
__________________
Dave
US Army (Ret)
2020 Entegra Accolade 37TS
2019 Jeep Grand Cherokee Trailhawk TOAD
|
|
|
|
|
07-21-2020, 03:17 PM
|
#270
|
|
Junior Member
Join Date: Aug 2019
Location: Hunterdon
Posts: 5
|
Can you post a pic of where you mounted the “brake applied” light in the Seneca ?
My biggest worry is how they mounted the light in the coach and how they routed the wiring for it. Done once.. Done right (I hope..)
And thanks for the towbar info. RoadMaster has some ‘non binding bars’ now that I’m going to check out to see if they have all the safety cables and such too. (Good advice - THANKS)
Do you also have a ‘brake controller’ for a regular trailer ? To the 7Pin connection.
Is there any interference between the Invisibrake setup and that brake controller ?
Sometimes we will have a Jeep as a TOAD, sometimes we will have our off-roader on a car trailer. I’m hope we can do both with little fuss.
THANKS AGAIN !
|
|
|
|
|
07-21-2020, 03:59 PM
|
#271
|
|
Senior Member
Join Date: Sep 2019
Location: Longs
Posts: 1,484
|
Quote:
Originally Posted by gorgas99
Can you post a pic of where you mounted the brake applied light in the Seneca ?
My biggest worry is how they mounted the light in the coach and how they routed the wiring for it. Done once.. Done right (I hope..)
And thanks for the towbar info. RoadMaster has some non binding bars now that Im going to check out to see if they have all the safety cables and such too. (Good advice - THANKS)
Do you also have a brake controller for a regular trailer ? To the 7Pin connection.
Is there any interference between the Invisibrake setup and that brake controller ?
Sometimes we will have a Jeep as a TOAD, sometimes we will have our off-roader on a car trailer. Im hope we can do both with little fuss.
THANKS AGAIN !
|
I don't normally tow a trailer so I have not added a brake controller.
My Sterling towbar is one of the non-binding tow bars with the integrated cables.
In the pic the Brake Monitor is to the left of the leveler control panel. The green light indicates everything is powered up and functioning correctly.
I am attaching the Brake Monitor Manual so you can see the different conditions monitored and how the Red, Yellow and Green lights function.
Roadmaster Universal Brake Monitor Manual.pdf

__________________
Dave
US Army (Ret)
2020 Entegra Accolade 37TS
2019 Jeep Grand Cherokee Trailhawk TOAD
|
|
|
|
|
07-21-2020, 05:35 PM
|
#272
|
|
Senior Member
Join Date: Apr 2020
Location: Paris
Posts: 154
|
2020 Seneca Air Bag Manual Dump Valves
Installed my manual air bag dump valves. Works great and really helps with leveling the coach. Another item on my, before I travel check lists.
|
|
|
|
|
07-28-2020, 06:42 PM
|
#273
|
|
Senior Member
Join Date: Oct 2017
Location: Oregon Coast
Posts: 3,099
|
Have read a few times of leveler pump assemblies falling off and I check mine regularly and there is quite a bit of flex in the bracket they use but the welds all looked good. Today I decided to cross this off my list and made a support that bolts onto the factory bracket and the other end bolts to a 1/4" plate mounted to the frame that is an exhaust support. Cant even flex the pump assembly now.
__________________
Brian & Jeannie
2018.5 Seneca 37RB with to many mods to list
2015 Jeep JKU Rubicon
|
|
|
|
|
08-17-2020, 09:15 AM
|
#274
|
|
Senior Member
Join Date: Jun 2015
Location: Elk city
Posts: 186
|
Entry door handle
Has anyone replaced the small door handle with a fold out handle? I would like to replace the factory handle with a larger handle, but I can’t find one that the attachment holes will line up. Factory holes are 18”, most fold out handles are 23.5”. I would be for drilling new holes for the bottom clamp, but not sure the door frame stud goes from top to bottom of door. This is on a 2015 Seneca. The factory handle is a Stromberg Carlson.
|
|
|
|
|
08-29-2020, 07:22 AM
|
#275
|
|
Senior Member
Join Date: Jan 2017
Location: Manchester Center
Posts: 1,519
|
Can you send a photo of what you mean? Which door handle? I want to replace the one inside my unit from the standard one to and actual handle like they have on class a units. But have not had the time to research it. Not sure if that is what you mean or not.  
__________________
Paul
2018 37TS
Jeep JL
|
|
|
|
|
08-29-2020, 11:20 AM
|
#276
|
|
Senior Member
Join Date: Oct 2017
Location: Oregon Coast
Posts: 3,099
|
Quote:
Originally Posted by RVermont
Can you send a photo of what you mean? Which door handle? I want to replace the one inside my unit from the standard one to and actual handle like they have on class a units. But have not had the time to research it. Not sure if that is what you mean or not. Attachment 62926Attachment 62927 |
I am guessing he means the outside grab handle on the side of the coach. A lot of trailers have a larger fold out handle.
__________________
Brian & Jeannie
2018.5 Seneca 37RB with to many mods to list
2015 Jeep JKU Rubicon
|
|
|
|
|
08-29-2020, 04:37 PM
|
#277
|
|
Member
Join Date: Aug 2020
Location: Elgin
Posts: 83
|
Quote:
Originally Posted by Rustynuts
Second 3D printing project finished, this is a huge improvement. I found the original file on Thingiverse but it would not work with the straight legged lever. I tried a second version (red one) and still didnt quite work right so I tried a 3rd version and it works great. Again, not making for sale but I will share the printing files.
|
Can you send me the file for the latch that you like?
Thanks
|
|
|
|
|
08-31-2020, 11:13 AM
|
#278
|
|
Senior Member
Join Date: Aug 2020
Location: Sandy
Posts: 277
|
A shop made version from plexiglass.
Wish I had seen the simpler 3D printed one sooner
https://youtu.be/2xw5ai9VYs4
|
|
|
|
|
09-03-2020, 11:08 PM
|
#279
|
|
Senior Member
Join Date: Oct 2017
Location: Oregon Coast
Posts: 3,099
|
Been wanting to upgrade to 6 6volt batteries and had a friend ask where to buy some Trojan 105s so I made him a deal on my 4 and made the move to 6 Lifeline AGMs. On our RB I have a small compartment right in front of the battery tray, so I added the 2 extras in that compartment where I usually keep my fluids/filters for the chassis. I cut a piece of Baltic Birch to stiffen up the floor and mounted a NOCO dual GC2 battery box and the 2/0 cables exit right out through the back of the compartment and loop around the back side and connect to the other 4 batteries, worked out great. It will be nice to not have to deal with watering anymore. I did seal all gaps on the battery box and vented out of the compartment, many say you dont need to vent with AGMs but Lifeline says you do, so I did. I finished off the compartment with an aluminum tray that holds all the filters I carry along with coolant and oil. One other thing I did was seal this cross-thru compartment. It has always been one that gets very dirty inside with dust and dirt, upon inspecting, I could see light in several places where it met the floor above it and there was a 1/2 gap on each side that was open to under the chassis. I went and sealed the perimeter of the compartment with 2 black Eternbond tape which was a challenge being big boned 
__________________
Brian & Jeannie
2018.5 Seneca 37RB with to many mods to list
2015 Jeep JKU Rubicon
|
|
|
|
|
09-04-2020, 06:15 AM
|
#280
|
|
Senior Member
Join Date: Jul 2015
Location: Southern Illinois
Posts: 880
|
Quote:
Originally Posted by Mwade
Has anyone replaced the small door handle with a fold out handle? I would like to replace the factory handle with a larger handle, but I cant find one that the attachment holes will line up. Factory holes are 18, most fold out handles are 23.5. I would be for drilling new holes for the bottom clamp, but not sure the door frame stud goes from top to bottom of door. This is on a 2015 Seneca. The factory handle is a Stromberg Carlson.
|
We installed the trailer style handle that folds, as one of our first mods. Didn't remove the old smaller handle, just installed the folding handle over it. The folding handle folds out of the way back over the cover of the TV while traveling. We've always used this type of handle folded over when the door is open, but the screen door is closed to make sure the screen door stays closed because of an inside cat. Easy install, been in place for almost 5 years. Use it almost everyday.
__________________
Smooth Sailing,
Ric and Jan Golding
Southern Illinois
2016 Jayco Seneca 37FS
2016 Chevrolet Traverse
2018 Cheverolet Silverado
|
|
|
|
|
|
 Posting Rules
|
You may not post new threads
You may not post replies
You may not post attachments
You may not edit your posts
HTML code is Off
|
|
|
|
 » Recent Threads
 |
|
|
|
|
|
|
|
|
|
|
|
|
|
|
|
|
|
|
|
|
|
|
|
|
|
|
|
|
|
|
|
|
|
|
|
|
|
|
|
|
|


 Linear Mode

