 |
|
 06-28-2022, 07:07 PM
|
#9821
|
|
Member
Join Date: May 2022
Location: Madison
Posts: 35
|
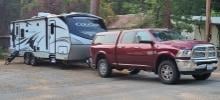
Tested my aux/satellite port at the main TV in our 2022 Jayco Eagle HT. Determined it was a straight run from the Aux port in the wet bay an now our tailgater is working fine. Our first trip out I had to run the coaxial through a window since I couldnt get a signal from the satellite port in the wet bay. Instead of a splitter or switch preventing communication with the tailgater, it turns out I ran the cable from the wrong port.
That makes me happy.
|

|

|
|
06-29-2022, 11:48 AM
|
#9822
|
|
Member
Join Date: May 2022
Location: Madison
Posts: 35
|
Todays project was installing the Flag Pole Buddy mount on my ladder and elevating our Starlink dish. Pretty straight forward install and the dish is a nice height above the roofline now.

|
|
|
|
|
06-30-2022, 11:17 PM
|
#9823
|
|
Senior Member
Join Date: Dec 2017
Location: Nor Cal
Posts: 3,117
|
Successfully restrung the blinds on the large rear window. It wasnt hard, just a little time-consuming the first time, especially getting the valance off, and then removing the blinds from the valance. Along with the United Shade First Aid kit, a really helpful tool was a set of long upholstery needles DW found at Joannes. The longest one threaded each string through the folded shade in seconds.
__________________
2018 JayFlight SLX 212QBW
1999 Ford F-250 Super Duty Lariat SC, 7.3L PSD, 3.73
Transfer Flow 50 gal aux; Andersen WDH; Prodigy P2
😁 "If a man says hell fix something, he will. Theres no need to remind him every 6 months.
|
|
|
|
|
07-04-2022, 04:37 PM
|
#9824
|
|
Senior Member
Join Date: Mar 2015
Location: Auburn, WA
Posts: 1,855
|
Added some radiant heat shielding to the corner of the fridge opening by the boiler tube. This was mainly to reduce the heat transfer into the living space that occurs, especially in warmer weather, when the fridge is working a little harder. The IR heat gun shows upwards of ~120-125 at the wall just under the microwave which makes it a bit harder to keep the interior cool, especially when no A/C and just using fans. This has been on the list of things to do for a while - finally got the time over the long holiday weekend to do it.
I had some scrap 2x3 laying around so I made a simple stand to slide the fridge onto - no lifting required. When I installed my ARP Fridge Defend all of the various wire connections behind the fridge got insulated crimp-style disconnects so removing the fridge is about a 15 minute job at this point.
I used two packages of Thermo-Tec 13575 Adhesive Backed Aluminized Heat Barrier which is affixed to a piece of 24 gauge aluminum sheet metal. Once in place there is 1/2" air gap between the heat shielding and the wall. The pink fiberglass insulation overlaps the radiant heat shield by 2". I fired up the fridge early this morning and so far the wall temp under the microwave is staying within ~3-4 degrees above the ambient temp in the trailer as shown by the wall thermostat.
__________________
TT: 2019 ORV Timber Ridge 23DBS, Blue Ox SwayPro 15K/1500
TV: 2019 Ford F-250 XLT SuperCab LB, 6.2L, 4.30/e-locker, 4x4, 164" WB, RoadActive Suspension, 3216 payload
TV: 2014 RAM 1500 Big Horn CC (Traded in)
TT: 2015 Jay Flight SLX 195RB Baja Edition, Andersen No-Sway (Traded in)
|

|
|
|
07-05-2022, 02:40 PM
|
#9825
|
|
Senior Member
Join Date: Jan 2019
Location: Valley
Posts: 272
|
Quote:
Originally Posted by ttavasc

Added some radiant heat shielding to the corner of the fridge opening by the boiler tube. This was mainly to reduce the heat transfer into the living space that occurs, especially in warmer weather, when the fridge is working a little harder. The IR heat gun shows upwards of ~120-125 at the wall just under the microwave which makes it a bit harder to keep the interior cool, especially when no A/C and just using fans. This has been on the list of things to do for a while - finally got the time over the long holiday weekend to do it.
I had some scrap 2x3 laying around so I made a simple stand to slide the fridge onto - no lifting required. When I installed my ARP Fridge Defend all of the various wire connections behind the fridge got insulated crimp-style disconnects so removing the fridge is about a 15 minute job at this point.
I used two packages of Thermo-Tec 13575 Adhesive Backed Aluminized Heat Barrier which is affixed to a piece of 24 gauge aluminum sheet metal. Once in place there is 1/2" air gap between the heat shielding and the wall. The pink fiberglass insulation overlaps the radiant heat shield by 2". I fired up the fridge early this morning and so far the wall temp under the microwave is staying within ~3-4 degrees above the ambient temp in the trailer as shown by the wall thermostat. |
Some nice work happening there!
__________________
2022 37K
2018 Bighorn mistake gone
2017 SoCal teardrop still have
2019 F-150
|
|
|
|
|
07-05-2022, 10:58 PM
|
#9826
|
|
Senior Member
Join Date: Jul 2018
Location: Hot Springs
Posts: 236
|
Not to my RV but one of our camping accessories. My Predator generator had been showing signs of a weak battery. It was about 3 years old and had not been kept on a battery tender until this spring. So, today was generator maintenance day. Fired it up and sure enough, the battery almost wouldn't start it. Let it run for about 20 minutes to warm up, changed the oil, cleaned the spark arrestor, installed a new battery, and it's all good to go for our cross-country trip later on this month. This is the second battery I've replaced in this unit. The factory battery died the first winter. The replacement 7LBS battery from Napa lasted 3 years. I'll have to see how long this one will last, putting on a battery tender when not camping.
__________________
2018 Jayco X23B (traded)
01 Dodge Durango (sold)
18 Ram 2500HD Laramie
2021 Keystone Cougar 27SABWE
|
|
|
|
|
07-06-2022, 10:42 AM
|
#9827
|
|
Senior Member
Join Date: Sep 2010
Location: PNW
Posts: 5,195
|
Removed all the wire racks, the glass shelf, the drip tray and veggie drawer from my refrigerator and scrubbed them clean. I used a Magic Eraser to remove all the stubborn stains and scuff marks where needed.
Wiped out the interior with bleach/water mix to sanitize.
Looks like a new Norcold now!
__________________
Bill
2011 Dodge Ram 1500 HEMI Quad Cab
2011 Jay Flight 26BH
|
|
|
|
|
07-06-2022, 06:57 PM
|
#9828
|
|
Senior Member
Join Date: Sep 2010
Location: PNW
Posts: 5,195
|
Scrubbed the heck out of the shower surround, tub and toilet today too. Lookin' good!
__________________
Bill
2011 Dodge Ram 1500 HEMI Quad Cab
2011 Jay Flight 26BH
|
|
|
|
|
07-07-2022, 05:37 AM
|
#9829
|
|
Senior Member
Join Date: Sep 2018
Location: Ottawa
Posts: 1,681
|
It's been a busy few days. Pulled the trailer out of storage on Saturday and started with a full checkout and cleaning in preparation for camping this week. All systems tested and working fine, water system sanitized, washed the roof, washed and waxed the outside (thanks LuckyDuck for the reference to the Meguiar's Cleaner Wax for RVs, it worked fantastic) and of course it rained the next day, lol.
Got to the campsite yesterday, beautiful day for driving and setup went perfectly. An hour or so in, DW noticed water on the bathroom floor, a quick examination showed that the plastic elbow in the connection to the toilet was cracked (it was dry during all of the testing two days earlier). 10 minutes later a new copper elbow is in place and crisis averted. Once again, the advice from this forum enabled me to have the right tools and parts on hand to make this simple fix and look like a hero!
__________________
--
Cheers
Colby
Eastern Ontario, Canada
2018 Jayco 212QB
2020 Ford F150 SuperCrew
|
|
|
|
|
07-07-2022, 07:20 AM
|
#9830
|
|
Senior Member
Join Date: Feb 2020
Location: On The Move
Posts: 1,203
|
Removed a damaged Girard awning arm - damaged after recent flash rain deluge that I didn't get to bring in fast enough....can't catch a break here of late... 
__________________
S&T
2019 Entegra Insignia 37MB
2022 JEEP Wrangler 4xe (chase and touring vehicle)
(2019 NP 383FKWS)
(2019 RAM 3500 DRW Big Horn)

|
|
|
|
|
07-18-2022, 05:38 AM
|
#9831
|
|
Junior Member
Join Date: Dec 2021
Location: Madison`
Posts: 24
|
Installed a MaxxAir II cover on the ceiling exhaust fan of our 2022 Jay Feather 25RB so we can run the fan when raining. (The fan has pre-fabbed mounting tabs so this wasn’t really a mod, just completing what should have already been there IMHO).
|
|
|
|
|
07-18-2022, 11:00 AM
|
#9832
|
|
Senior Member
Join Date: Aug 2015
Location: Miami
Posts: 356
|
I had large gaps in the lower seals underneath my main slide. Since its near the generator exhaust i was concerned with Carbon Monoxide entering the cabin. I could actually see daylight under the slide when looking inside under the couch. The slide seals are folded back and wouldn't pull forward to seal against the bottom of the slide no matter what i tried. I saw a mod on here to open the side slide seals which involved putting sweeps on the side of the slide when it is opened to fold the seals forward and seat correctly. I thought that might work on the lower seals. I installed strips of 1/2 in quarter round about 9" out from the coach wall. I tacked them on with 1 1/4 in brads. Face the rounded side of the Q round facing in, the the wide side facing out to grab the seal lip when extending the slide.This works well all of the slide edges folded out perfectly, sealing the slide tightly. Problem solved for less than $5.
|
|
|
|
|
07-18-2022, 11:33 AM
|
#9833
|
|
Senior Member
Join Date: Oct 2018
Location: Alta Loma
Posts: 111
|
Hope your having cool weather in Canada,extremely hot in the SW US
|
|
|
|
|
07-18-2022, 11:39 AM
|
#9834
|
|
Senior Member
Join Date: Oct 2018
Location: Alta Loma
Posts: 111
|
Air Tabs ? What is the function?
|
|
|
|
|
07-18-2022, 05:18 PM
|
#9835
|
|
Senior Member
Join Date: Aug 2020
Location: Daytona Beach
Posts: 672
|
Quote:
Originally Posted by corv65
Air Tabs ? What is the function?
|
Supposedly helps with aerodynamics/air flow.
PaulB12
|
|
|
|
|
07-24-2022, 07:53 AM
|
#9836
|
|
Senior Member
Join Date: Feb 2020
Location: On The Move
Posts: 1,203
|
Success - I think....
 located the hydraulic pump and reservoir - fluids good, pump good...did another LCI Electronic Leveler system reset and zero....BUT this time
I found instructions for RVs with airbags... did that portion of the Zero Set point and looks like the system is working now...just a hair of on the front, but will save that for another day...all jacks are down and the green LCI light in the middle lights up steady... might be a good day.
__________________
S&T
2019 Entegra Insignia 37MB
2022 JEEP Wrangler 4xe (chase and touring vehicle)
(2019 NP 383FKWS)
(2019 RAM 3500 DRW Big Horn)
|
|
|
|
|
07-24-2022, 08:43 AM
|
#9837
|
|
Senior Member
Join Date: Sep 2015
Location: Kansas City
Posts: 4,327
|
We have a couple zero-gravity chairs that we've always had to store inside the camper. A while back I noticed our neighbor in the storage barn had a rack for his turd toter bolted to the back bumper of his camper and got an idea.
I did some measuring and determined it would work to strap those chairs to instead of putting them inside.
__________________
Willie
1998 Jayco Eagle 12 UDK
2008 Keystone Cougar 29FKS
Poking at a campfire with a stick is one of life's great satisfactions.
|
|
|
|
|
07-24-2022, 05:10 PM
|
#9838
|
|
Senior Member
Join Date: Feb 2020
Location: On The Move
Posts: 1,203
|
Quote:
Originally Posted by KCSA75
We have a couple zero-gravity chairs that we've always had to store inside the camper. A while back I noticed our neighbor in the storage barn had a rack for his turd toter bolted to the back bumper of his camper and got an idea.
I did some measuring and determined it would work to strap those chairs to instead of putting them inside.
|
Great idea!
__________________
S&T
2019 Entegra Insignia 37MB
2022 JEEP Wrangler 4xe (chase and touring vehicle)
(2019 NP 383FKWS)
(2019 RAM 3500 DRW Big Horn)
|
|
|
|
|
07-24-2022, 06:06 PM
|
#9839
|
|
Senior Member
Join Date: Feb 2019
Location: FORESTVILLE
Posts: 475
|
Finally got around to cleaning/conditioning my roof. Used the Camco cleaner and my Ryobi battery powered rotary brush. Looks new again!
|
|
|
|
|
07-25-2022, 04:30 AM
|
#9840
|
|
Senior Member
Join Date: Nov 2013
Location: Duxbury
Posts: 7,113
|
Started going through her with a fine tooth comb and "fixing" the mess that came from the factory.
Jayco has apparently started using lever nuts instead of wire nuts and I found several that were either loose or the wire was stripped so short that it barely made a connection. Needless to say, I've got a lot more connections to check...
__________________
Rob & Kelly, Bella & Brady (Miniature Schnauzers)
2022 Eagle HT 28.5RSTS
2017 RAM 3500 SRW CTD/AISIN CC LB
|
|
|
|
|
|
 Posting Rules
|
You may not post new threads
You may not post replies
You may not post attachments
You may not edit your posts
HTML code is Off
|
|
|
|
 » Recent Threads
 |
|
|
|
|
|
|
|
|
|
|
|
|
|
|
|
|
|
|
|
|
|
|
|
|
|
|
|
|
|
|
|
|
|
|
|
|
|
|
|
|
|


 Linear Mode

