 |
|
 06-11-2016, 06:25 PM
|
#21
|
|
Senior Member
Join Date: Oct 2015
Location: Southern, VT
Posts: 387
|
Quote:
Originally Posted by DamonBecky

Duke_26 and ScarabChris, I have a new 2016 North Point that has the same sticker saying I am prewired for camera. But for the life of me cannot find any info on the location of wires or install...did one of you say Jayco sent a PDF on the install for the Voyager camera? I have a wireless set that is put together from Amazon camera/transcender/receiver/monitor I ordered. I've hooked them all up to power and they work as far as sending vid. Now I'm ready to install but afraid to drill the first hole!
Any leads to locations of wiring would be SO appreciated...
Damon & Becky, Arkansas
New Forum Member
|
In my 2016 26BH, the rear middle marker light has an extra black wire capped off and attached to the marker wire harness. You need to pull off marker light and pull wires out of hole. If you scroll back through the posts in this thread you will find pictures of what to expect if it's anything like mine. I connected the positive wire of the camera to the extra black wire and tapped into the one of the white wires for the camera negative.
Jayco did provide the instructions for the Voyager camera. You can also find it hear on the forum.
Hope this helps! Good luck with yours.
Duke
__________________
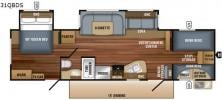
2019 Jay Flight 31QBDS Elite, Fiberglass, Thermal Pkg, Al. Rims, 15K AC
2018 Jay Flight 28BHS Elite, Fiberglass, Thermal Pkg, Al. Rims, 15K AC, Elec. Stab. Jacks (Traded)
2016 Jay Flight 26BH Elite, Fiberglass, Thermal Pkg, Al. Rims, 15K AC, Elec. Stab. (Traded)
2015 RAM 3500HD Cummins Turbo Diesel, Tradesman Crew Cab 4WD
|

|

|
|
06-11-2016, 08:12 PM
|
#22
|
|
Senior Member
Join Date: Feb 2014
Location: MD
Posts: 3,856
|
My 2017 JayFlight has the extra power wire behind the rear center marker light as well. That extra power wire is always hot from what I've read. I'd assume that's where they all are...
__________________
2017 JayFlight 28BHBE
2014 JayFlight Swift 264BH (Sold)
2007 GMC 2500 Sierra Classic Crew Cab LBZ Duramax / 6spd Allison
|
|
|
|
|
11-04-2016, 04:22 PM
|
#23
|
|
Junior Member
Join Date: Jun 2016
Location: Loxley
Posts: 18
|
Hey Duke I finally got around to installing my camera. Followed your instructions, and it made install very easy. Just a question, my camera is powered all the time? It is apparently drawing power off the battery? Is there a switch in my coach somewhere to turn it off? I connected red wire from camera to extra capped wire in center marker light, connected black wire from camera to white wires as you did.
It works great, paired right up with monitor, just staying on?
Thanks your help and responce has been invaluable on this project!
|
|
|
|
|
11-04-2016, 05:46 PM
|
#24
|
|
Junior Member
Join Date: Jun 2016
Location: Loxley
Posts: 18
|
Sorry Duke I just read back through the thread and realized it is apparently supposed to be on all the time.
Thanks for the info
|
|
|
|
|
11-04-2016, 06:32 PM
|
#25
|
|
Senior Member
Join Date: Oct 2015
Location: Southern, VT
Posts: 387
|
Quote:
Originally Posted by Tomworsh
Hey Duke I finally got around to installing my camera. Followed your instructions, and it made install very easy. Just a question, my camera is powered all the time? It is apparently drawing power off the battery? Is there a switch in my coach somewhere to turn it off? I connected red wire from camera to extra capped wire in center marker light, connected black wire from camera to white wires as you did.
It works great, paired right up with monitor, just staying on?
Thanks your help and responce has been invaluable on this project!
|
Quote:
Originally Posted by Tomworsh
Sorry Duke I just read back through the thread and realized it is apparently supposed to be on all the time.
Thanks for the info
|
Hello Tom!
Glad all went well with the installation. Yes, the camera is on 24-7. I have not found any switch yet. I have been thinking about pulling fuses to see which one shuts it down, but have not got to it yet.
Cheers!
Duke
Sent from my iPhone using Tapatalk
__________________
2019 Jay Flight 31QBDS Elite, Fiberglass, Thermal Pkg, Al. Rims, 15K AC
2018 Jay Flight 28BHS Elite, Fiberglass, Thermal Pkg, Al. Rims, 15K AC, Elec. Stab. Jacks (Traded)
2016 Jay Flight 26BH Elite, Fiberglass, Thermal Pkg, Al. Rims, 15K AC, Elec. Stab. (Traded)
2015 RAM 3500HD Cummins Turbo Diesel, Tradesman Crew Cab 4WD
|
|
|
|
|
11-13-2016, 06:27 AM
|
#26
|
|
Senior Member
Join Date: Nov 2016
Location: San Antonio
Posts: 2,952
|
Now to figure out how to enable the camera to send pictures or video while it is in storage. Solar powered web cam kind of thing.
__________________
2017 JayFlight 21QB
2021 Ford F150 SCrew 3.5 Eco, 157, 3.55, Tow Pkg
|
|
|
|
|
11-13-2016, 06:50 PM
|
#27
|
|
Senior Member
Join Date: Aug 2016
Location: Highlands County
Posts: 148
|
My husband mentioned he wanted a backup camera. I just ordered this backup camera for my husband for Christmas off of Amazon. Does anyone know if the 2015 white Hawk dsrl is prewired? If not, I can call Jayco with the vin # and ask.
__________________
Maureen & Carl
"Let the Reel Cool Times Roll !!!!!
|
|
|
|
|
03-09-2017, 08:09 PM
|
#28
|
|
Junior Member
Join Date: Jul 2016
Location: gardnerville
Posts: 12
|
Hi Duke, I am going to order the Furrion FOS48TAPK-BL backup camera today you mentioned there is a PDF document for installation somewhere on the posts. May I ask where it might be.. I am anxious to install it on my 2017 24RBS
Gary
|
|
|
|
|
03-09-2017, 08:51 PM
|
#29
|
|
Senior Member
Join Date: Oct 2015
Location: Southern, VT
Posts: 387
|
Quote:
Originally Posted by whit66
Hi Duke, I am going to order the Furrion FOS48TAPK-BL backup camera today you mentioned there is a PDF document for installation somewhere on the posts. May I ask where it might be.. I am anxious to install it on my 2017 24RBS
Gary
|
Hi Gary!
Here you go, please keep in mind that Jayco's instructions are for the Voyager camera, but it gives a basic idea. With the Furrion camera the hole the wires go through are behind the camera and the hole is covered by the camera hiding the wires, unlike the Voyager shown below.
Some people actually replace the center marker light with the camera which will probably be a little easier since the wires are right there and you do not have to drill an extra hole for the wires. Not that I've had any issues with my camera all, but if I was to do it over, I think I would have gone this route. Here is an example:

Another thing to keep in mind is if you use the extra wire provided behind the center marker light for the camera power, the camera will be on 24-7. If you use the marker light power, the camera will only come on when you are hooked up to the tow vehicle and your parking lights are on.
Hopefully this link works, you should be able to do a direct download of the PDF without any issues:
https://www.dropbox.com/s/7z49kcvdx0...ation.pdf?dl=0

Good luck with it! Don't forget to share some pics when you get it done. I have been very happy with mine!
Cheers [emoji482]
Duke
Sent from my iPhone using Tapatalk
__________________
2019 Jay Flight 31QBDS Elite, Fiberglass, Thermal Pkg, Al. Rims, 15K AC
2018 Jay Flight 28BHS Elite, Fiberglass, Thermal Pkg, Al. Rims, 15K AC, Elec. Stab. Jacks (Traded)
2016 Jay Flight 26BH Elite, Fiberglass, Thermal Pkg, Al. Rims, 15K AC, Elec. Stab. (Traded)
2015 RAM 3500HD Cummins Turbo Diesel, Tradesman Crew Cab 4WD
|
|
|
|
|
03-09-2017, 09:03 PM
|
#30
|
|
Junior Member
Join Date: Jul 2016
Location: gardnerville
Posts: 12
|
Thank you so much Duke this is great
Gary
|
|
|
|
|
03-16-2017, 01:08 PM
|
#31
|
|
Junior Member
Join Date: Jul 2016
Location: gardnerville
Posts: 12
|
Hi Duke, I just got my wireless Furrion and when I took off the center lens on the back of my trailer all I have is a white and green wire no prewired black wire. Can I assume the green wire is the power and white is the ground.
Thanks
|
|
|
|
|
03-17-2017, 10:55 AM
|
#32
|
|
Senior Member
Join Date: Nov 2015
Location: Lakewood, WA.
Posts: 4,541
|
Yes, white wire go to white wire, your probably was not wire from the factory so when you have your running lights on it will power the camera.
__________________
2023 Jayco North Point 310RLTS
2022 GMC Denali Ultimate DRW
Retired Army MSG
|
|
|
|
|
03-18-2017, 02:17 PM
|
#33
|
|
Senior Member
Join Date: Feb 2017
Location: Gilroy
Posts: 475
|
Starting the install on a non prewired Jay Feather 18RBM hope to have some pictures and comments when finished.
I have a question, is there a preferred sealant to use to on the vacuum laminated surfaces?
|
|
|
|
|
03-18-2017, 04:45 PM
|
#34
|
|
Senior Member
Join Date: Dec 2015
Location: Pennsylvania
Posts: 1,880
|
Removing the center marker light could cause issues with state inspections in the states that require state inspections.
__________________
2012 Ford Expedition EL
2016 28BHBE, Elite and Thermal Packages.
Equal-i-zer 4-point Sway Control, Southwire 34930 Surge Guard 30A, Tire Minder TPMS A1A
(2) Yamaha EF2000iS Generators, Micro-Air EasyStart 364 (3-ton) Soft Start, Garmin RV 890, GoodYear Endurance ST225/75-15 Load Range E
|
|
|
|
|
03-18-2017, 05:06 PM
|
#35
|
|
Junior Member
Join Date: Jul 2016
Location: gardnerville
Posts: 12
|
Thanks, I did use the center light which I have 5 on the back of my trailer, after I return from my trip I might just move it down a bit. Thanks
|
|
|
|
|
03-18-2017, 05:11 PM
|
#36
|
|
Senior Member
Join Date: Oct 2015
Location: Southern, VT
Posts: 387
|
Quote:
Originally Posted by GarlicDude
Starting the install on a non prewired Jay Feather 18RBM hope to have some pictures and comments when finished.
I have a question, is there a preferred sealant to use to on the vacuum laminated surfaces?
|
I used clear automotive RTV silicone on my fiberglass sided 26BH. Seemed to have worked well.
Sent from my iPhone using Tapatalk
__________________
2019 Jay Flight 31QBDS Elite, Fiberglass, Thermal Pkg, Al. Rims, 15K AC
2018 Jay Flight 28BHS Elite, Fiberglass, Thermal Pkg, Al. Rims, 15K AC, Elec. Stab. Jacks (Traded)
2016 Jay Flight 26BH Elite, Fiberglass, Thermal Pkg, Al. Rims, 15K AC, Elec. Stab. (Traded)
2015 RAM 3500HD Cummins Turbo Diesel, Tradesman Crew Cab 4WD
|
|
|
|
|
03-18-2017, 07:28 PM
|
#37
|
|
Senior Member
Join Date: Feb 2017
Location: Gilroy
Posts: 475
|
Got the install done and working, need to do a bit of tiding up. I took a couple of pictures and have some comments tomorrow.
Big thanks to Duke and the others who have contributed to this thread.
Best,
Steve
|
|
|
|
|
03-18-2017, 07:54 PM
|
#38
|
|
Senior Member
Join Date: Nov 2015
Location: Lakewood, WA.
Posts: 4,541
|
Oh yeah, this is a mod I believe we should do, now let's do more. LOL.
__________________
2023 Jayco North Point 310RLTS
2022 GMC Denali Ultimate DRW
Retired Army MSG
|
|
|
|
|
03-19-2017, 06:25 PM
|
#39
|
|
Senior Member
Join Date: Feb 2017
Location: Gilroy
Posts: 475
|
Starting the install on a non prewired Jay Feather 18RBM hope to have some pictures and comments when finished.
I have a question, is there a preferred sealant to use to on the vacuum laminated surfaces? 
The camera is the Furrion Observation/Backup camera in a non pre-wired 2016 Jay Feather 7 18RBM.
The first picture is with the center marker light pulled out and showing how I Tap Spliced into the white ground wire and one of the black lamp leads. I used my Ohm meter and noticed that one of the black leads read 12V and the other was around .3V, I tapped the 12V one.
I drilled a 5/8 hole according to the instructions, but the supplied bushing was more like 1/2" or 9/16" so I had some other bushings and used one of those. There was a thin piece of plastic that ran parallel to the ground in the hole for the marker which I drilled through carefully. I then took a thin piece of welding rod and pushed it down through the styrofoam insulation until I saw it in the 5/8 hole. Looped the wire and electrical taped the added wires down to the new hole. Helps to sort of rotor rooter out the styrofoam with the fishing wire to make it easier to pull.
Shortened the camera wires so I could stuff all the wires in the recess in the camera. Soldered and heat shrunk the joints. The camera comes with a nice rubber gasket applied a generous bead or RTV and screwed it and the camera down to some holes that I started with an ice pick, the siding isn't very thick so I thought this was a better approach. Used 4 #8 SST wood screws 3/4" long.
One of the harder things was getting the plastic hardware stuffed back in the marker light hole, outside of that not to bad.
The light that is supposed to light up when in reverse doesn't seem to work. The newer pre-wired models may fix this? I learned in this post http://www.jaycoowners.com/forums/f7...ome-41831.html
about the yellow wire, opened up the junction box on mine, saw a yellow wire that was capped, hooked up the tow vehicle and saw 12V on it. I have a 2 pack of the lights mentioned in the above thread and will be installing them soon.
Thanks to Duke 26 and 01Tundra for their help!
Best,
Steve
|
|
|
|
|
03-19-2017, 06:53 PM
|
#40
|
|
Senior Member
Join Date: Oct 2015
Location: Southern, VT
Posts: 387
|
Quote:
Originally Posted by GarlicDude
Starting the install on a non prewired Jay Feather 18RBM hope to have some pictures and comments when finished.
I have a question, is there a preferred sealant to use to on the vacuum laminated surfaces? Attachment 29778
The camera is the Furrion Observation/Backup camera in a non pre-wired 2016 Jay Feather 7 18RBM.
The first picture is with the center marker light pulled out and showing how I Tap Spliced into the white ground wire and one of the black lamp leads. I used my Ohm meter and noticed that one of the black leads read 12V and the other was around .3V, I tapped the 12V one.
I drilled a 5/8 hole according to the instructions, but the supplied bushing was more like 1/2" or 9/16" so I had some other bushings and used one of those. There was a thin piece of plastic that ran parallel to the ground in the hole for the marker which I drilled through carefully. I then took a thin piece of welding rod and pushed it down through the styrofoam insulation until I saw it in the 5/8 hole. Looped the wire and electrical taped the added wires down to the new hole. Helps to sort of rotor rooter out the styrofoam with the fishing wire to make it easier to pull.
Shortened the camera wires so I could stuff all the wires in the recess in the camera. Soldered and heat shrunk the joints. The camera comes with a nice rubber gasket applied a generous bead or RTV and screwed it and the camera down to some holes that I started with an ice pick, the siding isn't very thick so I thought this was a better approach. Used 4 #8 SST wood screws 3/4" long.
One of the harder things was getting the plastic hardware stuffed back in the marker light hole, outside of that not to bad.
The light that is supposed to light up when in reverse doesn't seem to work. The newer pre-wired models may fix this? I learned in this post http://www.jaycoowners.com/forums/f7...ome-41831.html
about the yellow wire, opened up the junction box on mine, saw a yellow wire that was capped, hooked up the tow vehicle and saw 12V on it. I have a 2 pack of the lights mentioned in the above thread and will be installing them soon.
Thanks to Duke 26 and 01Tundra for their help!
Best,
Steve |
Looks great Steve! Nice clean install. You will love how much piece of mind this observation camera gives when going down the road and changing lanes! It took me a couple of trips before I got the angle dialed in.
Thanks for sharing!!
Happy Travels,
Duke
Sent from my iPhone using Tapatalk
__________________
2019 Jay Flight 31QBDS Elite, Fiberglass, Thermal Pkg, Al. Rims, 15K AC
2018 Jay Flight 28BHS Elite, Fiberglass, Thermal Pkg, Al. Rims, 15K AC, Elec. Stab. Jacks (Traded)
2016 Jay Flight 26BH Elite, Fiberglass, Thermal Pkg, Al. Rims, 15K AC, Elec. Stab. (Traded)
2015 RAM 3500HD Cummins Turbo Diesel, Tradesman Crew Cab 4WD
|
|
|
|
|
|
 Posting Rules
|
You may not post new threads
You may not post replies
You may not post attachments
You may not edit your posts
HTML code is Off
|
|
|
|
 » Recent Threads
 |
|
|
|
|
|
|
|
|
|
|
|
|
|
|
|
|
|
|
|
|
|
|
|
|
|
|
|
|
|
|
|
|
|
|
|
|
|
|
|
|
|


 Linear Mode

